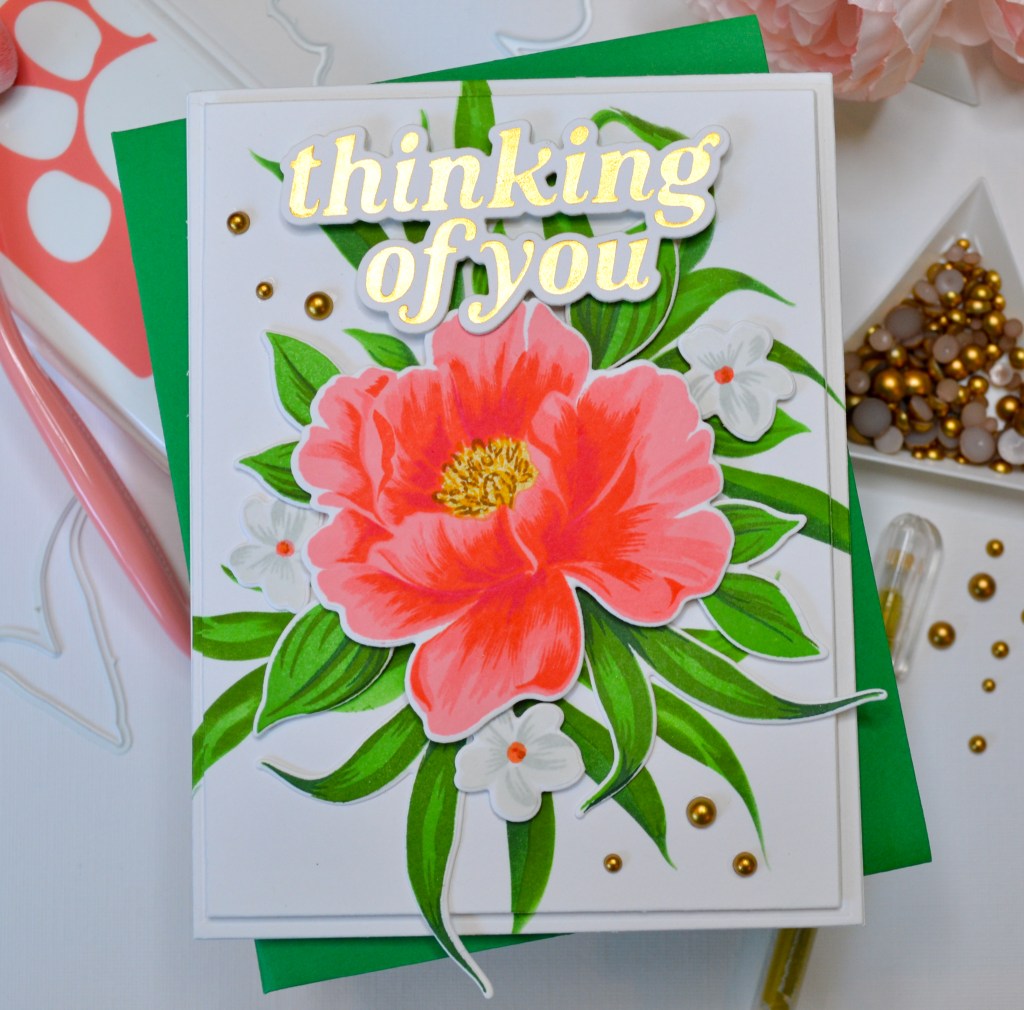
Hello! Today I’m sharing all the details of this gorgeous card featuring the Peony Dreams coordinating set of stamps, dies and stencils from The Stamp Market. This happens to be my first project using products from The Stamp Market and the detail in the stamps is amazing! The images look so realistic that it was hard to believe that I had made them. Keeping with my theme of “firsts”, I tried hot foiling for the first time for this project too. I used the “Thinking of You” hot foil plate also from the Stamp Market. Below I listed the key steps of my process for this card as well as a list of any important products and tools used. Thanks for stopping by my new space! I hope you find inspiration to create something beautiful.

STEPS
1.) First I stamped the layered floral and greenery images. Lining up the layers on the peony stamps was a little more challenging than I expected, but after a few tries I got things in place. Also, there is a Stamp Market YouTube video that has a few hints and tips to help you get things lined up.
2.) Next, I die cut all the images that I stamped, including 1 peony flower, 3 small flowers, 2 each of the leaves and 2 of the longer grass-like foliage.
3.) I stenciled the background foliage on a A2 sized panel. The foliage actually overhangs the panel, which is okay, because when elements hang off the background of your composition, it can create visual interest. There is a die that coordinates with this foliage so you could die cut the image and let the die cut overhang the card base if you wanted another option.
4.) I didn’t want to distract from such a beautiful image with a frame of any kind so I centered a rectangle die slightly smaller than an A2 size to cut my stenciled foliage panel. I then popped up that panel with foam tape to create the illusion of a frame, but still keeping the full stenciled foliage image.
5.) Now, after playing around with the placement of the images, I attached all the die cut images I had stamped earlier. Some were glued directly to the raised panel, others were attached with foam squares to create dimension and the illusion of space. My favorite tip is to use regular foam squares and thin foam squares. I love the thinner foam squares! I probably use them more often than the regular size. On this project, the only image that I used regular foam squares on is the peony and also the sentiment.
6.) Time for the sentiment. I hot foiled the sentiment and placed it centered at the top of the panel. This was my fist time foiling and I now understand what all the fuss was about! The results are beautiful and very professional looking. I’m new to this technique so I don’t have a lot of tips, but plenty of other card makers out there have great advice. After foiling, I die cut the sentiment with the coordinating die and then cut another piece of plain cardstock with the same die so I could glue them together to make the sentiment sturdier and give it more weight.
7.) Lastly, I embellished the card with matte gold baubles. Three here and three there. And that was it! This peony image is so impressive that it really didn’t need anything else, so I tried to keep it simple.
PRODUCTS AND TOOLS
Neenah 110# Classic Crest Cardstock Solar White
Simon Says Stamp White A2 Side Fold Scored Cards 120#
We R Makers Quickstik Precision Pickup and Placement Tool
Sizzix Curved Fine-Tip Tweezers
Scotch 3M Post-It Masking Tape
Simon Says Stamp Blending Brushes Small
Simon Says Stamp Blending Brushes Small Detail
Hero Arts Nesting Rectangle Infinity Dies
The Stamp Market Peony Dreams Bouquet Bundle
The Stamp Market Peony Dreams Bouquet Stencil
The Stamp Market Thinking Of You Foil Plate
Spellbinders Glimmer Hot Foil Roll Satin Gold
Trinity Stamps Gold Satin Baubles
Simon Says Stamp Pawsitively Saturated Inks Colors:
* Fairway
* Field
* Pine
* Cheeky
* Blush
* Watermelon
* Flannel
* Sherbet
* Mandarin
* Citrine
* Mocha
Spellbinders Glimmer Hot Foil System
Spellbinders Platinum Die Cutting And Embossing Machine
Scrapbook Adhesives Thin 3D White Foam Squares
Scrapbook Adhesives .25″ 3D White Foam Squares
Scrapbook Adhesives .5″ 3D White Foam Squares
Simon Says Stamp Pawsitively Perfect White Foam Tape
Bearly Art Precision Craft Glue
