Recently I was thrilled to have purchased all the coordinating products of the Folk Garden series from Pinkfresh Studio – the cling stamp, die, hot foil plate, and the stencils! I love that they always have all the coordinating things when they release a new design. Pinkfresh studio describes this floral design as whimsical and folksy, and for me, it reminds me of the beautiful textile designs of William Morris. I carried around an old calendar featuring his work for decades, moving it from house to house to house. But when you move to the other side of the country, it seems whatever wasn’t intentionally downsized was somehow lost. Needless to say, I no longer have it. And now I’m thinking I should have maybe created a small calendar with this set of whimsical and folksy products…
But for now, I’ll share the first two cards I created with this set, with more to come. Below you will find all the details.
STEPS
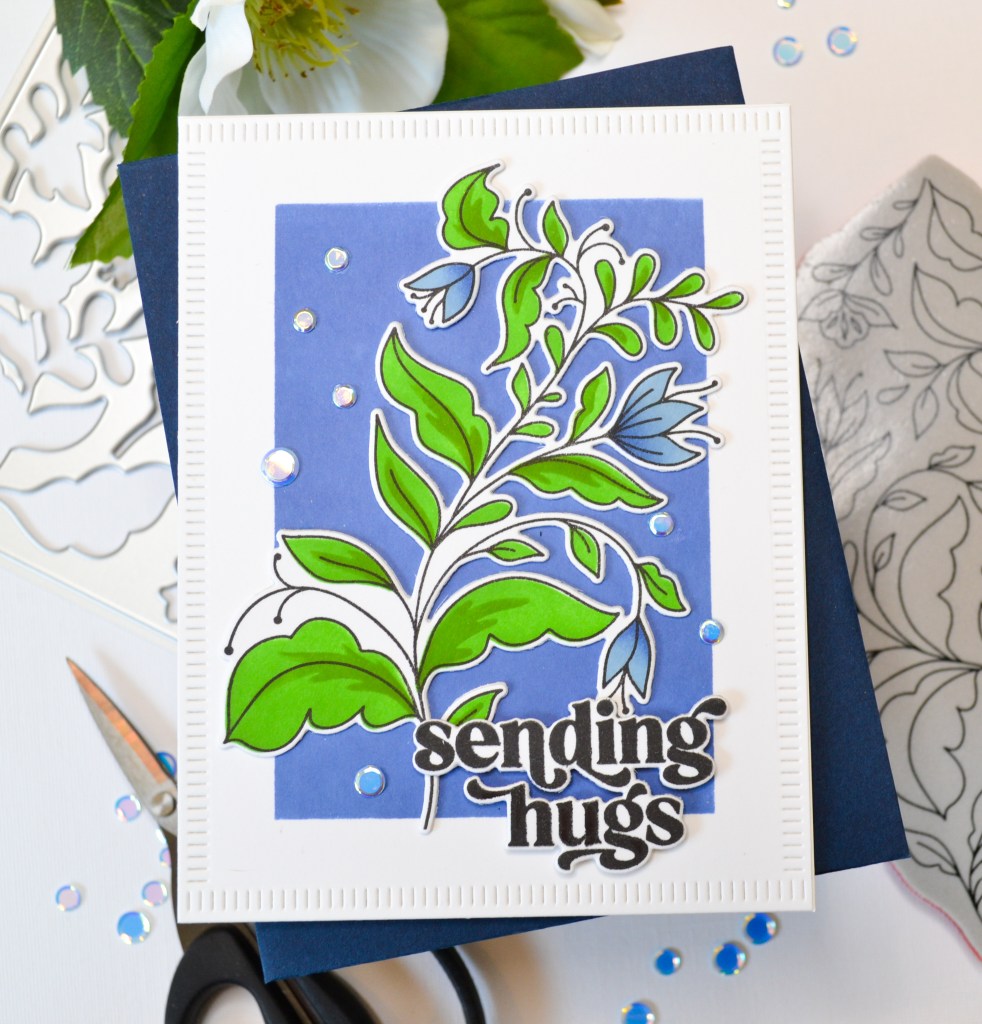
1.) The first step was to stamp the large 4 1/4″ x 5 1/2″ floral image on 110# cardstock with black ink. My favorite all-purpose, black ink is Hero Arts Intense Black. Then I used the 4 layering stencils to apply ink with small blending brushes. I found using more of a pouncing motion on the smaller floral blooms helped to minimize any bleeding. I used a small detail brush to apply a darker blue to the bottom portion of the blooms. After stenciling, I used the large coordinating die to die cut the entire image at one time. There are plenty of blooms and leaves in this one stamp so I was able to divide the images between both cards.
2.) For the background of this card, on 110# cardstock, I used A2 masks form Simon Says Stamp to apply the same blue ink I had used for the blooms. Next, I used the largest Blanket Stitched Rectangle die, from Pinkfresh Studio, to provide a frame for and add interest to the background.
3.) I die cut the entire floral image again so that I could double up the stamped and stenciled die cut. I wasn’t planning on using foam squares on this image (believe it or not!) so it helps provide some much-needed dimension and of course adds weight and substance to the die cut. I then centered and glued the doubled-up die cut on the background, letting the image overhang the inked rectangle area.
4.) Lastly, I stamped the sentiment, also from Pinkfresh Studio, with VersaFine Ink in Onyx Black. Versafine ink is great for providing crisp, clean lines and I use it often for sentiments. Just know that this is a pigment ink so it does need a little more dry time. After die cutting the Sending Hugs sentiment, I used thin foam squares to attach it to the bottom right of the card. I finished by adding some iridescent embellishments from Trinity Stamps and then attaching the entire panel to a side-fold card base.
PRODUCTS AND TOOLS
Neenah 110# Classic Crest Cardstock Solar White
Simon Says Stamp White A2 Side Fold Scored Cards 120#
We R Makers Quickstik Precision Pickup and Placement Tool
Sizzix Curved Fine-Tip Tweezers
Scotch 3M Post-It Masking Tape
Spellbinders Platinum Die Cutting And Embossing Machine
Misti Precision Stamper Tool
Bearly Art Precision Craft Glue
Scrapbook Adhesives Thin 3D White Foam Squares
Simon Says Stamp Blending Brushes Small
Simon Says Stamp Detail Round Blending Brushes
Simon Says Stamp Stencils A2 Masks
Hero Arts Intense Black Ink
VersaFine Onyx Black Ink
Pinkfresh Studio Blanket Stitched Rectangle Die Set
Pinkfresh Folk Garden Cling Stamp
Pinkfresh Folk Garden Die
Pinkfresh Folk Garden Layering Stencils
Pinkfresh Perfect Sentiments Stamp Set
Pinkfresh Perfect Sentiments Die
Trinity Stamps Poolside Iridescent Pearl Confetti
Simon Says Stamp Pawsitively Saturated Inks Colors:
* Morning
* Twilight
* Fairway
* Field

STEPS
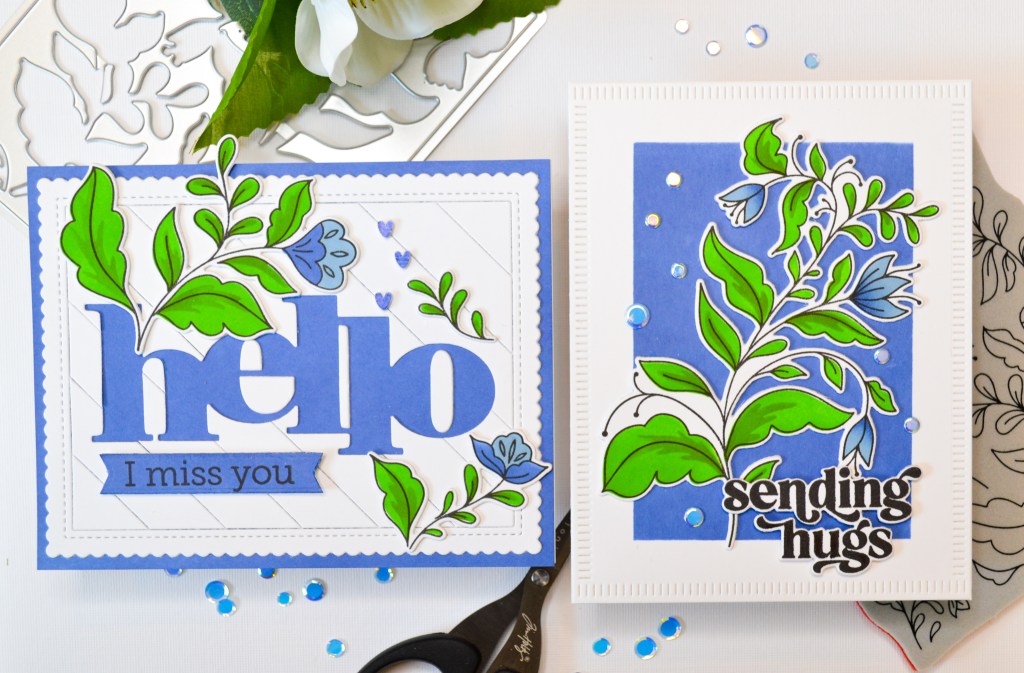
1.) As I mentioned before, there are plenty of flower blooms and leaves in this stamp so these are leftover from step one in the card above.
2.) For the background, I used white cardstock and a scalloped, diagonal striped background die from Mama Elephant. Before running the die through my die cut machine, I applied purple tape to the back to help hold the diagonal pieces in place after it was cut. I then centered and taped the Hello die from Concord and 9th across the diagonal stripes and ran it through my die cut machine so I could use the negative space. Be sure to save the positive white pieces for the “e” and “o”…ooorr just fish them out of your wastebasket like I did. The diagonal stripes came apart after this but it was pretty easy to piece back together. Which is what I did on a custom-colored piece of cardstock. I wanted to match the flowers so I used the same Twilight ink to ink blend an entire A2 card panel.
3.) Then, with glue, I attached the flower blooms and leaves without doubling-up with cardstock this time. Again, letting them overhang the edges a bit. By the way, a great tip from Jennifer McGuire is to use an A6 sized envelope if you have elements that overhang your A2 card. These are slightly larger and there are many options available online.
4.) Lastly, I inked a scrap piece of cardstock in Twilight to match the background and stamped the I Miss You sentiment. I then used a sentiment strip die to die cut the sentiment as well as another scrap piece of cardstock to double-up the strip. I attached this with thin foam squares for a little dimension. The three heart embellishments match perfectly because I used a copic marker to color plain white hearts! It’s so easy and you customize them to match your project. I glued the whole panel to a side-fold card base to finish the card.
PRODUCTS AND TOOLS
Neenah 110# Classic Crest Cardstock Solar White
Simon Says Stamp White A2 Side Fold Scored Cards 120#
We R Makers Quickstik Precision Pickup and Placement Tool
Sizzix Curved Fine-Tip Tweezers
Scotch 3M Post-It Masking Tape
Crafter’s Essentials Purple Tape
Spellbinders Platinum Die Cutting And Embossing Machine
Misti Precision Stamper Tool
Bearly Art Precision Craft Glue
Scrapbook Adhesives Thin 3D White Foam Squares
Simon Says Stamp Blending Brushes Small
Simon Says Stamp Detail Round Blending Brushes
Hero Arts Intense Black Ink
VersaFine Onyx Black Ink
Mama Elephant Striallop Diagonal Creative Cuts
Concord and 9th Everyday Sayings Die
Pinkfresh Folk Garden Cling Stamp
Pinkfresh Folk Garden Die
Pinkfresh Folk Garden Layering Stencils
Trinity Stamps Creamy Vanilla Heart Sprinkle Embellishments
Simon Says Stamp Pawsitively Saturated Inks Colors:
* Morning
* Twilight
* Fairway
* Field
