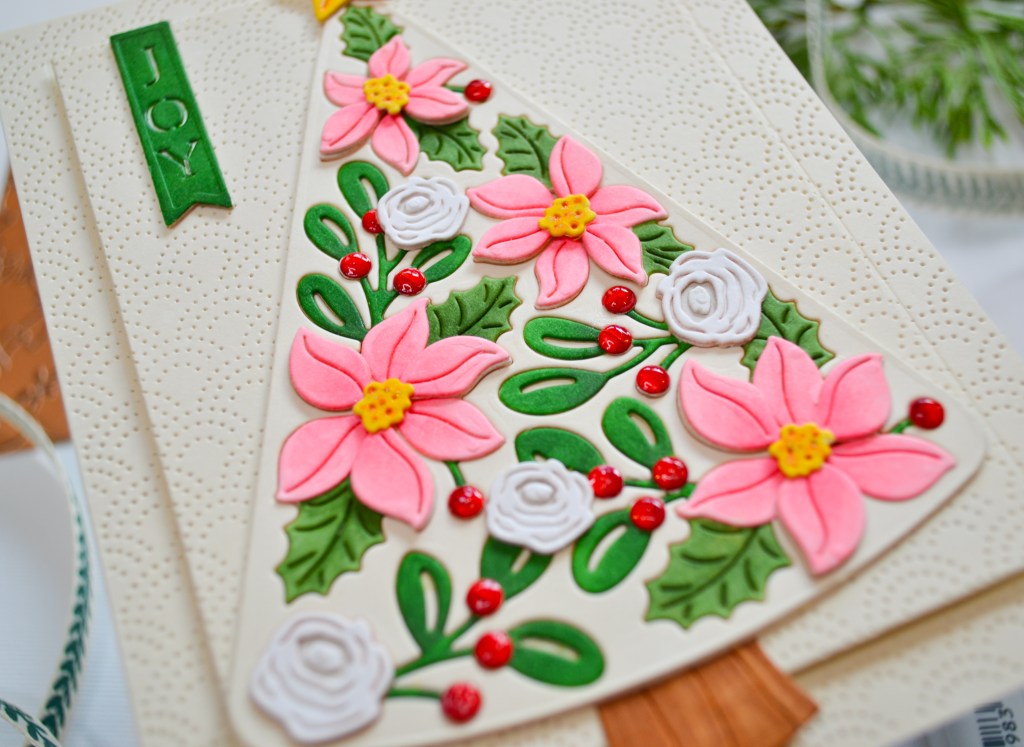
This lovely little tree is the Spellbinders July Small Die of the Month. For Christmas in July! Or August, it seems. The tree is adorned with these gorgeous poinsettia flowers, small rosettes, and some holly. This design reminds me of Nordic-inspired Christmas decorations, such a favorite of mine.
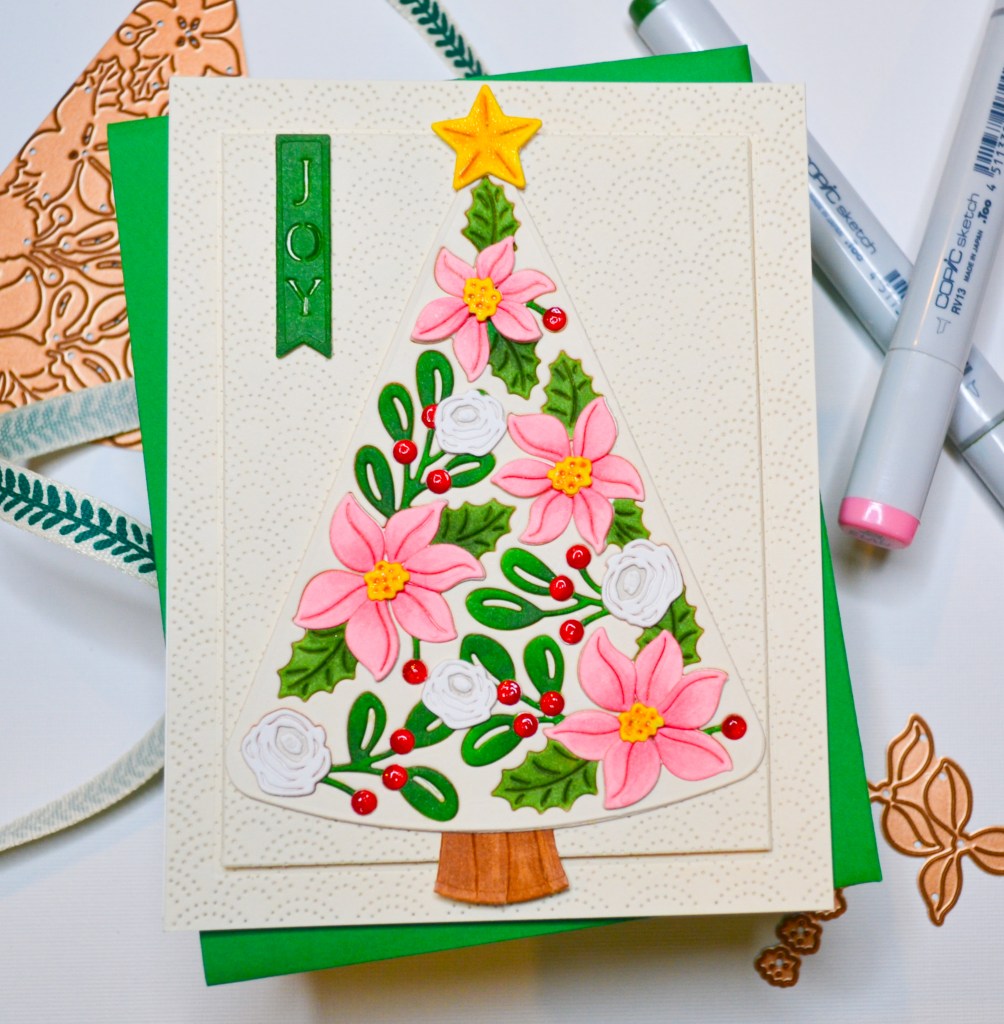
When I first opened this set, I thought I would use colored cardstock for all the layering die cuts, but in the end I decided to use my Copic markers. I wanted to add shading to the small pieces and I thought this was the easiest way, plus it had been quite a while since I’d used my Copics for a project. And because ivory cardstock is my latest obsession, Lawn Fawn Vanilla Malt to be exact, I used it as a background to showcase this lovely little tree featuring Copic Colored die cuts. All the details are listed below.
STEPS
1.) Not wanting to distract from the all the beautiful layering die cuts in this card, I created a simple pierced background design. Using a piece of A2 sized ivory cardstock, I ran it through my die cut machine with a pierced background cover plate from Honey Bee Stamps. Then I used a rectangle die to die cut the center portion of the background. on an A2 sized card front, I popped up the center panel with foam tape and glued the remaining background piece directly to card front.
2.) There are two tree dies included in this set. The first one is a solid shape and the second one die cuts the entire design inside the tree as well. I die cut both in the same ivory cardstock, removing the inside pieces of the second die cut and then glued them together. This left a template to make paper piecing the die cuts easy. I then die cut the second tree again in white cardstock for coloring as well as any of the additional dies needed for layering. Layering the images isn’t necessary. You could easily just color the pieces from inside the tree and have a flat, one level card.
the star and the Joy banner I die cut twice for some weight and stability. I decided that to balance the design I needed to add a tree trunk and used a die from another Spellbinders set.
3.) The die cuts are fairly small so I used only two markers for blending on all the elements except the poinsettias, which I used three colors. After coloring all the pieces, I layered and glued all the interior tree pieces in place. Where the star and the trunk overhang the center panel, I used foam squares for added stability. The final touches were to apply Hero Arts Crystal Lacquer to the holly berries and a little sparkle to the star and poinsettia centers with a Wink of Stella glitter brush. I attached the card front to a top fold card base and that was it for this card!
TOOLS AND PRODUCTS
Neenah 110# Classic Crest Cardstock Solar White
Lawn Fawn Vanilla Malt Cardstock
Simon Says Stamp White A2 Top Fold 120# Card Base
We R Makers Quickstik Precision Pickup and Placement Tool
Sizzix Curved Fine-Tip Tweezers
Spellbinders Platinum Die Cutting And Embossing Machine
Bearly Art Precision Craft Glue
Scrapbook Adhesives .25″ 3D White Foam Squares
Simon Says Stamp Pawsitively Perfect White Foam Tape
Zig Wink of Stella Glitter Clear Brush Tip Marker
Hero Arts Crystal Clear Lacquer Pen
Hero Arts Nesting Rectangle Infinity Dies
Honey Bee Stamps Honey Cuts Rainbow A2 Pierced Cover Plate
Spellbinders July Small Die of the Month
Copic Sketch Markers
Poinsettia RV21, RV23, RV13
Berries R27, R39
Holly Leaves G07, G46
Poinsettia Leaves G94, BG96
Poinsettia Centers Y15, YR27
Rosettes W0, W1
