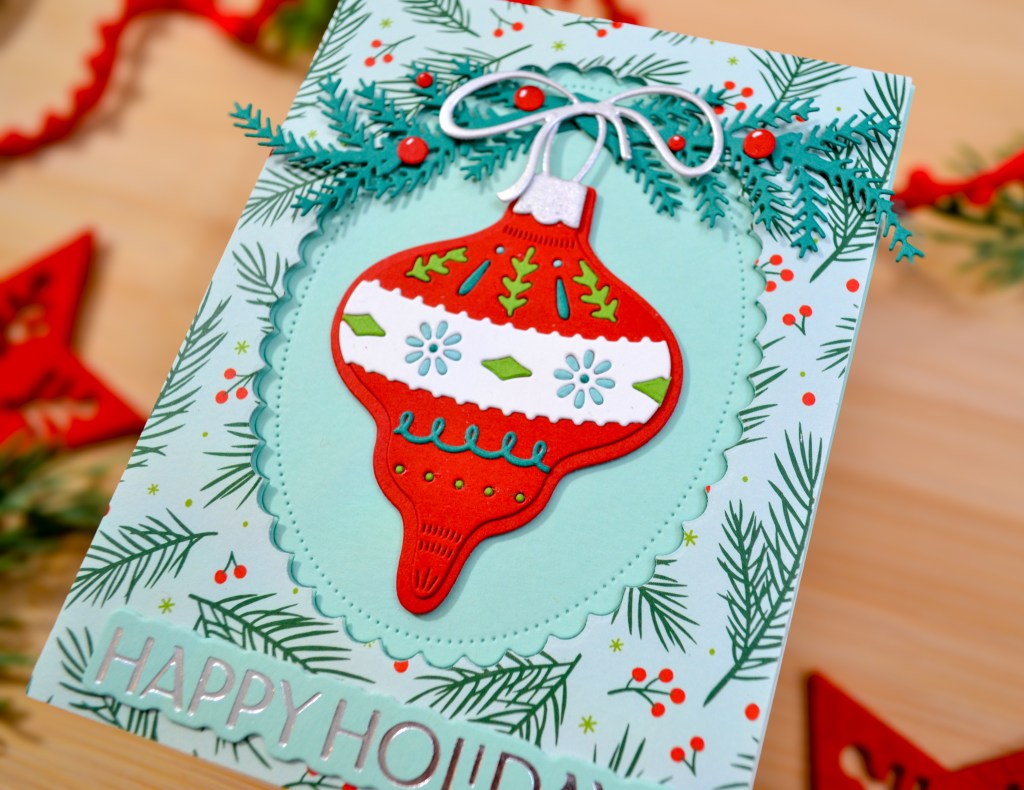
My card today features the most beautiful Layered Ornament Die from Waffle Flower Crafts. I inlaid the ornament with colored cardstock, pulling colors from the patterned paper I used, a favorite of mine from Concord and 9th. I nestled the ornament in a scalloped oval from Lawn Fawn and topped it with greenery from Waffle Flower’s Layered Winter Bird. A silver ornament topper, few holly berries and a foiled sentiment complete this merry card design.
Wishing everyone a merry and bright Christmas. Hope your holidays are filled with all the joys of the season!

STEPS
1.) Die cut the two base layers for the ornament from red cardstock. Die cut the middle band from white cardstock. I die cut the decorative base layer three more times to get the pieces needed for inlaying, a green and two blue cardstocks. I did the same thing for the middle band, die cutting it three more times, to get the pieces needed to inlay.
2.) Glue the red decorative base layer to the larger base layer and trim the top of the larger layer to match the decorative layer. Glue the white band to the center portion of the decorative layer. Using liquid adhesive and an embellishment wand, inlay the pieces with your chosen colored cardstocks.
3.) Die cut the ornament topper and bow from white cardstock. Using Frozen Fog Mica Stain, spray the pieces and let them dry. Die cut the greenery from green cardstock and berries from red cardstock. I used the eye from the Winter Bird set for the smaller berries and the dies for the blushing cheeks of the Folk Art Reindeer set, for the larger berries. Set these aside.
4.) Using the scalloped oval from the Giant Holiday Messages Lawn Cuts, die cut two ovals, one from a mint-colored A2 card panel and one from the patterned paper, trimmed to A2 size. Die cut the ovals closer to the top of the card panels to leave room for the sentiment. The patterned paper is thinner so I die cut them at the same time, to ensure they would be cut in the same place on both panels. If it doesn’t cut all the way through both panels, align the die in the impression of the partially cut panel, and run it through the die cut machine again. Save the patterned paper oval for another project.
5.) Glue the mint-colored card panel and the oval cut from it to the front of an A2 top-fold card base. Use double-sided tape to attach the patterned paper panel over the mint-colored panel. The corner of a Misti can help with the alignment of both panels.
6.) Attach the ornament to the center of the ovals with liquid adhesive. Attach the greenery and the ornament topper and bow with more liquid adhesive. I attached the topper first, then tucked the greenery underneath. Glue the berries in place and add white highlights with a white gel pen.
7.) Hot foil the sentiment in silver on the same mint-colored cardstock and die cut with the coordinating die. Attach the sentiment at the bottom of the card panel with thin foam squares.
SUPPLIES
Waffle Flower Layered Ornament Die
Waffle Flower Elegant Christmas Foil Plate Matching Die
Waffle Flower Elegant Christmas Foil Plate
Waffle Flower Layered Winter Bird Die
Waffle Flower Folk Art Reindeer Die
Lawn Fawn Giant Holiday Messages Lawn Cuts
Concord and 9th Be Merry Patterned Paper Pack
Concord and 9th Assorted Cardstock
Neenah 110# Classic Crest Cardstock Solar White
Simon Says Stamp White A2 Top Fold Scored Cards 120#
Sakura White Gelly Roll Classic Gel Pen
We R Makers Quickstik Precision Pickup and Placement Tool
Simon Says Stamp Place and Score Embellishment Wand
Sizzix Curved Fine-Tip Tweezers
Spellbinders Glimmer Hot Foil System
Spellbinders Platinum Die Cutting And Embossing Machine
Bearly Art Precision Craft Glue
Tim Holtz Tonic Craft Mini Snips
Misti Precision Stamper Tool
Lawn Fawn Bone Folder
Scotch 3M Post-It Masking Tape
Simon Says Stamp Pawsitively Perfect WHITE FOAM TAPE
Scrapbook Adhesives Thin Foam Squares
Tim Holtz Distress Frozen Fog Mica Stain
Spellbinders Glimmer Hot Foil Roll Silver
