
Once upon a time, I was a Spellbinders’ Card Kit and Small Die of the Month Club member. This was, yikes, almost five years ago, when I couldn’t dedicate as much time to cardmaking and paper crafting. Many club kits went unused, and I eventually canceled my memberships. Since then, my husband and I have traveled back and forth across the country, moved from our home state of Minnesota to the warmer (usually!) Georgia, and I am now, again, a member of multiple Spellbinders’ clubs. But I haven’t forgotten about my unused, but still loved, dies and kits, including this one from January 2019.
After seeing all the super cute typewriter themed products recently from companies like, My Favorite Things, Simon Says Stamp, and most recent, The Greetery, I rummaged through my Spellbinders stash and pulled out this oldie but goodie. This card was so fun to put together, even inlaying all those little typewriter keys! I added some patterned papers and a few things from Simon Says Stamp and from My favorite things to round out my card design. All the details for this card, including supplies, are listed below. Thanks for stopping by!
STEPS
1.) Die cut an A2 stitched rectangle, I used Lawn Fawn’s, from light pink cardstock. Die cut the largest Postage Stamp Edge Frame Die from Simon Says Stamp in a coordinating patterned paper and attach to the light pink stitched rectangle with liquid adhesive.
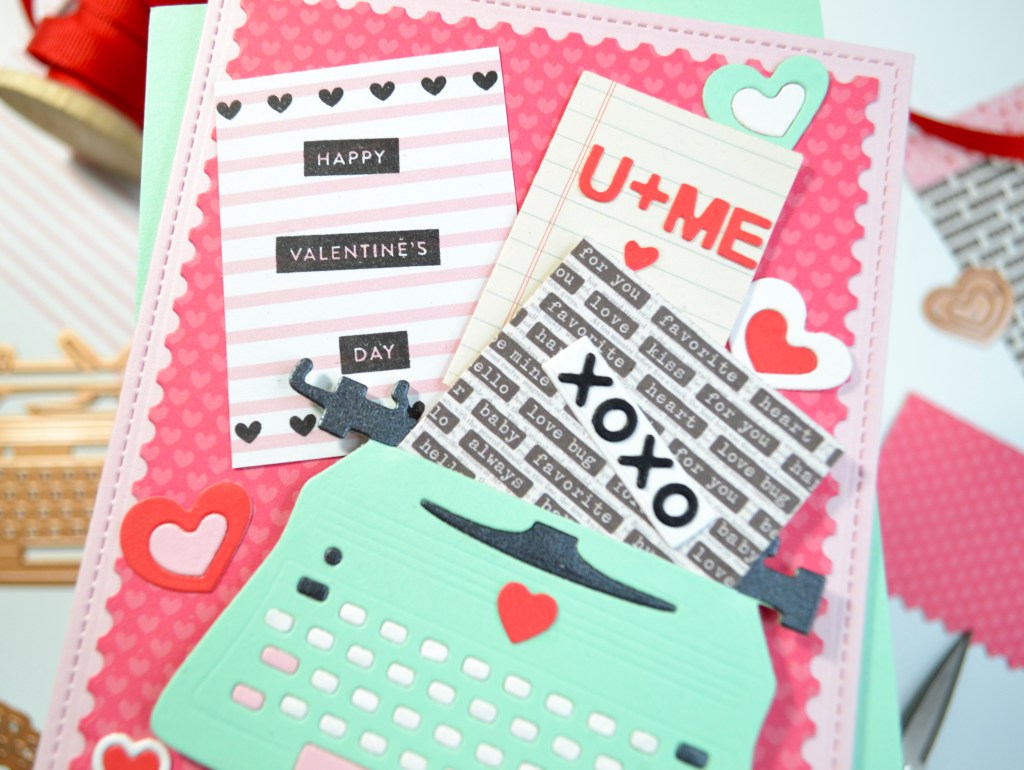
2.) Die cut the typewriter 4 times in the colored cardstock of your choice. I chose, mint green, light pink, white and a metallic gray. Assemble the typewriter, securing the components with glue. Die cut a small red heart and attach to the typewriter with glue.
3.) Die cut some papers for the typewriter. I used the included die for the paper in my typewriter but just trimmed the other papers to the size I wanted with a scissors.
4.) Embellish the papers. I used a variety of stamps, some of the included dies, and/or dies from other sets.
5.) Attach the typewriter with foam squares. Insert one of the papers into the slit of the typewriter and place foam squares behind it to secure. Attach the other papers with glue and/or thin foam squares around the typewriter.
6.) Add additional heart die cuts or other embellishments.
7.) Attach everything to an A2 side-fold card base.
SUPPLIES
Spellbinders Clubs
Lawn Fawn Large Stitched Rectangle Stackables
Simon Says Stamp Postage Stamp Edge Frames
My Favorite Things Tag Builder Blueprints 5 Die-namics
We R Makers Quickstik Precision Pickup and Placement Tool
Simon Says Stamp Place and Score Embellishment Wand
Sizzix Curved Fine-Tip Tweezers
Spellbinders Platinum Die Cutting And Embossing Machine
Misti Precision Stamper Tool
Waffle Flower 6.5×8.5 Grip Mat
Bearly Art Precision Craft Glue
Tim Holtz Tonic Craft Mini Snips
Lawn Fawn Bone Folder
Scotch 3M Post-It Masking Tape
Scrapbook Adhesives Thin Foam Squares
Scrapbook Adhesives Foam Squares
Simon Says Stamp White A2 Side Fold Scored Cards 120#
Cardstock and patterned paper from my stash
