
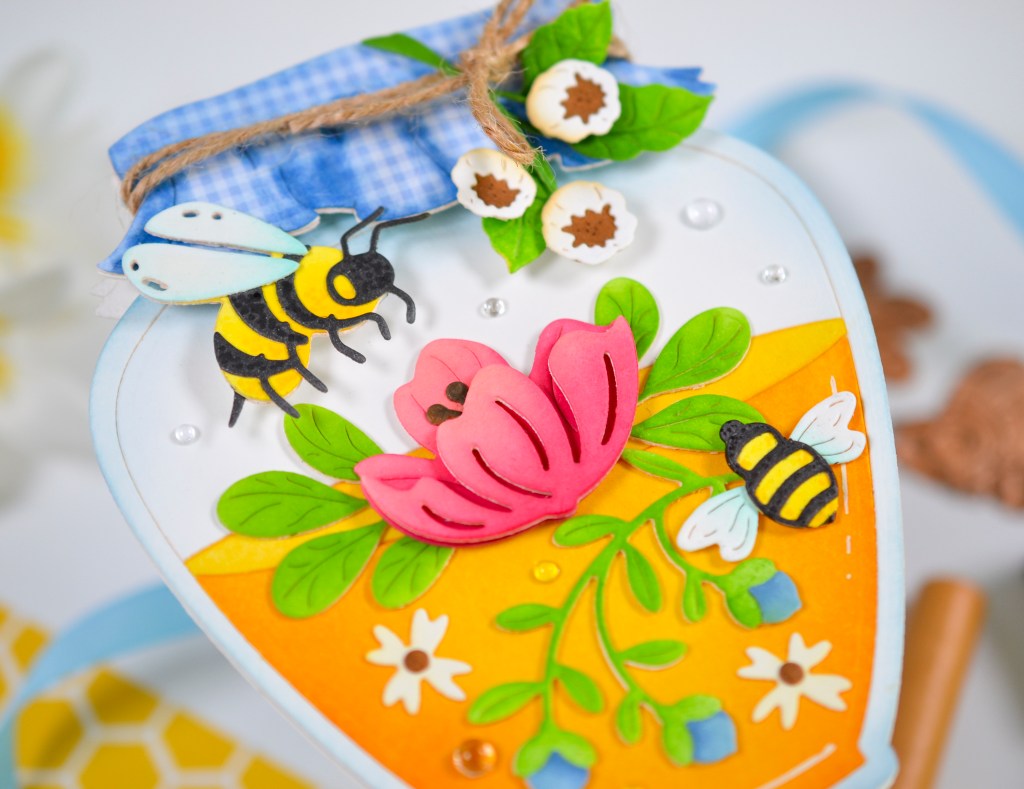
I’m finally getting around to using some of my Spellbinders Club Kits from January, and this project is by far my favorite. Being the large die of the month, the jar is big at 4.2 x 5, perfect for a shaped card and giving you plenty of space to add pretty florals and the honey bee. The scale of the honey bee is actually quite large too, and I love it. I have mine popped up with a couple layers of foam squares for extra dimension. Near the end of creating this card, I thought my design needed another bee, but a different orientation than the larger one, so I added a smaller bee from Concord and 9th’s Friendly Florals Bundle.
I liked some of the flowers and greenery from the Large Die kit for this design but decided to add some from other January club kits I received as well. For coloring my die cuts, I used mostly Distress Inks, and then used Copic markers for a little texture on the bees.
The cloth top for this honey jar is one of my favorite elements in this kit. I used gingham patterned paper for mine and then tied it off with some twine. Clear crystal drops and white gel pen highlights are the finishing details for this fun honey bee-shaped card.
The steps I took to create this card and the supplies I used are listed below. Thanks for stopping by today!
1.) Create the jar-shaped card.
Die cut the jar from an A2 top-fold card base made from heavyweight, white card stock. Position the die so the top of the jar just slightly overhangs the top fold of the card base and run through your die cut machine a couple of times to cut through both layers. By placing the top of the die just slightly off the top of the card base, it will keep the fold of the card base in tack.
2.) Die cut and color all the elements.
Die cut the flowers, greenery, bees, and the jar pieces from white cardstock and the cloth top from patterned paper. Use inks and blending brushes to color and add shading to the pieces. Use Copic markers to add some stippling to the bees for texture.
3.)Assemble the bee with liquid adhesive and the large flower with a combination of liquid adhesive and foam squares for added dimension.
4.) Stamp a sentiment on the inside of the card before adding any die cuts to the front of the card.
5.) Attach the jar elements.
Glue the jar and honey pieces in place on the card base. Wrap a piece of twine around the cloth top die cut a couple of times and tie in a bow. Add foam squares to the back of this piece, around the twine, and attach to the top of the jar. I die cut the cloth top again from plain white cardstock and attached this to the back of the card base for a cleaner look. You can see it peeking out in the picture below.
6.) Add the remaining die cut elements.
Secure the die cuts with liquid adhesive and/or foam squares. Tuck some small flowers into the twine and secure with liquid adhesive and foam squares.
7.) Add embellishments.
Add white gel pen highlights to the honey and glitter to the wings of the bees with a glitter marker. Add clear drops.

- Spellbinders Honey Bee Jar- Large Die of the Month
- Spellbinders Bee Stitched – Stitching Die of the Month
- Spellbinders Sitting Pretty – Small Die of the Month
- Concord and 9th Friendly Florals Bundle
- Neenah 110# Classic Crest Cardstock Solar White
- We R Makers Quickstik Precision Pickup and Placement Tool
- Simon Says Stamp Place and Score Embellishment Wand
- Simon Says Stamp Place and Pierce Embellishment Wand
- Sizzix Curved Fine-Tip Tweezers
- Spellbinders Platinum Die Cutting And Embossing Machine
- Misti Precision Stamper Tool
- Waffle Flower 6.5×8.5 Grip Mat
- Bearly Art Precision Craft Glue
- Tim Holtz Tonic Craft Mini Snips
- Lawn Fawn Bone Folder
- Scotch 3M Post-It Masking Tape
- Simon Says Stamp Blending Brushes Large
- Simon Says Stamp Blending Brushes Small
- Simon Says Stamp Blending Brushes Detail Round
- Waffle Flower Shader Brush 0+
- Scrapbook Adhesives Thin Foam Squares
- Scrapbook Adhesives Foam Squares
- Simon Says Stamp White A2 Top Fold Scored Cards 120#
- Hero Arts Intense Black
- Sakura White Medium Point Gelly Roll Pen
- Copic Sketch Markers
N9
Y35 - Wink of Stella Glitter Clear Brush Tip Marker
- Memory Box Fairy Drops Embellishment
- Tim Holtz Distress Ink Pad Faded Jeans
- Tim Holtz Distress Ink Pad Gathered Twigs
- Tim Holtz Distress Ink Pad Antique Linen
- Tim Holtz Distress Ink Pad Shaded Lilac
- Tim Holtz Distress Ink Pad Speckled Egg
- Tim Holtz Distress Ink Pad Rustic Wilderness
- Tim Holtz Distress Ink Pad Black Soot
- Tim Holtz Distress Ink Pad Mowed Lawn
- Tim Holtz Distress Ink Pad Wild Honey
- Tim Holtz Distress Ink Pad Fossilized Amber
- Simon Says Stamp Pawsitively Saturated Ink
Lemonade
Sunbeam
Seafoam
Cheeky
Punch
Sangria
