Welcome to Day 3 of the Pretty Pink Posh August 2024 Release Blog Hop! I hope you’ve been hopping along this week to see all the spooktacular inspiration created with the cutest and spookiest Halloween goodies that are available NOW! 👻🪄🎃
To celebrate this haunting release, there are 3 $30 gift certificates up for grabs, one each day of the hop, with the winner being randomly picked from the comments left along the way. Be sure to leave a comment by 11:59 PM PST on 8/19/2024 for your chance to win. Winners will be announced on the Pretty Pink Posh Blog.
Here is your list of spooky stops for Day 3:
🪄Pretty Pink Posh blog
🪄Jill Hawkins
🪄Amy Tsuruta
🪄Mindy Eggen
🪄Jeanne Jachna
🪄Rebecca Keppel
🪄Christina Rannow ⬅️You are here!
🪄Laura Evangeline
🪄Zsofia Molnar
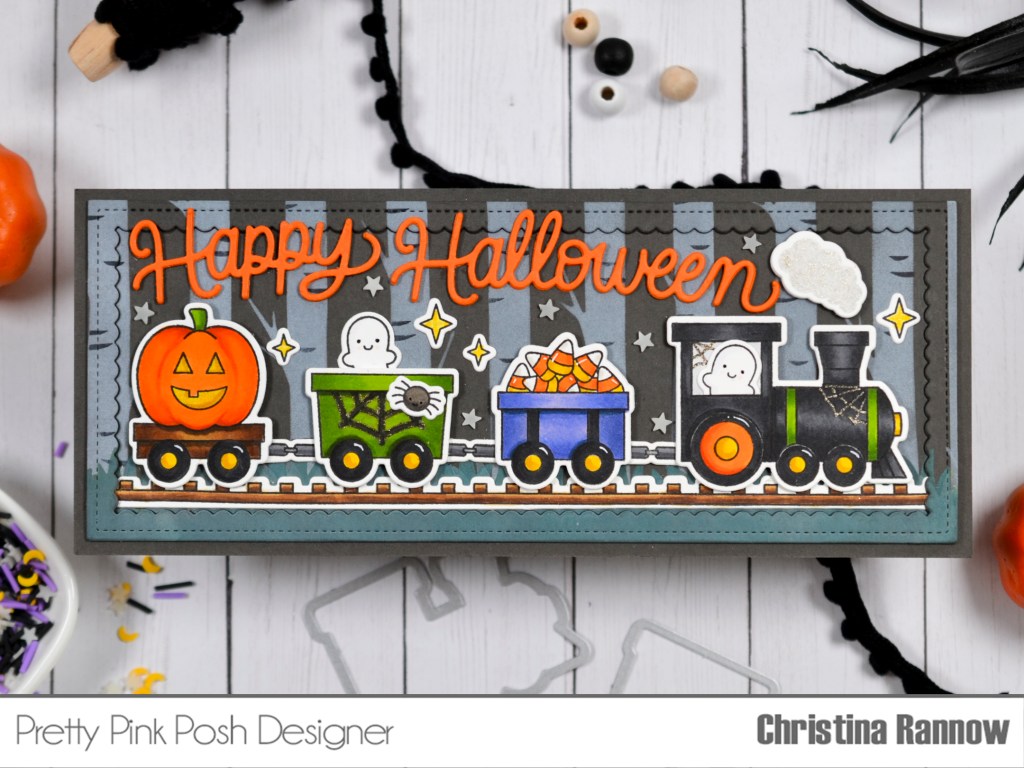
My Blog Hop project features the new Halloween Train Stamp Set chugging along a stenciled nighttime backdrop created with the Layered Birch Trees Stencils. Follow along as I walk you through the steps to create this fun, slimline Halloween scene.
I created the background by stenciling the Layered Birch Trees on dark gray cardstock with white pigment ink using a paper pouncer applicator. This is a 6×6 stencil, so I shifted the stencil over and continued the tree line in order to accommodate the 8 ½” length of the slimline card size. Then, I added a grassy stencil detail over the trees with Distress Oxide Inks. Lastly, I die cut the panel with the larger Slimline: Scallop Frames Dies.
Next, I stamped the images from the Halloween Train Stamp Set with black ink and colored them with alcohol ink markers. I used the coordinating dies to die cut them and added fun details with a white gel pen and a glitter marker. I used a light gray ink to stamp the puff of smoke from the train’s chimney, die cut it, and added some sparkle with a Wink of Stella brush pen.
To assemble my card, I attached the stenciled background panel to a dark gray slimline panel trimmed to 8 ½” x 3 ½ “. Then, before attaching the frame, I stacked it with another die cut frame for some dimension and tucked the train tracks underneath. Next, I attached the train cars and the engine with thin foam squares and the other elements with liquid adhesive.
To finish up my card, I stamped and die cut some sparkles from the new Batty About You Stamp Set and added them to my scene along with some of the glow-in-the-dark stars from the Spooky Sky Clay Confetti. The last step was to add the Happy Halloween Script die cut from orange cardstock and stacked a few times for lots of dimension to the sentiment.
That completes my spooky, cute Halloween project for the Pretty Pink Posh August Release Blog Hop. I hope I’ve inspired you to create something spooktacular with some of the newest goodies over in the Pretty Pink Posh Shop! Be sure to check out all the talented designers along the hop this week for even more inspiration. Happy Halloween hopping, friends!🎃👻🪄

Pretty Pink Posh Supplies
🎃Halloween Train Stamp Set
🎃Halloween Train Coordinating Dies
🎃Layered Birch Trees Stencils
🎃Slimline: Scallop Frames Dies
🎃Happy Halloween Script Die
🎃Batty About You Stamp Set
🎃Batty About You Coordinating Dies
🎃Spooky Sky Clay Confetti

This is so cute! Too cute to spook!
LikeLiked by 1 person
Thanks Kimberly!🥰
LikeLike
I love the details on the train. Cute card!
LikeLiked by 1 person
Thank you!
LikeLike
This is so adorable! I love all of the little candies! 🎃🎃🎃
LikeLiked by 1 person
Thank you sister!🥰
LikeLike
so super cute Christina!
LikeLiked by 1 person
Thanks Amy!🥰
LikeLike
Love these adorable “scary” figures and the background is terrific!
Lori S in PA
LikeLiked by 1 person
Thank you Lori!🥰
LikeLike
LOVE LOVE LOVE this spooky train! So festive!
LikeLiked by 1 person
Thank you!🥰
LikeLike
Your coloring is darling! I LOVE the train! TOO CUTE!
LikeLiked by 1 person
Thank you!
LikeLike
what a great scene you’ve created with that train! i love it!
LikeLiked by 1 person
Thank you!🥰
LikeLike
This is such a fun card. I love the way you did the background too.
LikeLiked by 1 person
Thank you!🥰
LikeLike
So cute for little kiddos–not spooky. Very cute
LikeLiked by 1 person
Thanks so much!🥰
LikeLike
The stenciled background makes a great design for this adorable train! Very fun card!
LikeLiked by 1 person
Thank you!🥰
LikeLike
Absolutely love this train! A great chance to be creative!
LikeLiked by 1 person
Thank you! It’s a great set!🥰
LikeLike
Cute scene. Like the ghosts popping out of the train.
LikeLiked by 1 person
Thank you!🥰
LikeLike
I love your cute train card. So beautiful and I love the dimension of your images too.
LikeLiked by 1 person
Thanks a bunch!🥰
LikeLike
Love the colors of your slimline card!
LikeLiked by 1 person
Thank you!🥰
LikeLike
So adorable!
LikeLiked by 1 person
Thank you!🥰
LikeLike
I can’t get over how cute this little train is–love it!
LikeLiked by 1 person
Thanks a bunch!🥰
LikeLike
Chugging along choo choo, no I mean boo boo for the Halloween Express Train heading to deliver treats.
LikeLiked by 1 person
Choo choo!🚂👻🥰
LikeLike
so super cute! This release is too cute 🥰
LikeLiked by 1 person
Thanks! It really is too cute!🥰👻
LikeLike
The train die set is so doggone cute!! I’m surprised I haven’t seen it in more “makes” for the Hop, but I’m so glad you used it.
LikeLiked by 1 person
Thanks so much! The train series is a super cute!🥰
LikeLike
Your train is too cute!
LikeLiked by 1 person
Thank you!🥰🚂
LikeLike
Love love love the Train! darling!
LikeLiked by 1 person
Thank you!
LikeLike
Adorable Halloween train!
LikeLiked by 1 person
Thank you!🥰
LikeLike
I like the striped background for this colorful train.
LikeLiked by 1 person
Thank you!🥰
LikeLike
so cute I want it to Choo Choo to my mailbox!
LikeLiked by 1 person
Thanks so much!🥰
LikeLike
Fantastic card and awesome coloring! Love it!
LikeLiked by 1 person
Thanks a bunch!🥰
LikeLike
So cute. The spooky figures are too cute.
LikeLiked by 1 person
Thank you!🥰
LikeLike
The card is darling. You put a lot of work into and it shows. Thanks for the inspiration.
LikeLiked by 1 person
Thanks so much!🥰
LikeLike
Absolutely ADORABLE! Love the ghostly train! You have inspired me!! Thanks for sharing!
LikeLiked by 1 person
Thank you for your kind words!🥰🚂
LikeLike
Such a cute scene, Christina!
LikeLiked by 1 person
Thank you!🥰
LikeLike
such a cute Halloween train!!
LikeLiked by 1 person
Thank you!
LikeLike
It’s a cutie not a spooky!
LikeLiked by 1 person
Thank you!🥰
LikeLike
so cute, loving all the train sets
LikeLiked by 1 person
Thank you! Me too!
LikeLike
Such a cute Halloween train filled with sweetness!
LikeLiked by 1 person
Thank you!
LikeLike
I love this Halloween train full of treats in such faboolus colors with awesome shading!
LikeLiked by 1 person
Thank you!
LikeLike
Sooo adorable 😍
LikeLiked by 1 person
Thank you!
LikeLike
Trains are my favourite and these Halloween trains are just so cute
LikeLike