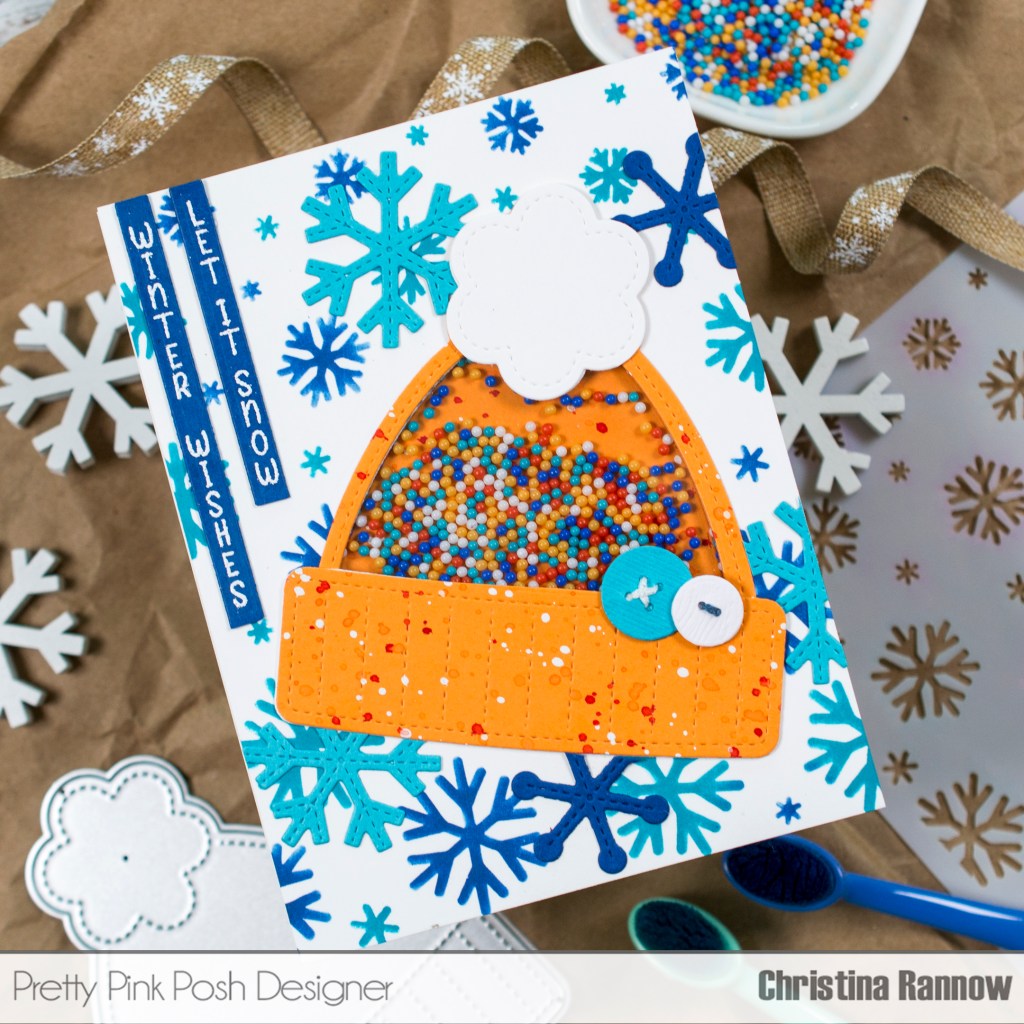
Hello! Today I’m sharing a happy and colorful winter shaker card showcasing many of the new things from the latest Pretty Pink Posh Holiday Release. This fun card is super easy to put together, so let’s get started!
Pretty Pink Posh products featured:
Cascading Snowflakes Stencil – New!
Stitched Snowflakes Dies – New!
Winter Hat Shaker Dies – New!
Upright Greetings: Christmas Stamp Set – New!
Sentiment Strip Dies
Beach Day Shaker Beads
I started by creating the stenciled A2 background panel using the Cascading Snowflakes Stencil and two bold colors that I matched from the Beach Day Shaker Beads – Pawsitively Saturated Inks in Royal and Ocean. Then I die cut the shaker window from the panel using the smaller, inside die from the Winter Hat set.
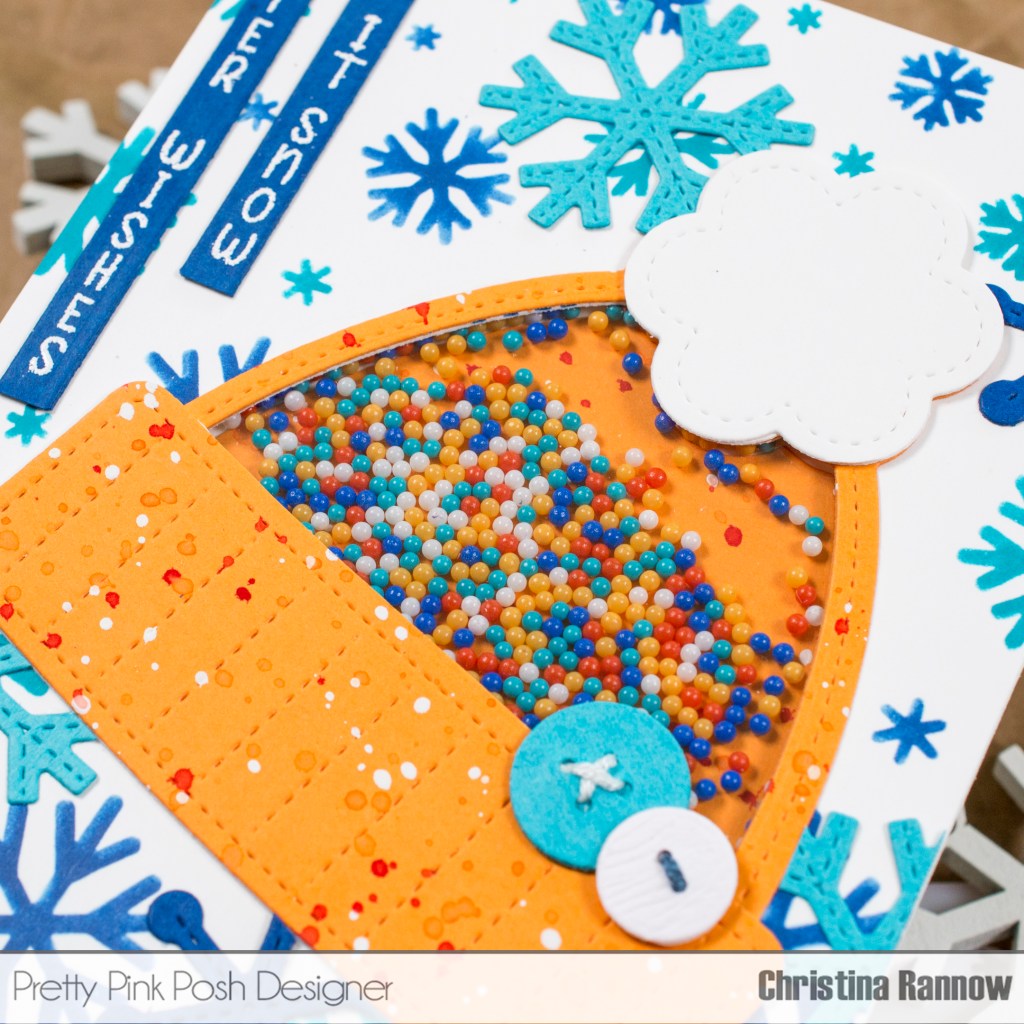
Next, I die cut the entire Winter Hat from orange cardstock, creating a frame and an inside piece. For a little interest and texture, I splattered the die cuts with white gouache paint and Terracotta and Cantaloupe Pawsitively Saturated Inks. Then, to create the base of the shaker card, I used the shaker window I die cut from the stenciled background panel as a template to attach the smaller, inside hat piece to a white A2 cardstock panel. I then attached a piece of acetate to the reverse side of the shaker window.
To create the shaker, I attached foam tape to the shaker card base, going around the smaller, inside hat piece to create a well. I filled the well with the shaker beads and placed the stenciled background panel onto the foam tape. Next, I attached the winter hat frame piece to the front of the stenciled background panel. For the white pom pom, I die cut the hat again from white cardstock and trimmed it from the die cut before attaching it to the top of my winter hat.
For the final details, I die cut two small circles and used a tiny paper punch to create a couple of buttons that I threaded embroidery floss through before attaching to my hat. I also die cut some of the Stitched Snowflakes from coordinating cardstock, trimming them where necessary to look like they are falling behind the hat. My last step was to heat emboss in white a couple of Upright Greetings on blue cardstock before die cutting with sentiment strips.
Thanks so much for stopping by and following along with the steps to create this bright and colorful winter shaker card! The project-specific supplies I used are linked in the description above, and my everyday supplies can be found here. See you soon!