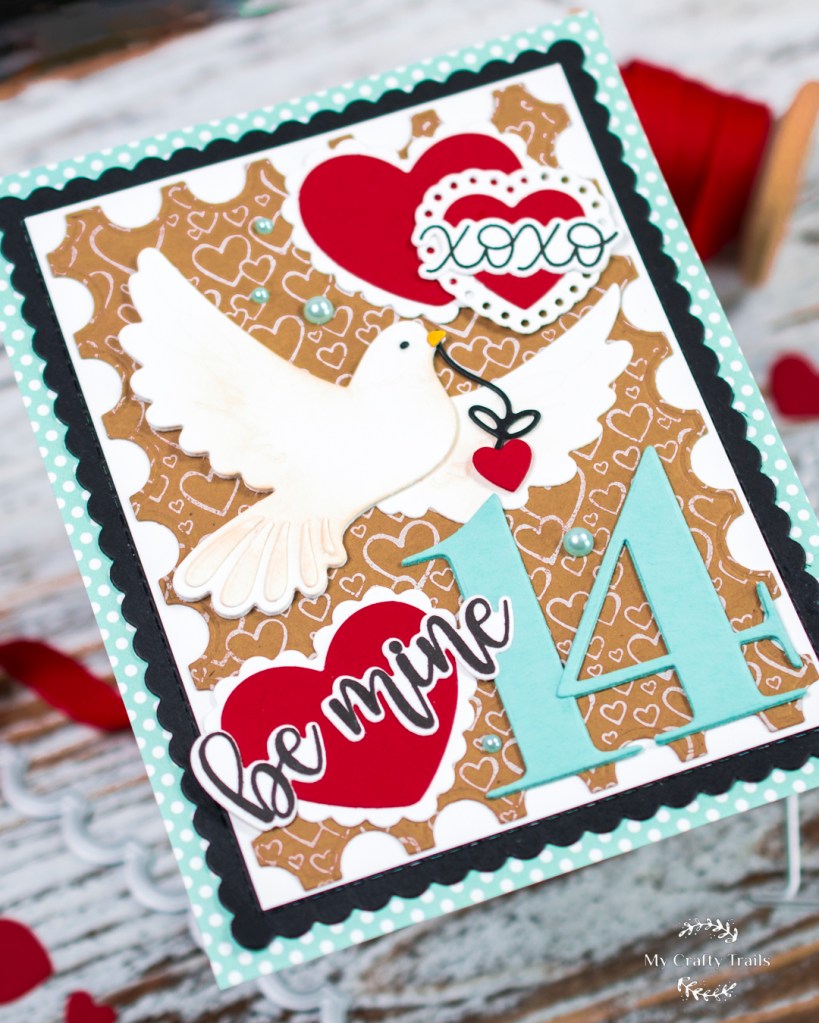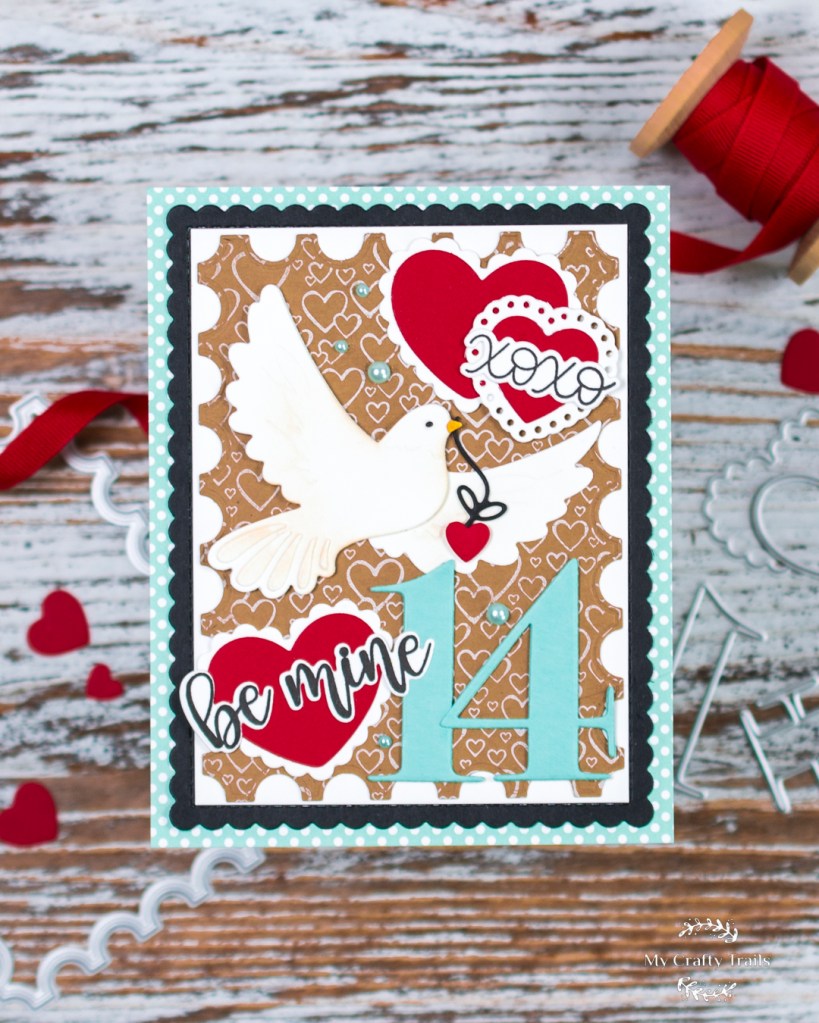
Happy Valentine’s Day, friends! I have a vintage-inspired valentine to share with you today featuring a mashup of a couple of my favorite companies, Hero Arts and Honey Bee Stamps. I used a Bold Print to stamp my background on kraft cardstock with white pigment ink before layering on the prettiest die cuts for what might be my favorite Valentine’s Day card this year. Keep reading for more detailed instructions on how to create this vintage-inspired card perfect for your valentine. Below, you’ll also find a list of project-specific supplies I used, while you’ll find my favorite everyday supplies here. Thank you so much for stopping by today to read all about my latest papercrafting project. XOXO
Hero Arts products:
Bursting with Love Bold Prints – background
Number One Fancy Dies
Number Four Fancy Dies
You’re Mine Bundle – “Be Mine” sentiment
Honey Bee Stamps products:
Lovely Layers: Doves
Lovely Layouts: Party Frames – kraft cardstock layer
Free Bee Heart Tag Jan. 2024 – (a gift with purchase) hearts with scallop detail
Scallop A2 Card Frames – black scallop layer
Vintage Pearls
Additional products:
Pretty Pink Posh Valentine Greetings Stamp Set – XOXO
Lawn Fawn Lacy Heart Stackables – small heart trim
Lawn Fawn Paper Bag Cardstock – kraft cardstock
Concord & 9th Cardstock
Doodlebug Plaid Polka Dot 6×6 pad
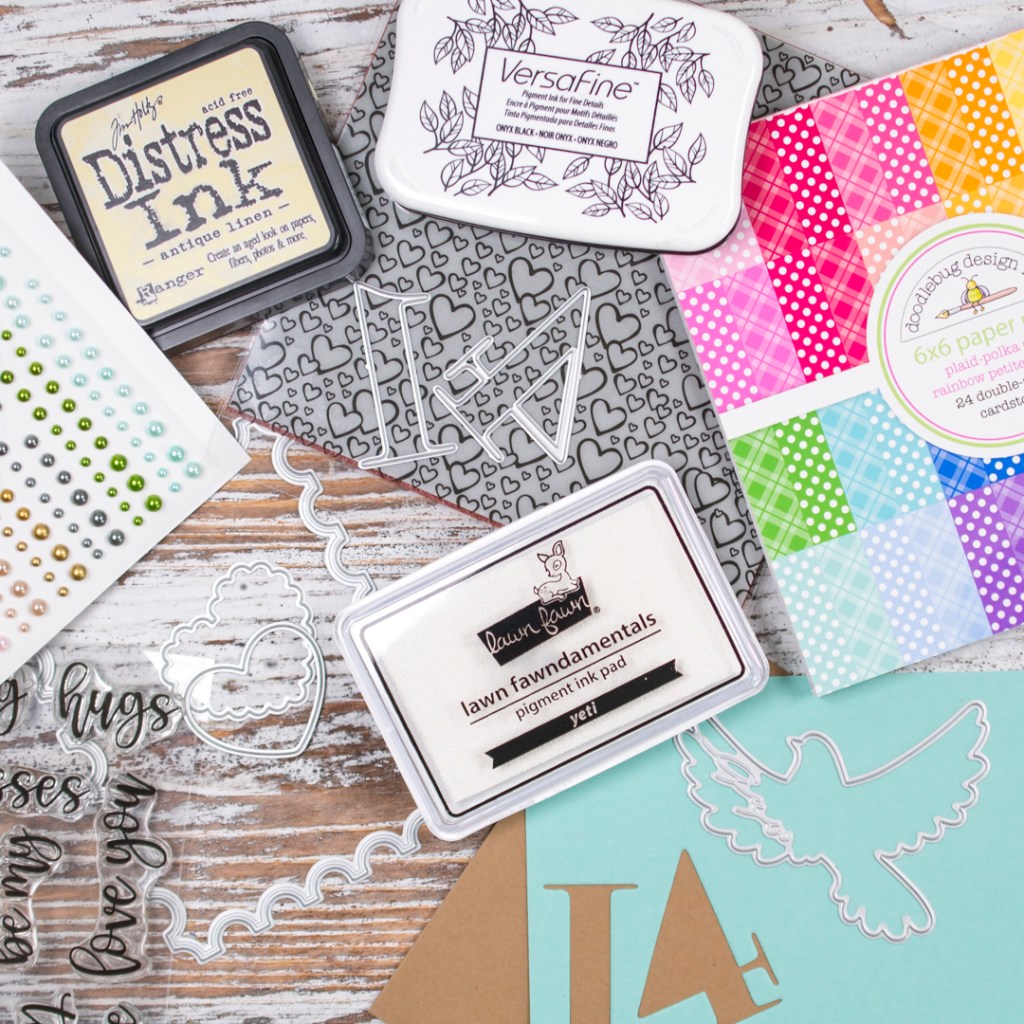
Lawn Fawn Yeti Ink Pad – background
Antique Linen Distress Ink – shading on dove
Copic Marker YR24 – beak
Copic Marker 110 – eye
Ok, let’s get started. My first step was to die cut the notched party frame layer from kraft cardstock and then stamp it with the bold print background stamp using white pigment ink. Then I attached this panel to three different layers: a white cardstock panel trimmed to fit inside the largest scallop frame that I die cut from black cardstock and lastly, a polka dot patterned paper trimmed to 4 1/4 x 5 1/2 inches.
Next, I die cut all the elements for my card design. I used white cardstock for the dove layers and added a little shading with Antique Linen Distress Ink. I attached the top dove layer with thin foam squares for added dimension. Then I die cut the fancy numbers from Sea Glass cardstock three times and stacked them together. I finished up my die cutting with the hearts and their decorative trimmings.

My final steps were to first attach my assembled die cuts to my layered background with liquid adhesive, except for the small heart, which is attached with thin foam squares. Next, I stamped my sentiments with black ink and die cut them with the coordinating dies before attaching them with liquid adhesive. And lastly, I added a few pearls in a coordinating color for embellishment.