In case you missed it, Pretty Pink Posh just turned 11 with an incredible birthday-themed release, and to celebrate, I have a project featuring many of the amazing new products that are available all wrapped up into one birthday shaker card. To create this card, I used new stencils, new shaker dies, and new shaker beads. And like I often do, I used the shaker beads as my color inspiration for this bright and fun mix. So let’s get started on this shaker card that is easier to put together than you might think. Below you’ll find a list of project-specific products and supplies as well as the details about creating this project. As always, thanks so much for stopping by today! I’m so grateful to have you. PS: you can find my favorite everyday supplies here!
Pretty Pink Posh Products:
Party Hat Shaker Dies – New!
Streamer Dies – New!
Let’s Party Shadow Dies – New!
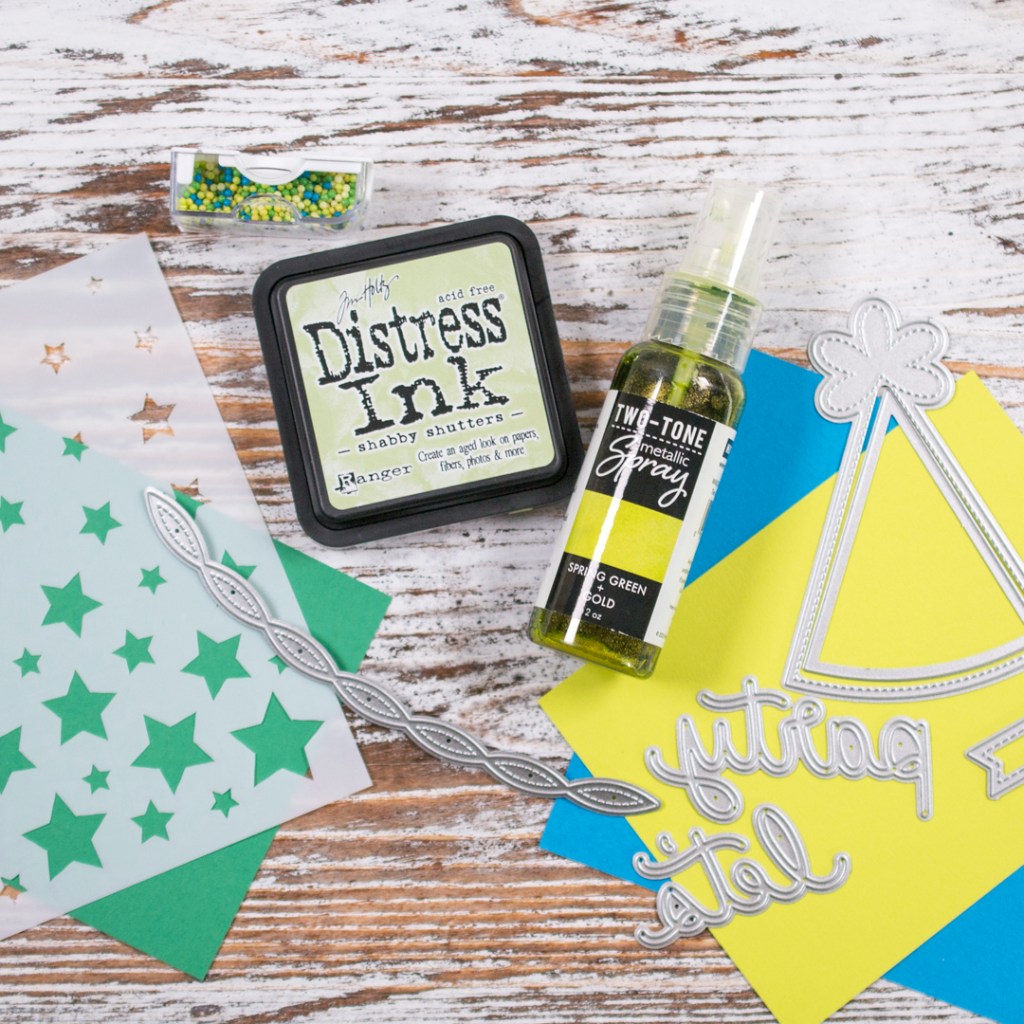
Cascading Stars Stencil – New!
Birthday Wish Shaker Beads – New!
Fancy Cake Dies – border
Sentiment Strip Dies
Sentiment Strips: Birthday Stamp Set
Distress Ink Shabby Shutters – stencil color
Two-Toned Metallic Spray Spring Green + Gold – background splatter
Concord & 9th and Simon Says Stamp Colored Cardstock
My first step was to stencil a white cardstock panel using the Cascading Stars Stencil and Shabby Shutters Distress Ink to be my background. Then I spattered the background with the metallic spray using a paint brush. I thought both of these products coordinated well with the shaker beads. Next I die cut this panel and another plain white cardstock panel, which will be the shaker base, with the stitched frame from the Fancy Cake Dies. We want the background panel and the base panel to be the exact same size for easier alignment when we assemble the shaker component. From the second plain white panel, the shaker base, we only need the inside piece and not the frame.
The second step was to die cut the elements for my card. I die cut multiple streamers from blue, jade, and chartreuse-colored cardstocks and the components for the Party Hat from chartreuse and teal-colored cardstocks. Again, all of these colors coordinate with the shaker beads!
My next step was to create the shaker component of the card using the stenciled background panel and the plain white shaker base. I used the smaller Party Hat die to die cut the window of the shaker from the stenciled background panel. Then, with the background panel and the base panel stacked together, I used the shaker window opening as a template for the placement of the teal Party Hat (that we die cut in the previous step) on the shaker base. This will be the background to the shaker window.
Next I attached a piece of acetate over the shaker window on the reverse side of the background panel, securing it with double-sided tape. Then, on the base panel, I attached foam strips around the teal Party Hat to create a well for the shaker beads and then foam tape across the rest of the panel. I added the shaker beads to the well and then used the corner of my Misti to align the stenciled background panel that has the shaker window with the base panel that has the foam tape.
With the shaker component completed, I focused on the remaining elements of my card. First I centered and attached the shaker to an A2 cardstock panel, which left room to add the stenciled background frame to the perimeter of the panel. The frame is at a lower height than the shaker, but I like that look. You could easily add foam strips around the perimeter before adding the frame if you want them to be even. Next I added all the die cuts from step two, like the Party Hat frame, the topper, and the decorative polka dots as well as the streamers, which I trimmed to fit around the hat and anything that over-hung the sides.
To finish up my card design, I first die cut Let’s Party from blue cardstock and added a vellum shadow before attaching it with liquid adhesive. And lastly, I heat embossed a secondary sentiment with white embossing powder on the same blue cardstock before die cutting it with a sentiment strip and attaching it to my card panel. And that completes this bright and fun birthday shaker!
