
Let’s Pawty! Check out the INSTAGRAM HOP & GIVEAWAY! Join Pretty Pink Posh as they celebrate turning 11 with a collection packed full of birthday products. Come hop along for inspiration that will inspire your birthday projects all year long!
Hi friends! I have a fun birthday project to share featuring one of the new stamp sets, the adorable Birthday Dogs & Cats. I used the Stitched Photo Frames to create candid snapshots of these party animals celebrating. So fun! Stick around to get all the details about this project, including a supply list. Then, head over to Instagram to hop along and see more incredible inspiration projects featuring products from the latest release. Thanks so much for stopping by, and happy hopping!
Pretty Pink Posh products featured:
Birthday Dogs & Cats Stamp Set
Paw Prints Stencil
Stitched Photo Frames
Stitched Torn Rectangles
Sentiment Strips: Birthday Stamp Set
Additional supplies & products:
Lawn Fawn Paper Bag Cardstock
Lawn Fawn Yeti Pigment Ink
Copic Markers
Kittie: W3, W5, W7, R01
Dalmatian: W0, W1, W7, R01
Small dog: E000, E81, E31, E35, E37, R01
Dog food: E23, E25, E27
Yellows: Y21, YR23
Teals: BG0000, BG45, BG49
Reds: R32, R27, R35
Here is a snapshot of the supplies and the Copic colors I used for this project. You can always find my favorite everyday supplies here.

Let’s get this pawty started! First I stamped my images on white cardstock, setting up the scenes to fit inside the dimensions of the photo frame. I stamped some of the props included in the stamp set and lightly penciled in some others, like the larger balloons, the pennant flags, and the confetti, before using a Copic Multiliner to complete the images. Then I used the Copic colors pictured above to color in the images.
Next, I die cut three photo frames from white cardstock and then stamped little icons and sentiments along the bottoms. I colored in the icons and then attached the stamped party scenes behind each frame. With the snapshots completed, I got to work on the background.
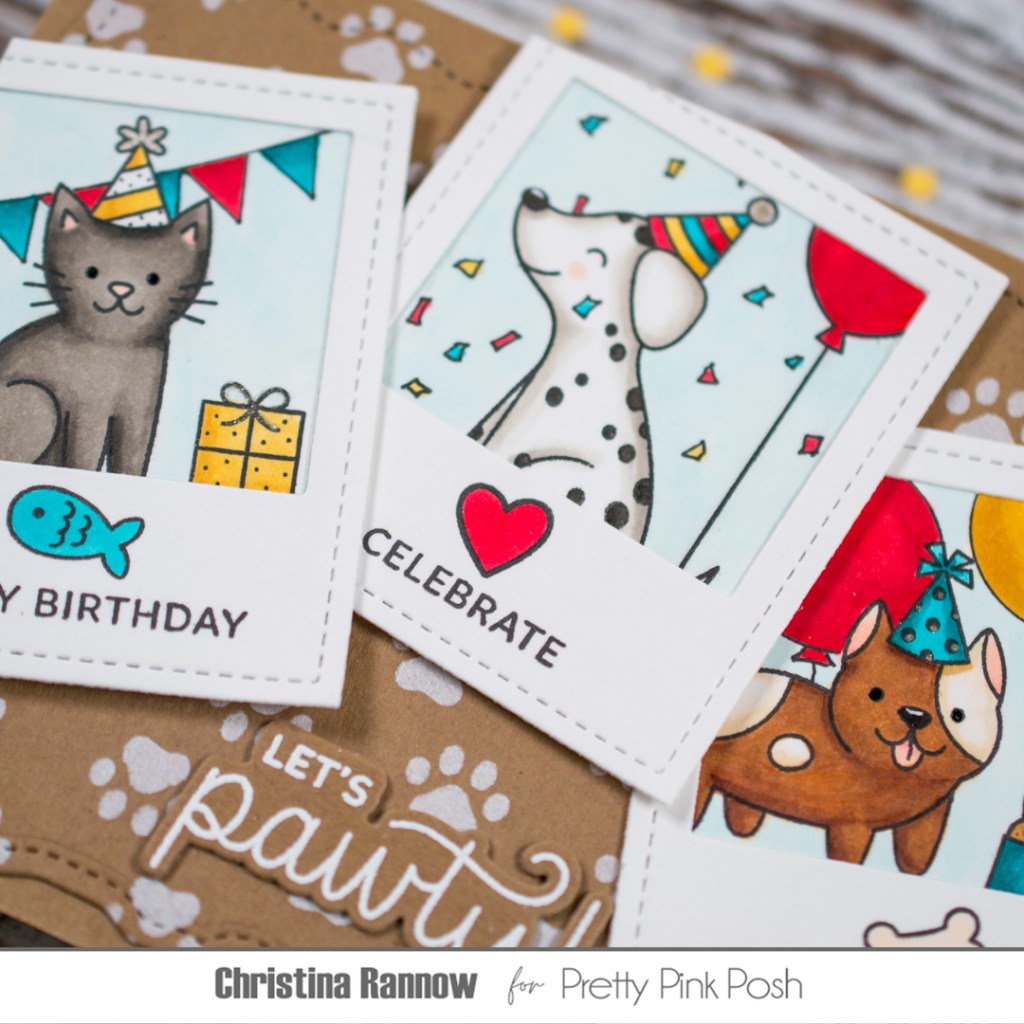
First, I die cut the largest Stitched Torn Rectangle from kraft cardstock and used white pigment ink to stencil on the paw prints. It’s such a simple stencil, but it’s one of my favorites from this release! I mounted this onto a 4 1/4 x 5 1/2 inch kraft cardstock panel and then attached the photo frame scenes. I used liquid adhesive for the photo on the right, thin foam squares for the middle one, and regular foam squares for the left photo. That way the photos would lay evenly on the background panel without any lumps or bumps!
Just a few more steps until we wrap this up! I stamped and heat embossed the sentiment on kraft cardstock before die cutting it and attaching it to my card with thin foam squares. I added small details with a glitter pen, a white gel pen, and a black glaze gel pen. (I missed adding white highlights to the eyes before taking photos. ugh!). And finally, I trimmed the photos where they overhung the card design for easier mailing. And that’s all there is to creating this fun birthday card featuring some of the awesome new things over at the Pretty Pink Posh Shop!

