I’m soooo excited to be participating in the latest Blocks of Fun release from Waffle Flower!! If you’ve been following me for a while, you know I have a serious soft spot for all things Postage Collage, and this release has some incredible goodies to add to the collection, like my absolute favorite thing, the Mini Postage Collage Die-n-Stencil. It’s too cute for words. And the envelope dies from the Mini Seals set I’m showcasing here might be a close second! Keep reading for a project-specific supply list and how I used those supplies to create this inspiration card. You can always find my favorite everyday supplies here!
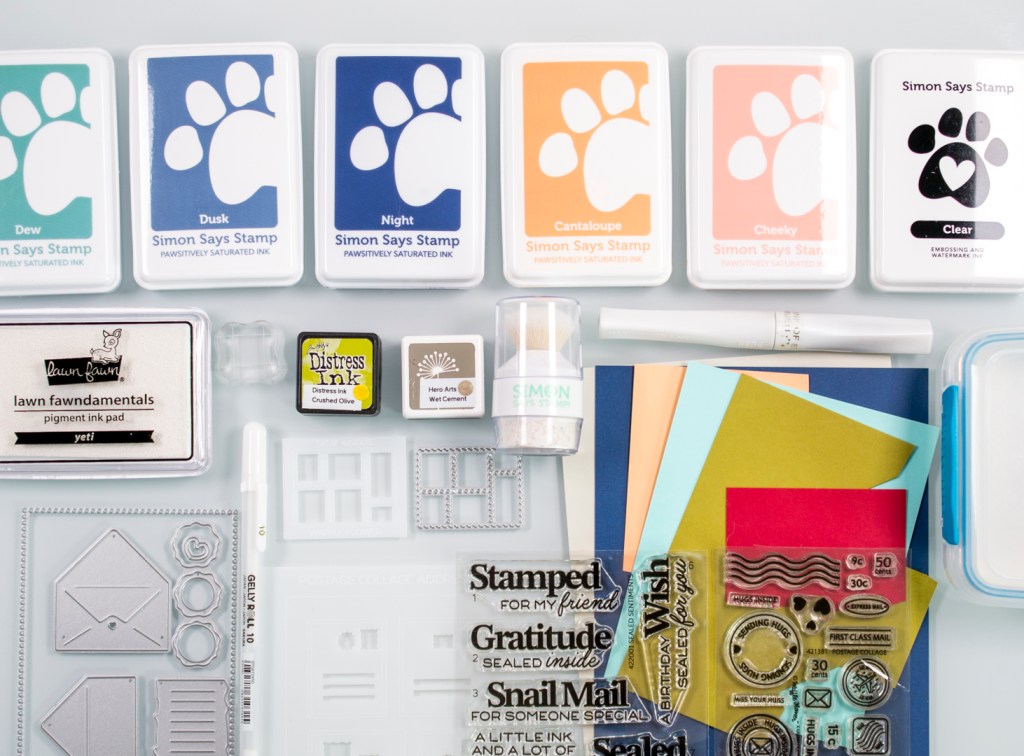
WAFFLE FLOWER SUPPLIES
Postage Collage Mini Seals Die – envelopes
Postage Collage Addressed Envelope Stencil
Wax Seal Trio Die – small wax seal
Sealed Sentiments Stamp Set
Sealed Sentiments Coordinating Dies
Postage Collage Mini Die-n-Stencil – mini stamps
Nested Dotted Rectangle Dies
Postage Collage Seals Stamp Set – background
Postage Collage Stamp Set – background
Simply Said Stamp Set – background
Oversized Postage Stamp Set – background
Script Texture Stamp Set – background
OTHER SUPPLIES
Cardstock:
Lawn Fawn Dolphin
Concord & 9th Midnight, Creamsicle, Aqua Sky, Grasshopper
Ink:
Hero Arts Wet Cement Ink – background stamping
SSS Pawsitively Saturated Ink:
Cantaloupe & Cheeky blended and Night for mini stamps
Dusk for mini stamp denominations
Dew for aqua addressed envelope
Distress Ink Crushed Olive for grasshopper addressed envelope
Lawn Fawn Yeti for mini stamp denominations
Let’s get started!
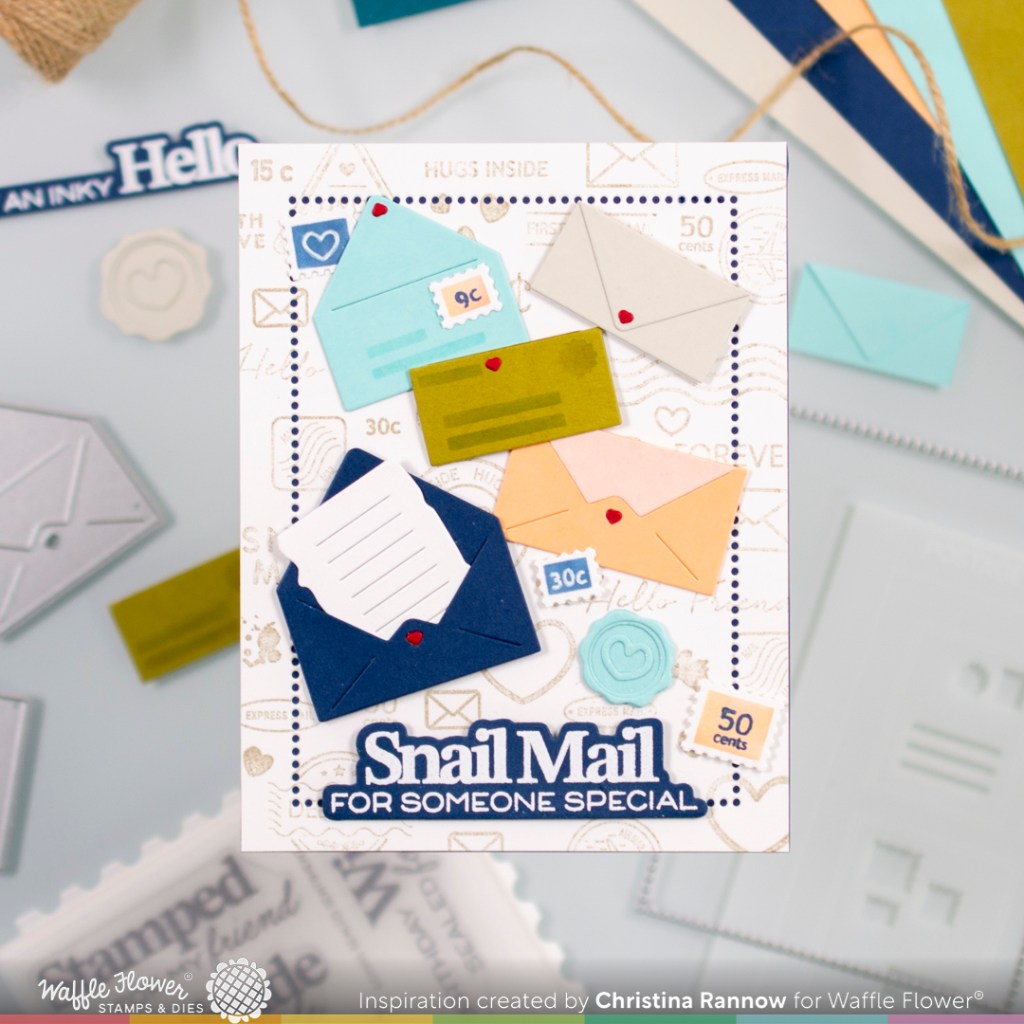
My first step was to create the patterned paper for the background panel. On a piece of white cardstock measuring 4 1/4 x 5 1/2 inches, I stamped numerous sentiments and icons, mostly Postage Collage related, all across the panel. This was a lot of fun to create and can be easily recreated with just a couple of stamps. For this card, I used 5 different stamp sets, sometimes using just a single small heart from the set, to create a unique patterned paper background. To finish the background panel, I die cut it with the second- largest dotted rectangle die for a fun design detail and then backed the panel with a piece of midnight cardstock that shows through the dotted detail.
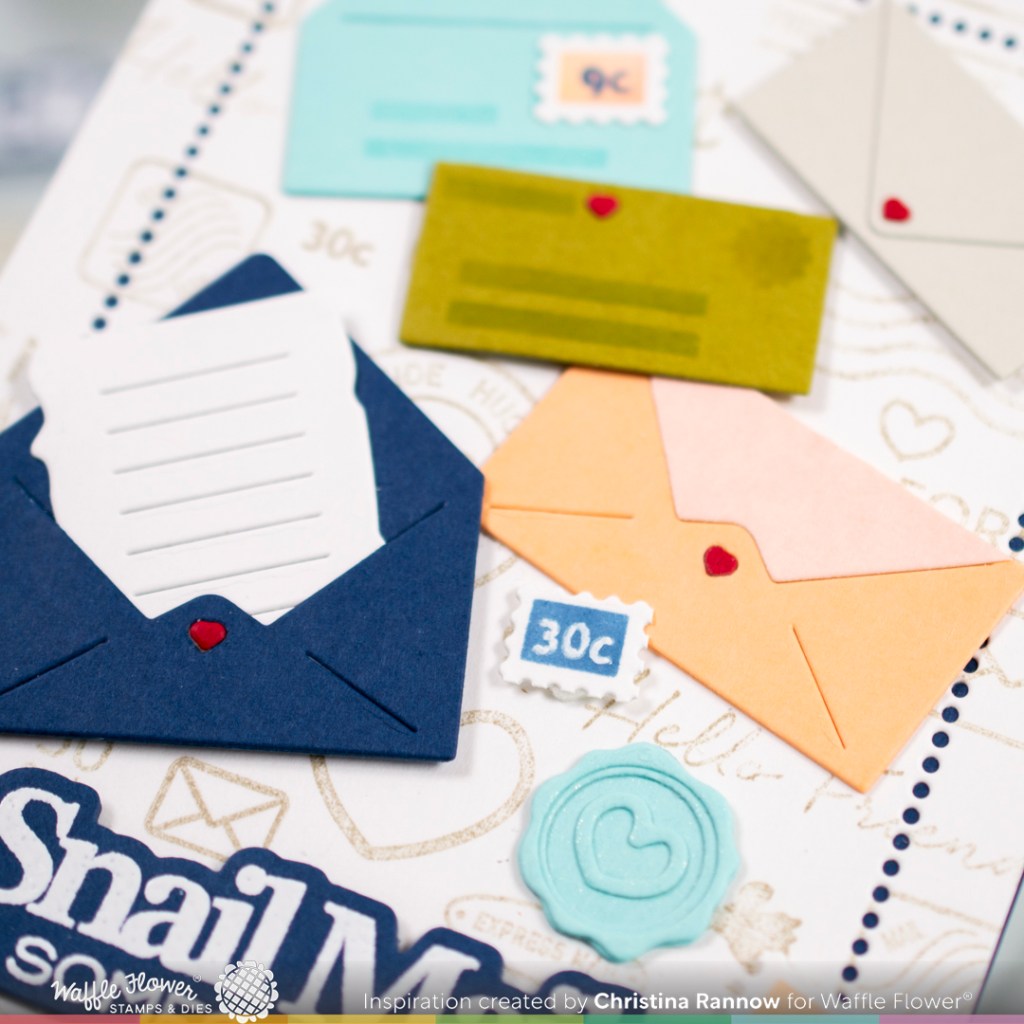
My next step was to create all the remaining elements for my card design. I started with the envelopes, leaving some open and others closed, and adding a tiny red heart to each one. I used a stencil, listed above, to address two of the envelopes and then attached them to my background panel using liquid adhesive or thin foam squares. Then I created the wax seal and the mini stamps. I die cut the elements for the seal from aqua cardstock, assembled it, and then added a little sparkle with a glitter brush pen. After die cutting the mini postage collage, I stenciled them, stamped them, and then snipped them apart before adding them to my card design.
To finish up my card, I heat embossed a sentiment with white embossing powder and die cut it with the coordinating die before attaching it with thin foam squares.
Thank you so much for stopping by to read all about my inspiration project featuring the Blocks of Fun release from Waffle Flower. Stay tuned for more projects using the latest release!

