Hi, friends! Today I’m sharing another inspiration project I created for Waffle Flower to celebrate their latest release, Blocks of Fun. I combined many of the new Postage Collage products with a couple of the originals to design a card that could be used for any occasion by simply switching up the main sentiment. Keep reading to find a project-specific supply list and all the details about how I used those supplies to create this inspiration project. You can always find my favorite everyday supplies here. Let’s get started!
WAFFLE FLOWER SUPPLIES
Dry Flowers Die
Wax Seal Trio Die
PC Mini Seals Stamp Set – “sealed with love”
PC Envelope Die
PC Envelope Stencil
Sealed Sentiments Stamp Set
Sealed Sentiments Coordinating Dies
Nesting Dotted Rectangle Dies
PC Die – original
PC Coloring Stencil – border
OTHER SUPPLIES
Lawn Fawn Paper Bag Cardstock
Lawn Fawn Vanilla Malt Cardstock
SSS Cream Embossing Powder – sentiment
Distress Oxide Antique Linen
SSS Pawsitively Saturated Inks:
Sky, Dusk, Artichoke, Kale – stamping and ink blending of flowers
*Oops! Rainbow Splash Buttercream and regular Antique Linen Distress inks are shown but I did not use them for this project 🙂

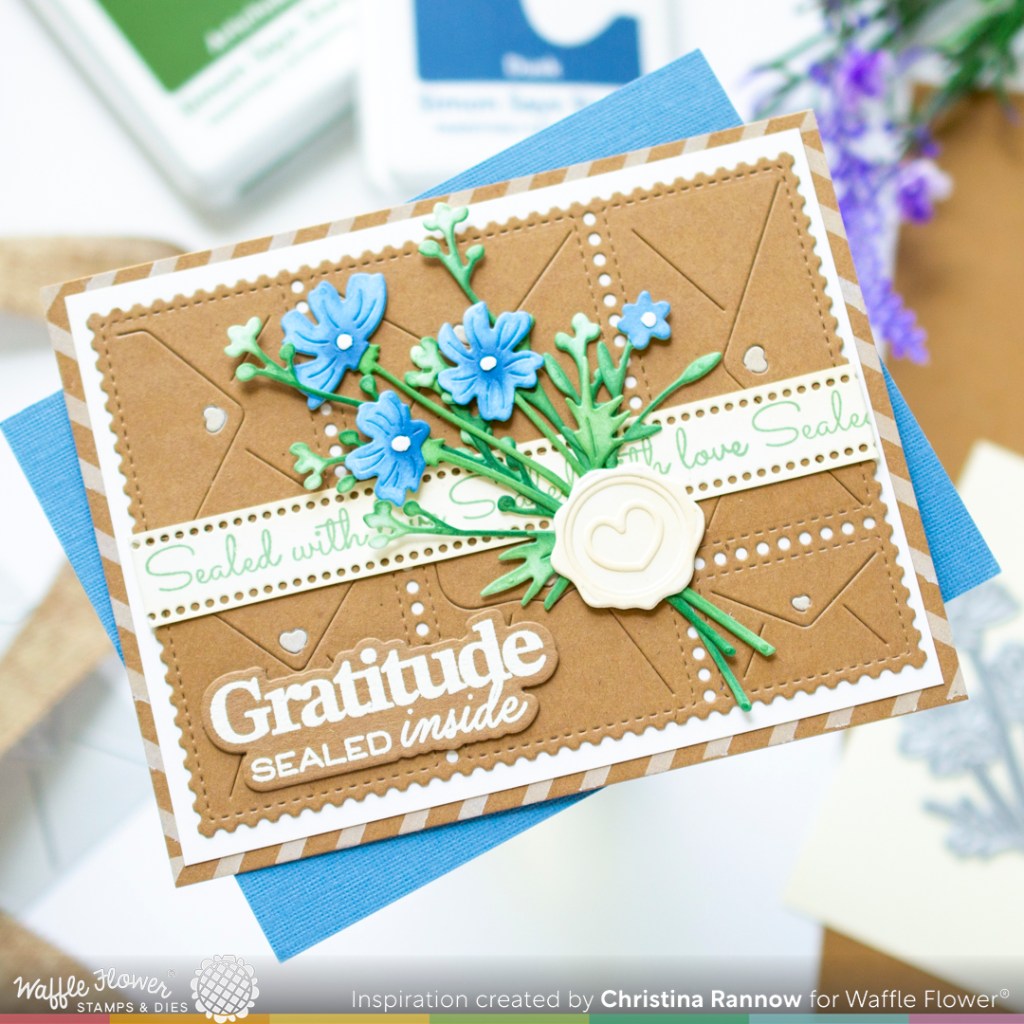
My first step was to die cut a piece of Paper Bag cardstock first with the Postage Collage base die and then the new PC Envelope die that creates the envelope detail. Then I used the coordinating PC Envelope stencil and Distress Oxide Antique Linen ink to ink just the little hearts on the envelopes. I also used Distress Oxide Antique Linen to stencil the airmail border on an A2 Paper Bag cardstock panel. I layered these panels with a piece of ivory cardstock and then added a paper ribbon detail.
To create the ribbon, I used a thin strip of vanilla malt cardstock and added a decorative detail on both sides using the Dotted Rectangles die. I stamped “Sealed with Love” across the strip with Kale ink and then wrapped it around the PC base panel, folding and tucking the ends underneath.

My next step was to die cut the flowers and ink them with the colors listed above. I ended up die cutting the flowers twice so I could snip them apart and layer the pieces for a more dimensional look. Then I arranged them on my card front and attached a wax seal that I die cut from Vanilla Malt cardstock to finish the arrangement.
My last step was to heat emboss a sentiment with cream embossing powder, die cut it with the coordinating die, and then attach it to my card front.

And that completes this inspiration project I created for Waffle Flower featuring many of the new products in the latest release. Thanks so much for stopping by today!