It’s release day over at Pretty Pink Posh, and the new collection has the most beautiful new stamps, dies, and stencils. There are hummingbirds, teacups, and a whole garden of new florals. I’m showcasing some of the new florals today from the Floral Wreath Builder Dies. This is such a gorgeous and versatile set. You can build a floral wreath for almost every occasion! I built my wreath on the new Notched Squares that I extended into a rectangle with some creative die cutting and added just a simple sentiment. Keep reading to find a complete project-specific supply list and then all the details about how I used those supplies to create this simple yet beautiful wreath design featuring products from the latest Pretty Pink Posh collection. Let’s get started!
SUPPLIES
Notched Squares Dies – New!
Floral Wreath Builder – New!
Simple Thanks Stamp Set – New!
Simple Thanks Coordinating Dies – New!
Spring Floral Dies – New!
Heart Lattice
OTHER SUPPLIES
Pawsitively Saturated Inks:
Spring, Lucky, Tropic
Peony, Rose
Cantaloupe, Sherbet
Heather, Violet
Lemonade, Sunbeam
Distress Inks:
Pine Needles, Cracked Pistachio

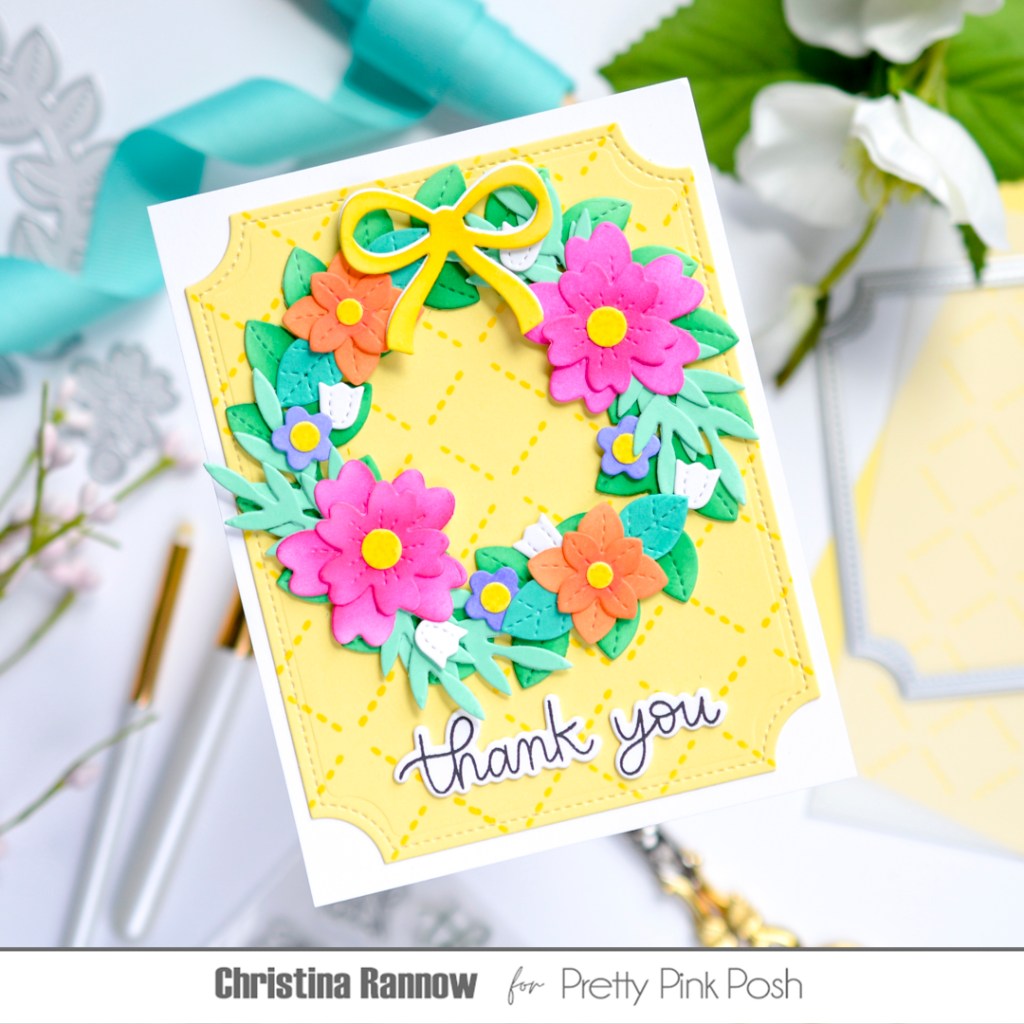
My first step was to create the background. I extended the largest Notched Square by partially die cutting it from pale yellow cardstock and then shifted the die down about an inch and a half before rotating the cardstock to finish die cutting the other end. This gave me a rectangular panel that fit on a white A2 card base, leaving a nice white border. Before I attached it to the card base, I stenciled the lattice pattern using Sunbeam ink.
With the background complete, I got to work die cutting all the wreath components from white cardstock. All of the components are from the Floral Wreath Builder except the small, white bell flowers; those are from the Spring Florals set. Next, I used the ink colors listed above and small blending brushes to color the die cuts. I used two or three shades per color for shading and color variation. I layered and assembled the flowers and the bow before moving on to my next step.
My next step was to assemble the card front. First I attached the main wreath die cut to the background panel with glue. Then I added the flowers and greenery, securing them with glue or thin foam squares depending on their placement and how much they overlapped. I concentrated on the larger flowers first, spacing them evenly, and then tucked in the smaller flowers and greenery. My final step was to stamp the sentiment with black ink and then die cut it with the coordinating die before attaching it under the wreath.
Thank you so much for stopping by and reading about this simple but beautiful floral wreath design I created featuring products from the latest Pretty Pink Posh release. Be sure to check out the entire collection of new stamps, dies, and stencils-everything is GORGEOUS!