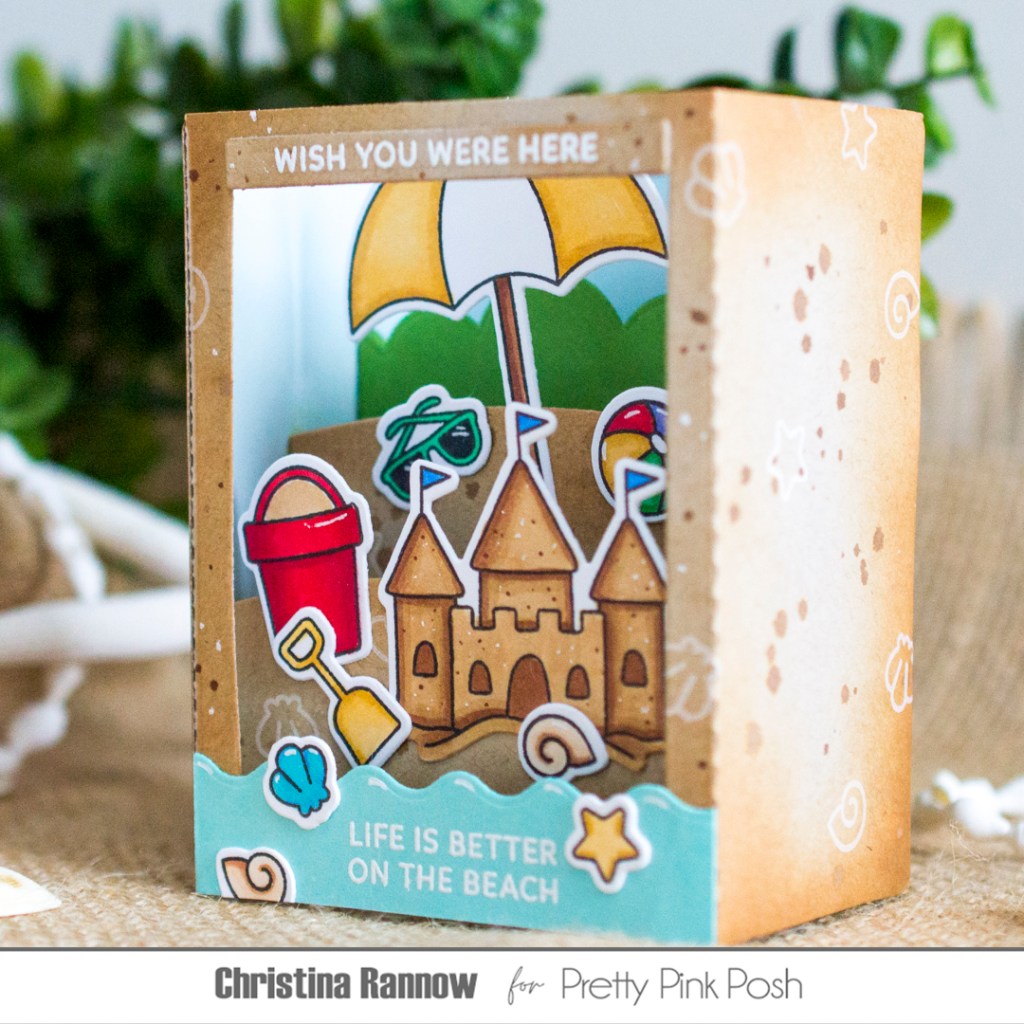
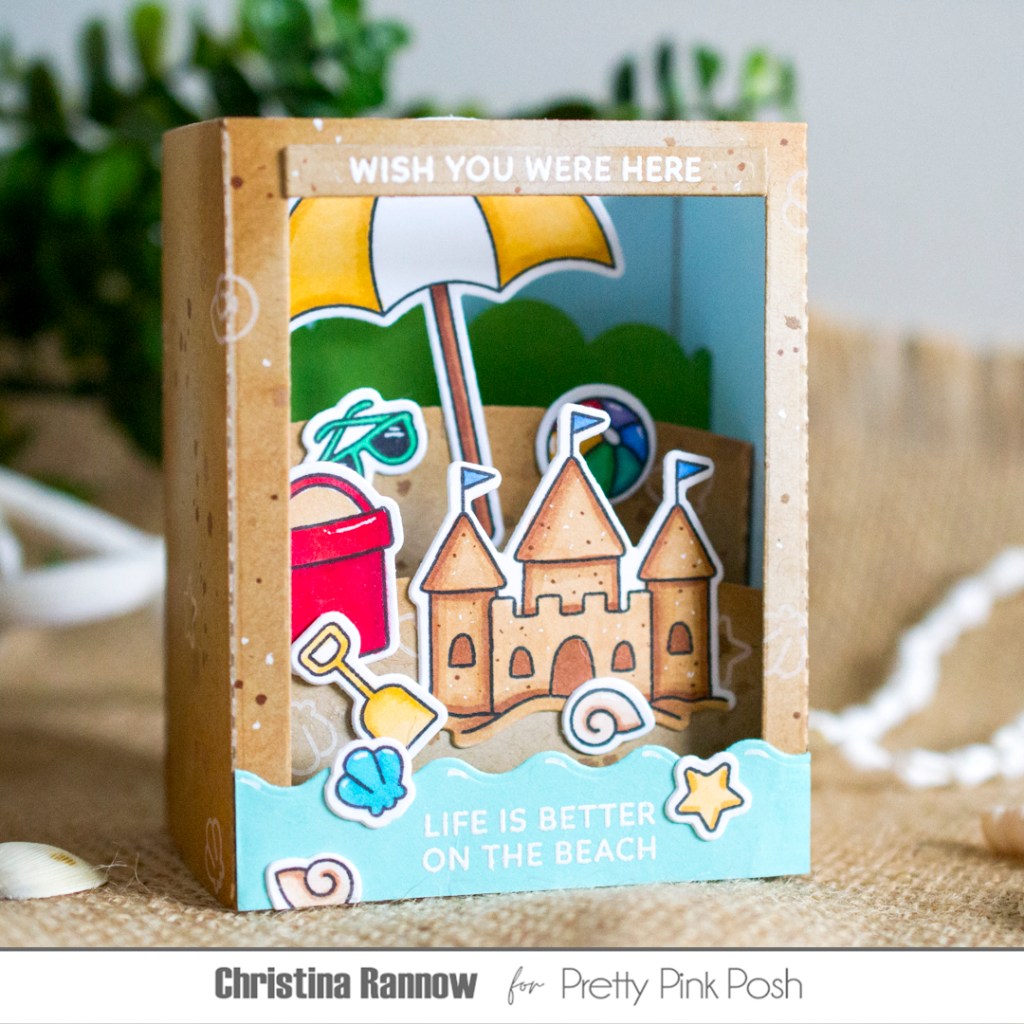
Hello crafty friends! Pretty Pink Posh has a brand new summer release full of seashells and sunshine, and to celebrate, there’s an Instagram Hop & Giveaway starting today! Get all the details for the hop and giveaway here! Plus, when you hop over, you’ll also find a ton of inspiration from the designers using products from the new summertime collection. I chose one of the new stamp sets, Beach Fun, for my inspiration project and created a 3D beach scene using the Shadow Box dies from last month’s release. I had a blast creating this card for the hop, and the Shadow Box dies make it super easy to assemble. Get the supply list and all the details below. Let’s get started!
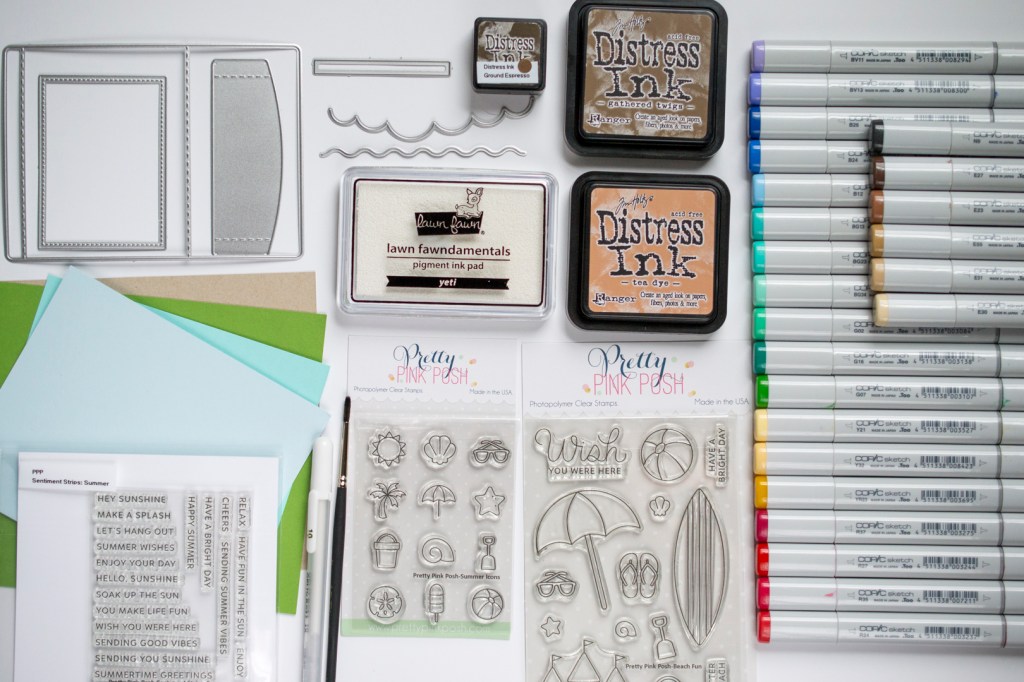
PRETTY PINK POSH SUPPLIES
Beach Fun Stamp Set
Beach Fun Coordinating Dies
Shadow Box Dies
Summer Icons Stamp Set – I used the ball and sunglasses from this set because the scale worked better for my scene
Summer Icons Coordinating Dies
Sentiment Strips Stamp Set: Summer
Sentiment Strips Dies
OTHER SUPPLIES
Neenah Desert Storm 100# Cardstock
C9 Cardstock – Powder, Aqua Sky, Parsley
Distress Inks – Gathered Twigs, Tea Dye, Ground Espresso
Lawn Fawn Yeti Ink
Copic Sketch Markers
Copic Coloring Guide
Yellows Y21, Y32, YR23
Reds R24, R35, R27, R37
Green G02, G07
Teal G02, BG34, BG23, BG13, G16
Blue B12, B24, B26
Purple BV11, BV13
Sandcastle E30, E31, E23, E55, E27
Shells E30, E23
I started this project by die cutting the components for the shadow box. I used kraft cardstock for the outside walls and for two hills on the inside of the box that will be the sand mounds. I die cut a window from one wall panel and then inked all the pieces with distress inks, concentrating the color around the edges. To create a sandy look to the pieces, I spattered them first with the same distress inks thinned with a little water and then with thinned white gouache. The last step for these wall pieces was to stamp little shells across them with white pigment ink. I set these aside while I worked on the other components of the shadow box.
I wanted my scene to have sky, so I die cut the wall pieces again, but this time from light blue cardstock. I used these to line the reverse side of the kraft wall pieces from step one. I trimmed a tiny bit off the ends of both wall panels to remove a bit of the bulk so the shadow box would still fold flat nicely once constructed. Also, I decided not to line the front window panel with the light blue cardstock, so I trimmed that panel off the wall piece at the score line. That helped with the extra bulk too. The last step for the shadow box prep was to die cut the scalloped greenery piece from green cardstock and the water from aqua cardstock.
Next, I stamped the images from both stamp sets I wanted to use with black Copic-safe ink and then colored them with Copic markers. There’s a coloring guide above if you’re interested. Then I die cut them with the coordinating dies and added white gel pen highlights to some of the images. I also stamped and heat embossed sentiments for the shadow box. I stamped one on kraft cardstock, heat embossed it with white embossing powder, and gave it the same sandy ink technique I gave the wall pieces after die cutting it with a sentiment strip die. The other I stamped and heat embossed right on the water piece I had already die cut. With all the components completed for the shadow box, I moved on to the assembly.

First, I scored and folded all the pieces before attaching the small flap piece of one wall to the other wall piece using glue. Before securing the other small flap piece to create the box, I attached both sandy mounds and the scalloped greenery piece to one of the inside panels. I staggered their heights and also their placement across the width of the side panel – one sand mound near the front and the other in the middle, with the greenery towards the back of the panel. With everything in place, I folded the shadow box closed and secured the other flap using glue.
Finally, I added the water piece and the sentiment strip outside the shadow box window before adding the stamped images to my scene. I used tweezers to help place the images inside the shadow box and to clamp them in place while the adhesive dried. You can always add the images before you close up and secure the shadow box, but I found it hard to get the placement right.
Thank you so much for stopping by today to get all the details about this 3D shadow box card featuring a beach scene created with the new summer collection from Pretty Pink Posh!