Hello! I’m so honored to be an Altenew Ambassador for the next three months! To celebrate, I have an exclusive offer for you – a free Perfect Picker on Altenew orders of $79 or more from September 17, 2025, at 12:00 am EDT to September 24, 2025, at 11:59 pm EDT! Add the Perfect Picker to your cart and use the code CHRISTINAFREE at checkout to get it for FREE! Hooray for crafty shopping!
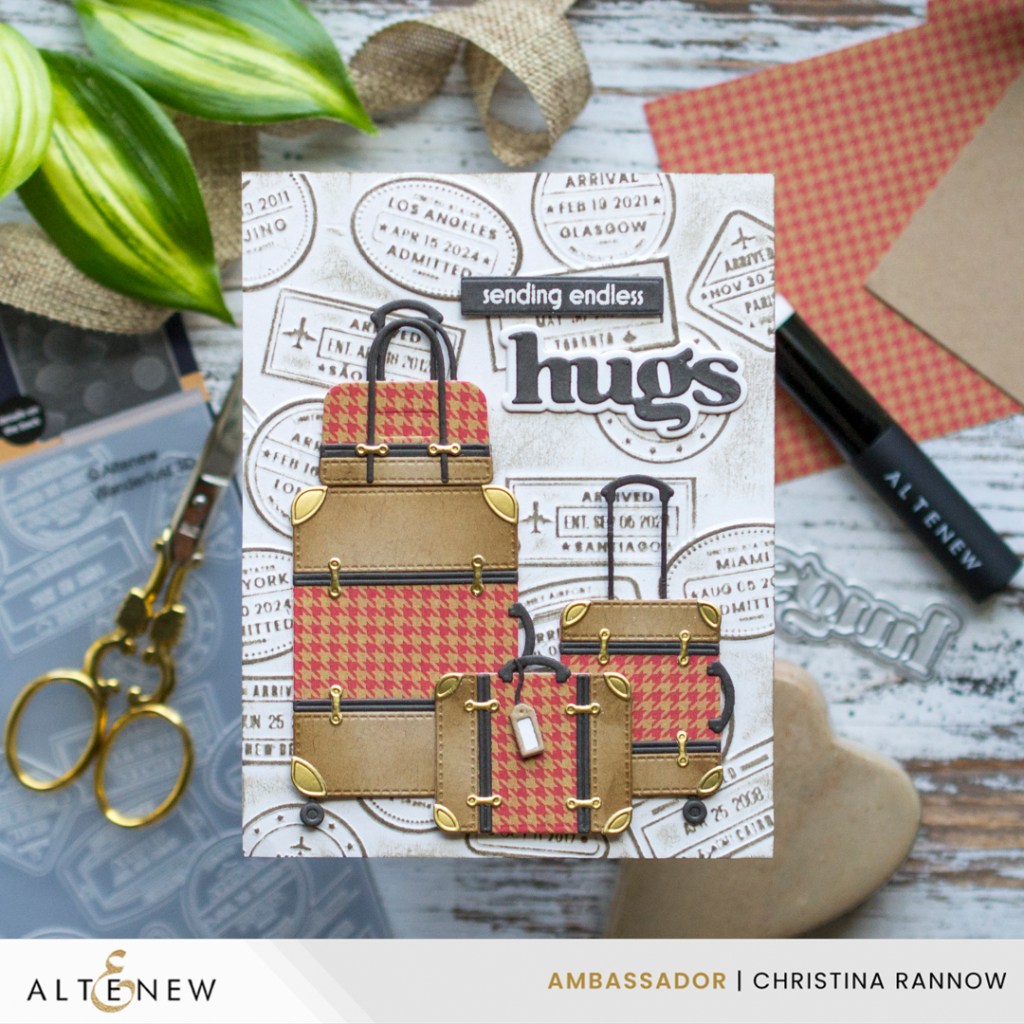
As an ambassador, I’ll be sharing inspiration projects with you each month featuring new release products as well as previously released favorites, like the Pack Your Bags Creative Cuts Layering Dies that I used for today’s card design. These die sets are amazing, you guys! Look at all the details on these luggage bags- I’m obsessed! I paired this set of luggage with the Wanderlust 3D Embossing Folder for a travel-themed card that would work for many different occasions by simply switching out the sentiment. Below you’ll find a supply list (with affiliate links) and then the steps I took to create this delightful travel-inspired card. Let’s get started!
ALTENEW SUPPLIES
Pack Your Bags Creative Cuts Layering Dies
Wanderlust 3D Embossing Folder
Versatile Greetings Die Set
Joyful Greetings Stamp Set

I couldn’t help but jump right into building these bags first, so that’s where we’ll start. With this set, you can build newer, more modern hard-shell luggage bags or something more vintage-inspired like I did for this card. The best part is that many of the dies do double duty and are used to make both types of luggage. Plus, Altenew uses a unique keyhole system in the diecuts that takes the guesswork out of lining up and layering your pieces! To create my vintage-inspired luggage, I used kraft cardstock that I inked around the edges, a houndstooth patterned paper, and brushed gold accents. I love how these turned out!
For the background, I embossed a rustic white cardstock panel using the Wanderlust 3D embossing folder. The embossing folder creates incredible dimensional images, but I wanted to highlight the images even more, so I lightly swiped the panel with a warm gray ink cube. This gave the panel more of a distressed look that I thought went well with the vintage luggage diecuts.
To finish things up, I added the “hugs” diecut from the Versatile Greetings Die Set, and to complete the sentiment, I heat-embossed a phrase from the Joyful Greetings Stamp Set.
Thank you so much for reading about my first project as an Altenew Ambassador! I hope I’ve inspired you to check out some of the amazing products that Altenew offers. Happy crafting!

