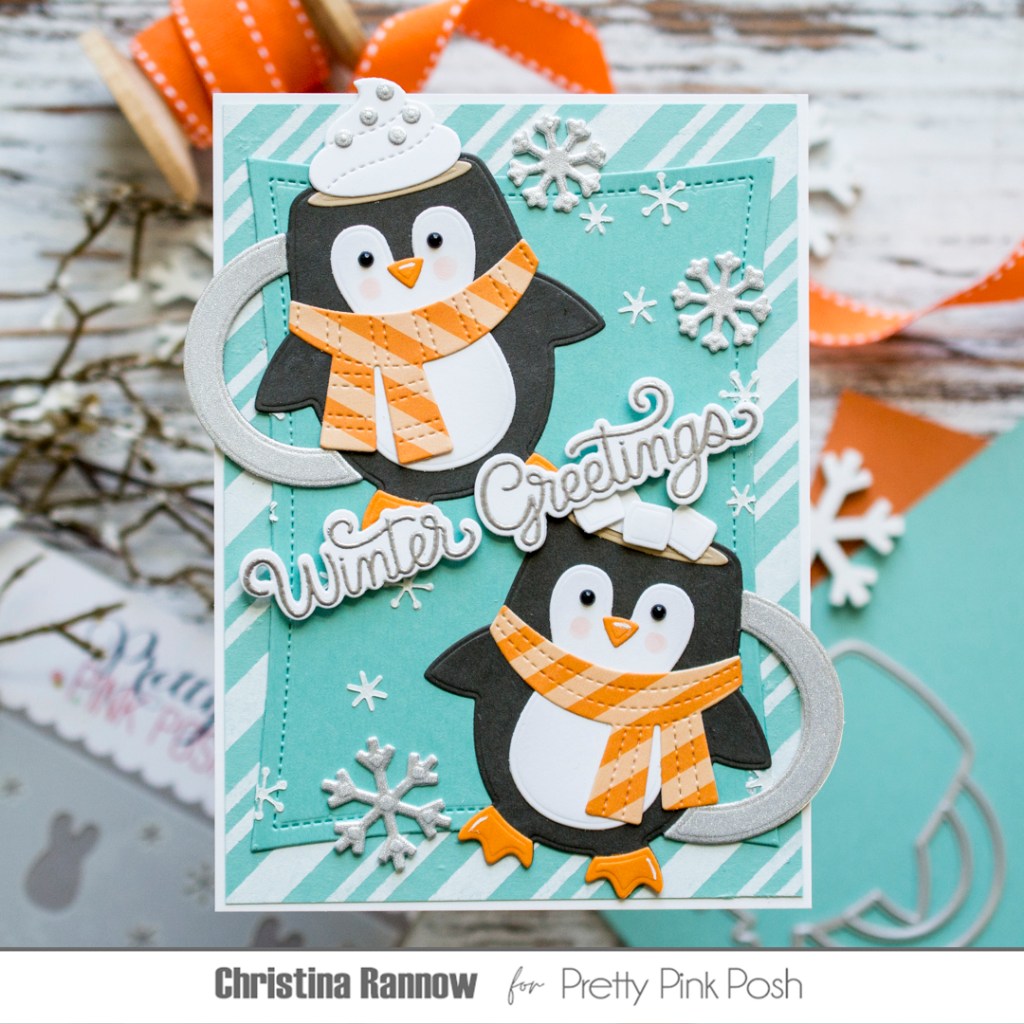
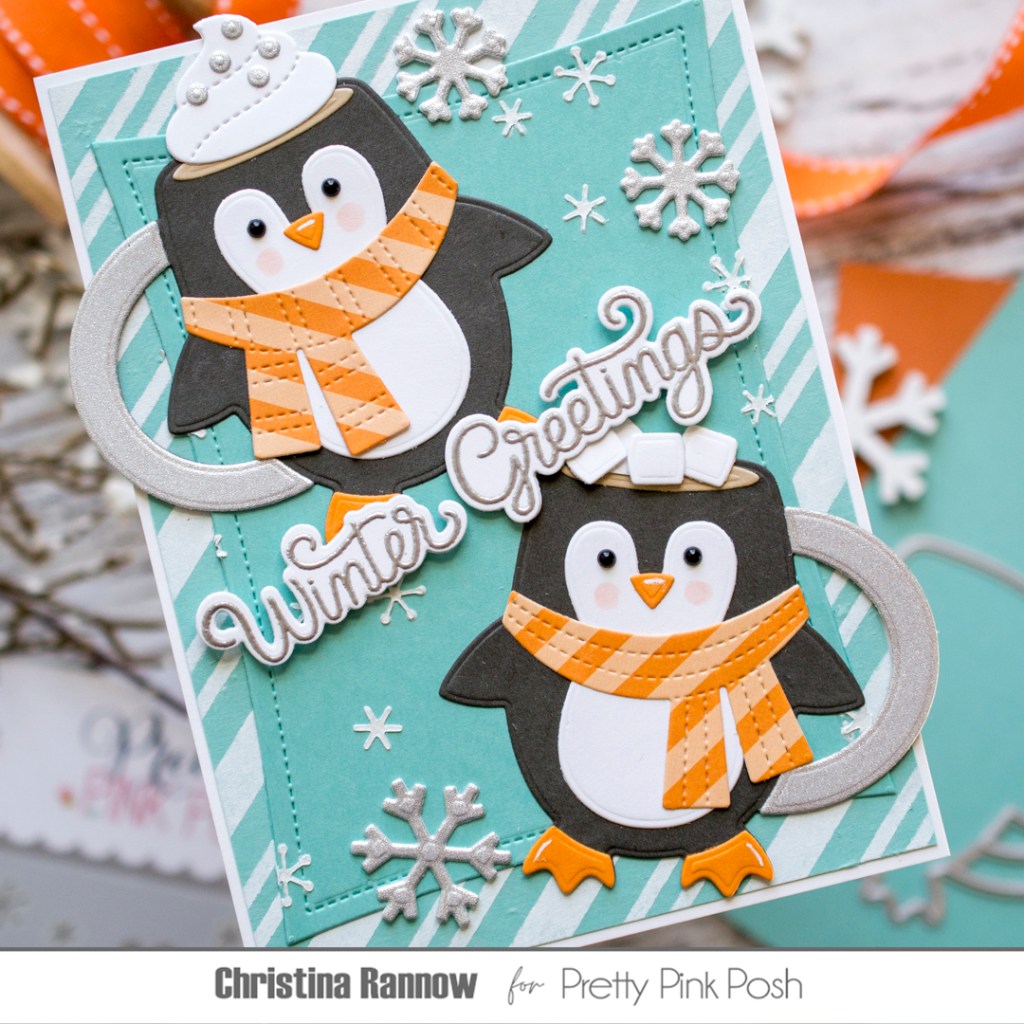
There’s a frosty and festive new release over at Pretty Pink Posh, and it’s packed full of winter and holiday-themed products that are truly irresistible! Just look at these pudgy, lovable Penguin Mugs. So. Much. Cuteness. I combined these cuties with a Candy Cane Stripe and a flurry of snowflakes for a festive wintertime card. Keep scrolling to see my list of supplies (with affiliate links), and then we’ll get started on this frosty fun card design!
PRETTY PINK POSH SUPPLIES
Penguin Mugs Dies
Layered Penguins Stencil
Candy Cane Stripes Stencil
Wonky Stitched Rectangle Dies
Christmas Holder Additions Dies – snowflake
Big Christmas Cupcake Dies – snowflake
Holiday Scripts Stamp Set
Holiday Scripts Coordinating Dies
Onyx Pearls
OTHER SUPPLIES
Concord & 9th Cardstock: Mushroom, Tidepool, & Almond
Lawn Fawn Fake Tan Cardstock
Patterned Paper and Silver Glitter cardstock from my stash
Altenew Cloud White Pigment Ink
Picket Fence Studio Paper Glaze Velvet Winter Snowfall Stencil Paste
Hero Arts Silver Embossing Powder

My first step was to create the adorable Penguin Mugs. I die-cut the pieces and assembled the mugs, adding some fun accessories like the scarves, marshmallows, and whipped cream. I chose Onyx Pearls for the eyes and gave these cuties rosy cheeks with Copic marker R00. I finished them up with a few white gel pen highlights.
With the Penguin Mugs ready to go, I got to work on the background. I wanted to use both mugs for this card design, so I chose an A6, or 4.5 x 6.25 inch, card size. I started by stenciling the Candy Cane Stripe on a Tidepool cardstock panel with white pigment ink. The stencils measure 6×6, slightly shorter than the height of the card. So I first stenciled the bottom portion of the panel before shifting the stencil up a bit, being sure to align the stripes, and then finished stenciling the top portion. Next, I die-cut a Wonky Stitched Rectangle from more Tidepool cardstock and stenciled on some snow flurries using stencil paste and one of the layers from the Layered Penguin Stencils. This layer also has the belly of the penguins, so I masked each of those with tape before stenciling and was left with just a few small snowflakes. Then I attached this panel to the center of the Candy Cane Stripe panel.
Now it was time to bring it all together. First, I attached the Penguin Mugs to the background panel, allowing the handles to overhang just a bit because the card will still fit nicely in a 5×7 envelope. Then I heat embossed a greeting with silver embossing powder on white cardstock before die-cutting it with the coordinating dies. I used foam strips to attach the greeting to my card design and finished with a few die-cut snowflakes.
Thank you so much for stopping by to check out my festive wintertime card featuring the new Penguin Mug Dies from the latest Pretty Pink Posh release!
