

Hello! I have two cards I’m sharing today featuring some fabulous layering products from the latest Altenew release and I have a giveaway offer over on Instagram for my followers! I created my first card using the new Stencil Art: Flourishing Vines layering stencils. This stencil creates beautiful, highly detailed greenery for a bold and graphic background. My second card features the new Mini Delight: Sweet Life Layering Stamp and Die set. This might be a mini set, but it’s packed full of sweet images and includes three sentiments and a word die! Check out my supply list (with affiliate links), and then we’ll take a closer look at how these fabulous cards came together.
ALTENEW SUPPLIES
Stencil Art: Flourishing Vines Layering Stencils
Mini Delight: Sweet Life Layering Stamp and Die set
Versatile Greetings Die Set
Botanical Rails 3D Embossing Folder
OTHER SUPPLIES
Stencil Art: SSS Pawsitively Saturated Ink Pads – Cabbage, Pine, Mist, Tidepool, and Lilac
Waffle Flower Crafts JJ’s Rainbow Candy Dots
Mini Delight: SSS Pawsitively Saturated Ink Pads – Cheeky, Punch, Cabernet, and Butter
SSS Green Leaf Premium Ink Pad
Hero Arts Hero Hues Forever Green, Spicy Mustard, and Caramel
Spellbinders Matte Gold Metallic Cardstock
Lawn Fawn Vanilla Malt Cardstock
Pink Cardstock from my stash
Pretty Pink Posh Metallic Gold Pearls
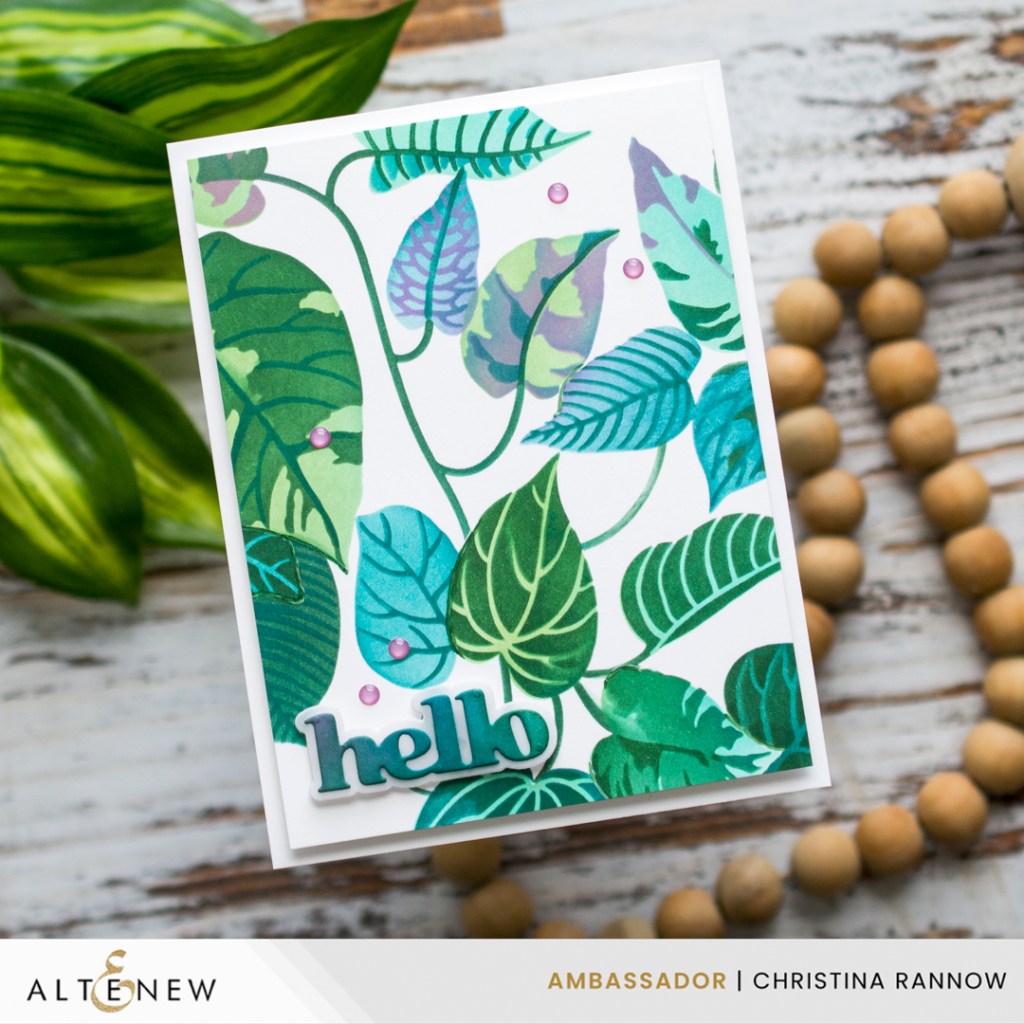
My first card is all about the layering stencils. I loved the pattern so much that I didn’t add anything other than a sentiment and a few embellishments. I used mostly traditional ink colors for the greenery but decided to toss in some blues and purples too, and I’m thrilled with how it turned out. I trimmed the panel to about 4 x 5.25 inches and used foam tape to pop up the panel on a white card base.
Next, I die-cut the sentiment from white cardstock and then used the same ink colors that I used for stenciling to create a blend of colors across the text. For the shadow piece I used vellum and then attached it to my card using thin foam strips. I finished with a few translucent purple enamel dots for embellishment.
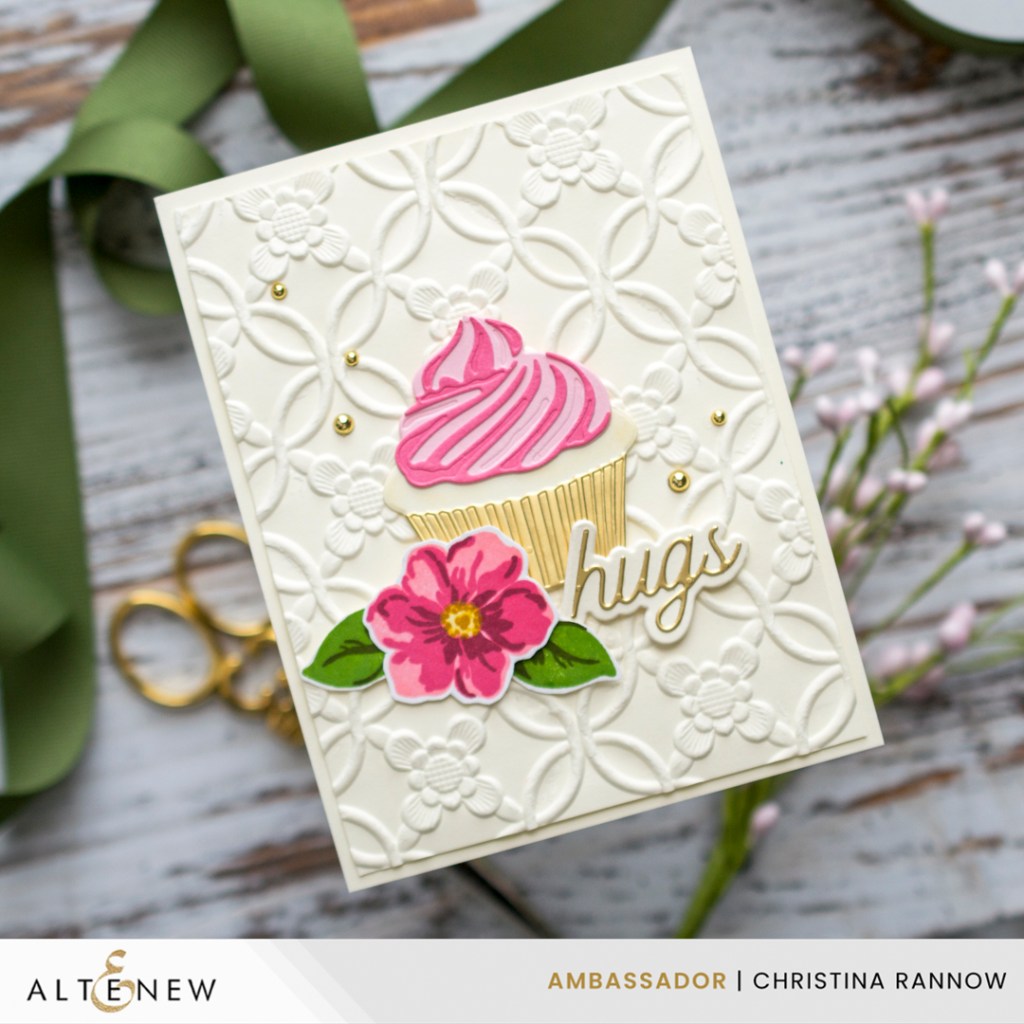
My second card combines stamping, die-cutting, and a 3D embossed background. I started by using the 3D embossing folder to emboss ivory cardstock trimmed to slightly smaller than 4.25 x 5.5 inches. I attached the embossed panel directly to an A2 ivory cardstock panel with glue.
Next I die-cut and assembled the layered cupcake and the sentiment and added it to my 3D embossed background. Then I stamped the layering flower and two leaves using the ink colors listed above. There aren’t coordinating dies for these images, so I fussy-cut before adding them to my card. The finishing touch was to add a few shiny gold pearls.
Thank you so much for checking out my latest cards featuring some fabulous new layering products from Altenew. Happy crafting!
