
Winter greetings, friends! I’m so happy you stopped by! Today I’m sharing a card featuring one of my all-time favorite dies from Pretty Pink Posh, the Mitten Shaker. I’ve used this die set almost every year since its release because it’s just so adorable. This year I chose not to include a shaker element and kept things pretty simple. I used cute gingham-patterned paper for the mitten and combined it with some newer products like the Argyle Pierced Plate and the Winter Greetings Shadow Dies. Take a peek at my full supply list (with affiliate links), and then we’ll get started!
PRETTY PINK POSH SUPPLIES
Mitten Shaker Dies
Argyle Pierced Plate
Winter Greetings Shadow Dies
Valentine Bucket Additions Dies – large heart
Build a Heart Dies – small hearts
Christmas Holder Addition Dies – snowflake
Holiday Wreath Builder – greenery
Fancy Cake Dies – frame
OTHER SUPPLIES
Doodlebug Design 6×6 Paper Pad Gingham- Linen Rainbow Petite Prints
Concord & 9th Wheat and Clover Cardstock
Birch Press Design Cherry Red Cardstock
Hero Arts Unicorn White Pigment Ink
Simon Says Stamp White Splatter Medium
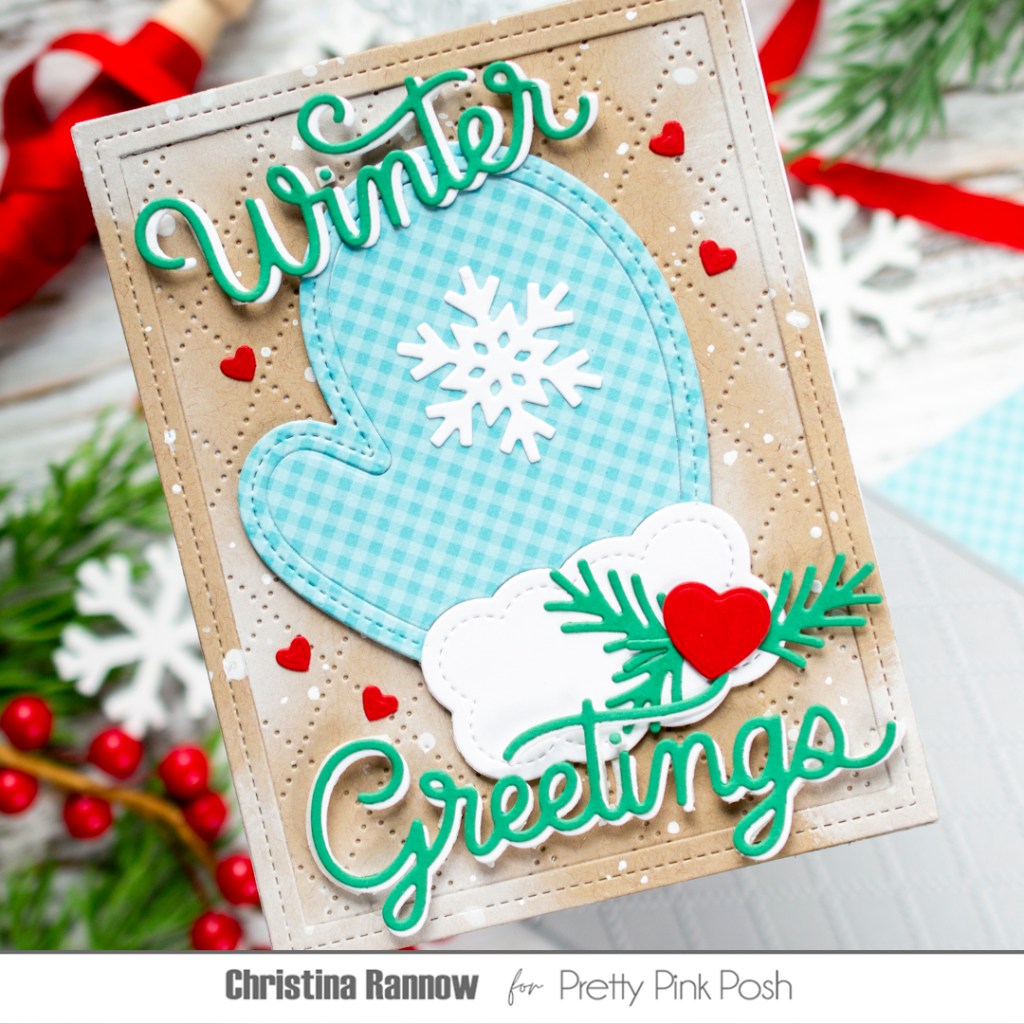
My first step was to create the background panel. I started by die-cutting the Argyle Pierced Plate and the frame from wheat cardstock. They both needed some frosty and snowy embellishment, so I softly blended in areas of white pigment ink here and there before spattering everything with white spatter medium. I attached the frame to the pierced panel and moved on to die-cutting the other elements for my card design.
I die-cut the pieces for the mitten a couple of times so I could stack them for more stability since the patterned paper is a lighter weight than most cardstock. Then I assembled the mitten and added a beautiful snowflake before attaching it to my background panel. I added more wintery embellishment to the mitten with some greenery and the perfect little red heart.
Next I die-cut the greeting once from white cardstock and once from green cardstock. I layered these together slightly offset and added the scripty text to my card front using thin foam strips. Attaching the greeting this way was a little challenging but worth it in my opinion. Another option would be to layer more cardstock diecuts or even a piece or two of foam diecuts under the areas that the text overhangs the mitten. And lastly, the finishing touch was a scattering of dainty red hearts.

Thanks again for stopping by to check out my wintery card design featuring one of my all-time favorite die sets, the Mitten Shaker, from Pretty Pink Posh. Happy crafting, and see you again soon!

