Hello friends! Today is Day 2 of the Pretty Pink Posh Instagram Hop showcasing the new collection of lovely Valentine’s Day and lucky St. Patrick’s Day products! This is an amazing release, and if you hop with us, be sure to leave a comment at each stop for a chance to win a $30 gift certificate to the PPP shop!
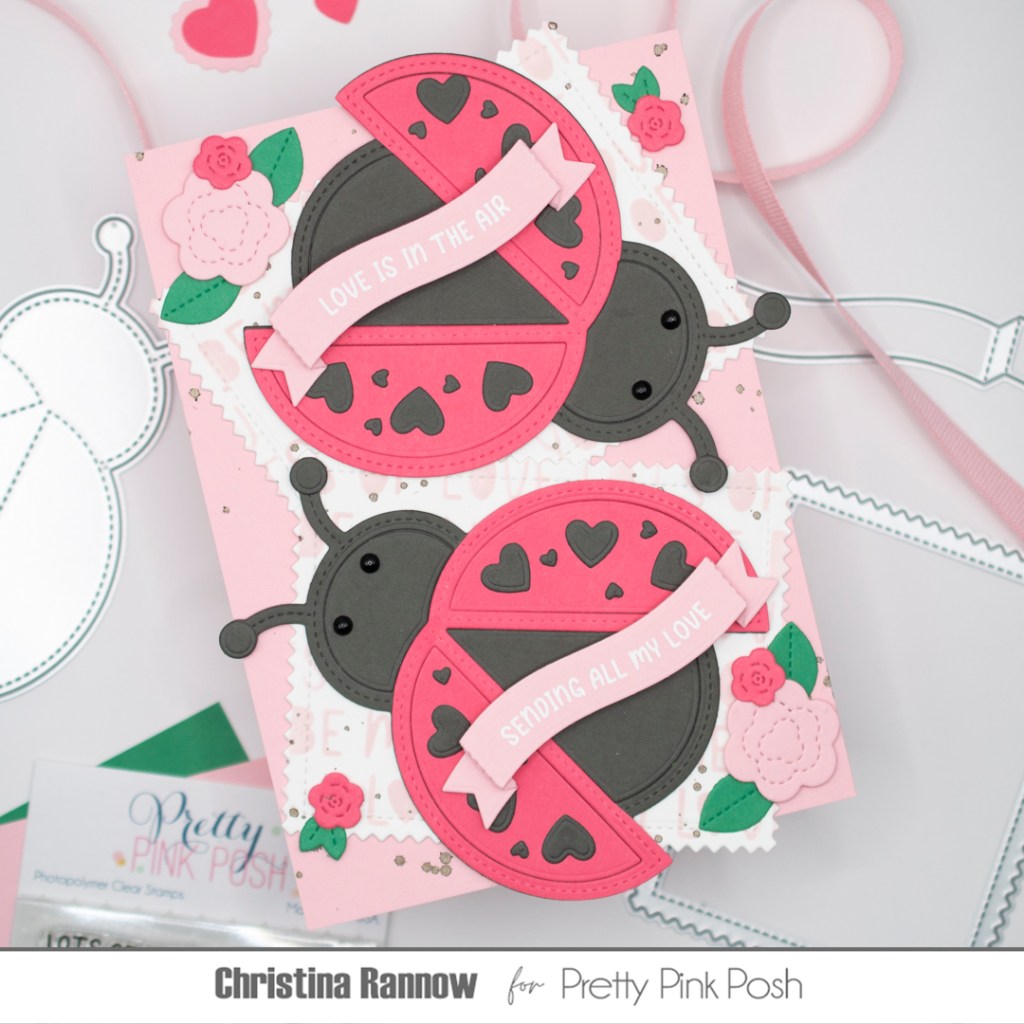
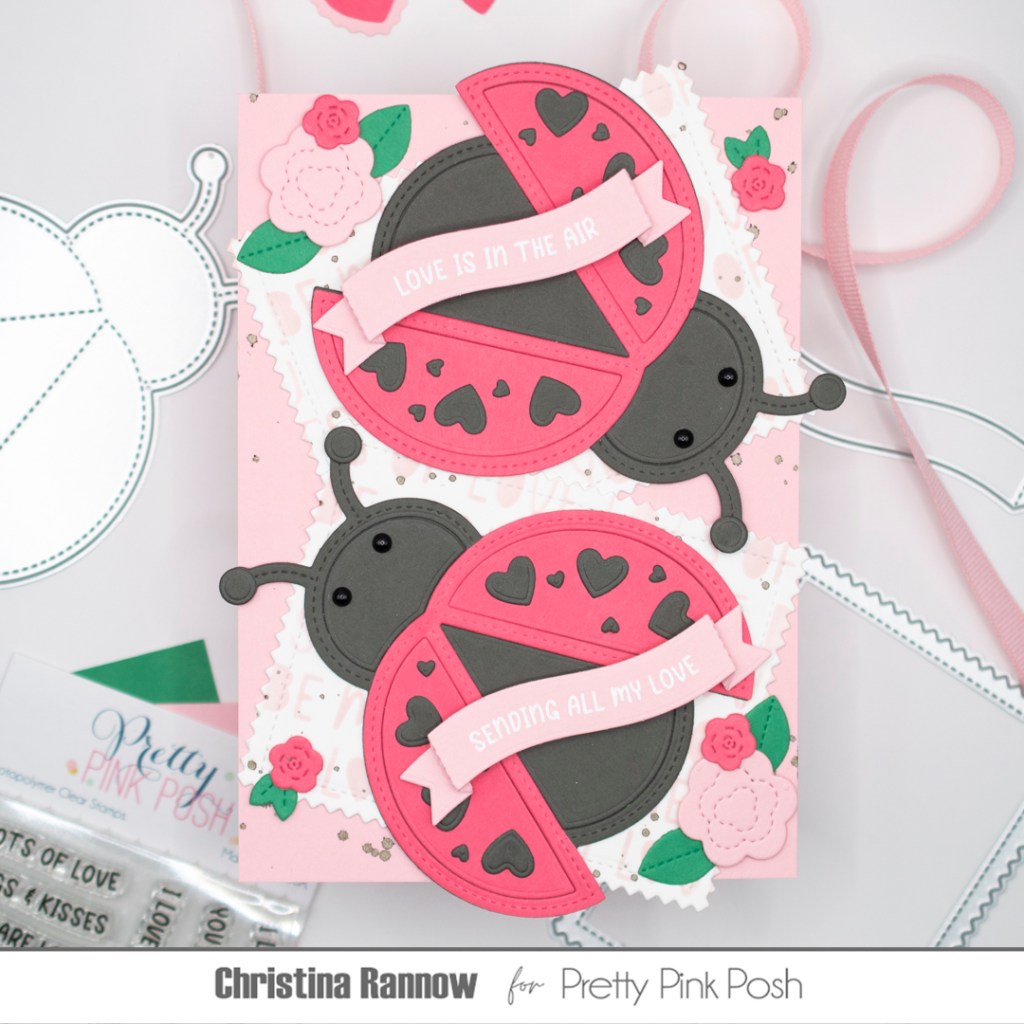
I’m sharing some Valentine’s Day inspiration for the hop with the new Ladybug Shaker dies. You can make shakers with these cuties or use them as regular diecuts like I did here. I wanted to fit two of these lovebugs on my card, so I opted for an A6 card size and gave each of them their own Pinking Rectangle stenciled with sweet Love Words and surrounded them with pretty pink blooms. Take a peek at my supplies (with affiliate links), and then we’ll get started!
PRETTY PINK POSH SUPPLIES
Ladybug Shaker Dies
Pinking Rectangles Dies
Banner Greetings Dies 2
Valentine Banner Greetings Stamp Set
Box of Chocolates Dies – tiny hearts
Valentine Holder Additions Dies – large rose and leaves
Big Valentine Cupcake Dies – small rose
Love Words Stencil
Onyx Pearls
OTHER SUPPLIES
Simon Say Stamp Cardstock Cotton Candy
Simon Says Stamp Pawsitively Saturated Ink Ballerina
Concord & 9th Cardstock Honeysuckle, Clover, and Mushroom
Distress Mica Stain Fallen Acorn
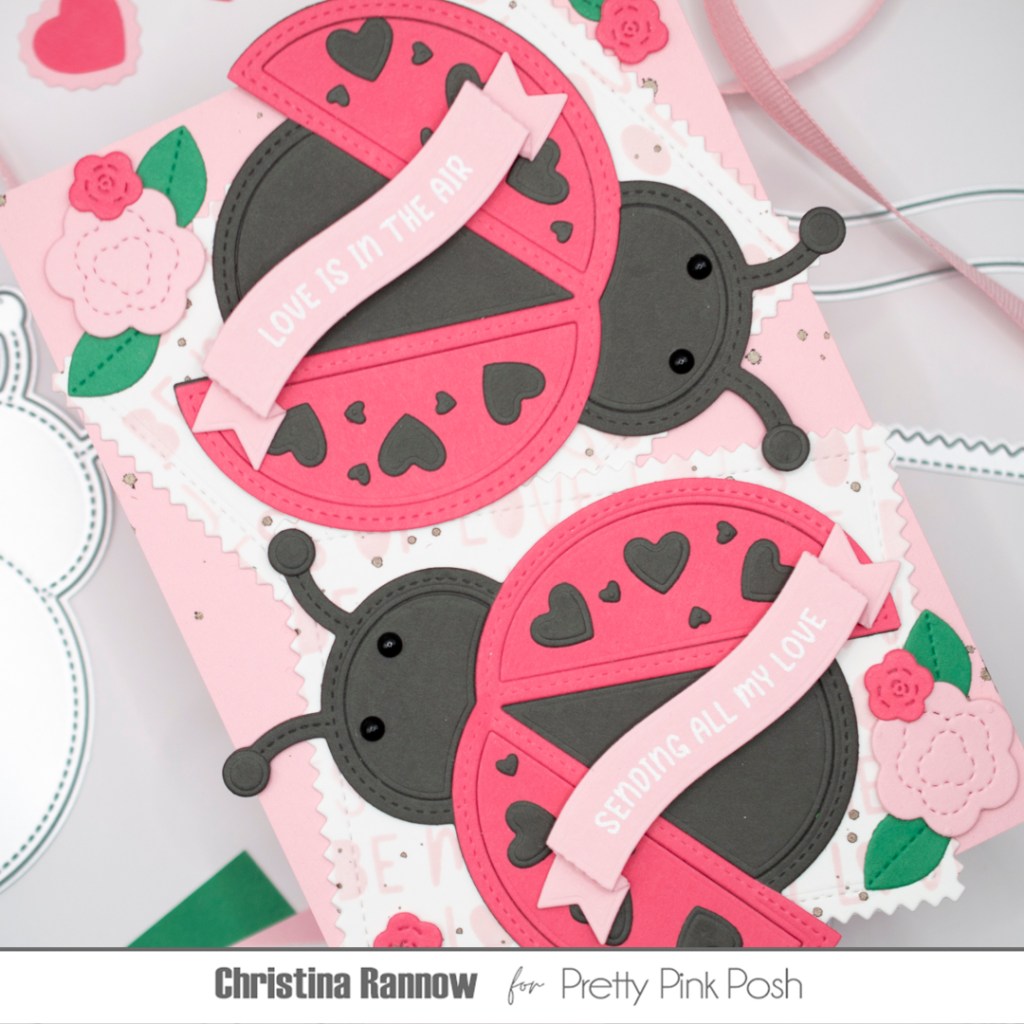
My first step was to die-cut all the elements for the Ladybugs from colored cardstock. Then I assembled the pieces and added some extra details to the ladybugs: some tiny hearts to the wings in addition to the hearts included in the die set and Onyx Pearls for the eyes. I set these aside while I worked on the background elements.
I started with an A6 pink cardstock panel, measuring 4.5 x 6.25 inches, to be the base panel. By the way, this card will fit nicely in a 5×7 envelope if you don’t keep A6 envelopes on hand! Next I stenciled the Love Words on a large white cardstock panel with light pink ink and then die-cut two of the second-largest Pinking Rectangles from the panel. I layered these at a slight angle on the pink base panel and then spattered the entire thing with sparkly Fallen Acorn Mica Stain.
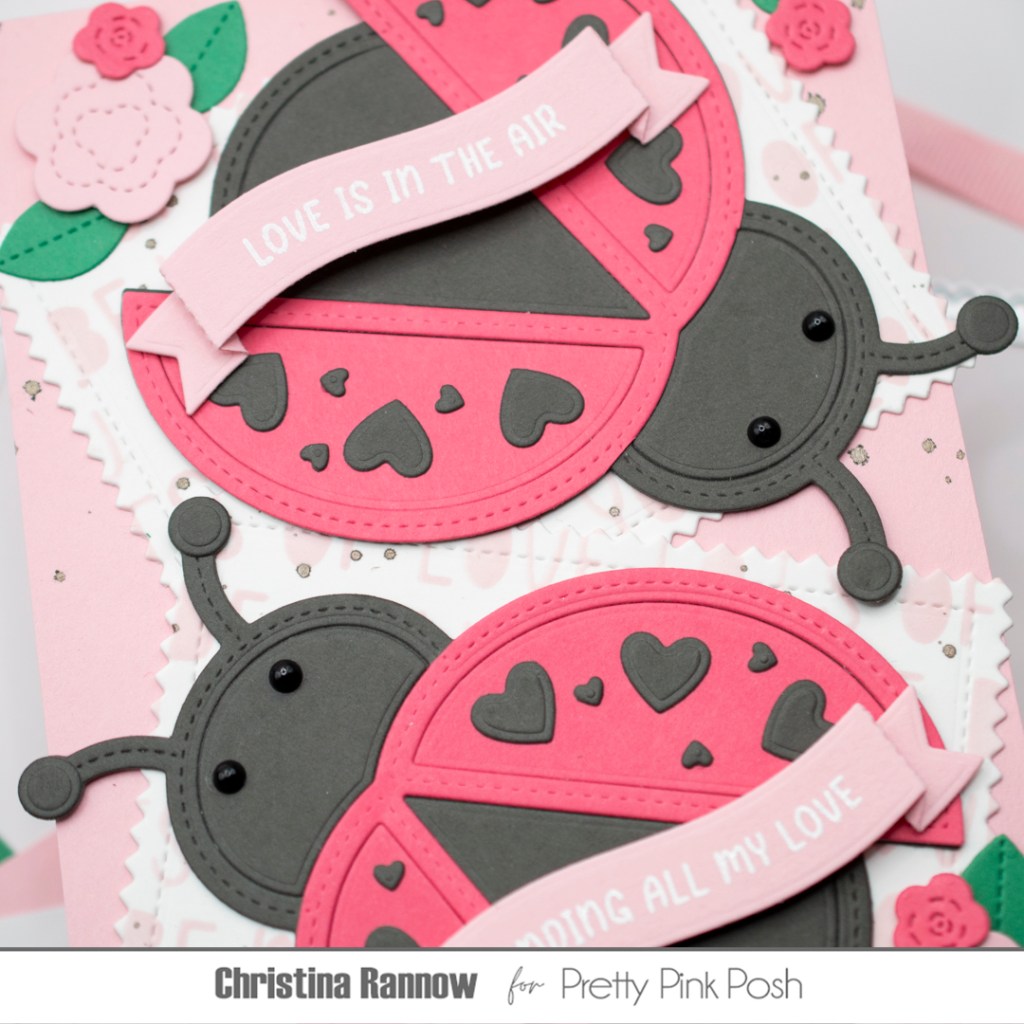
To finish things up, I added the assembled ladybugs to the pinking rectangles and then popped in some pretty die-cut roses to some of the open areas of the design. My last step was to add two banners with Valentine Greetings heat-embossed with white embossing powder across them.
Thank you so much for stopping by to see my Valentine’s Day inspiration for the Pretty Pink Posh Instagram Hop showcasing products from the new collection. Happy hopping!