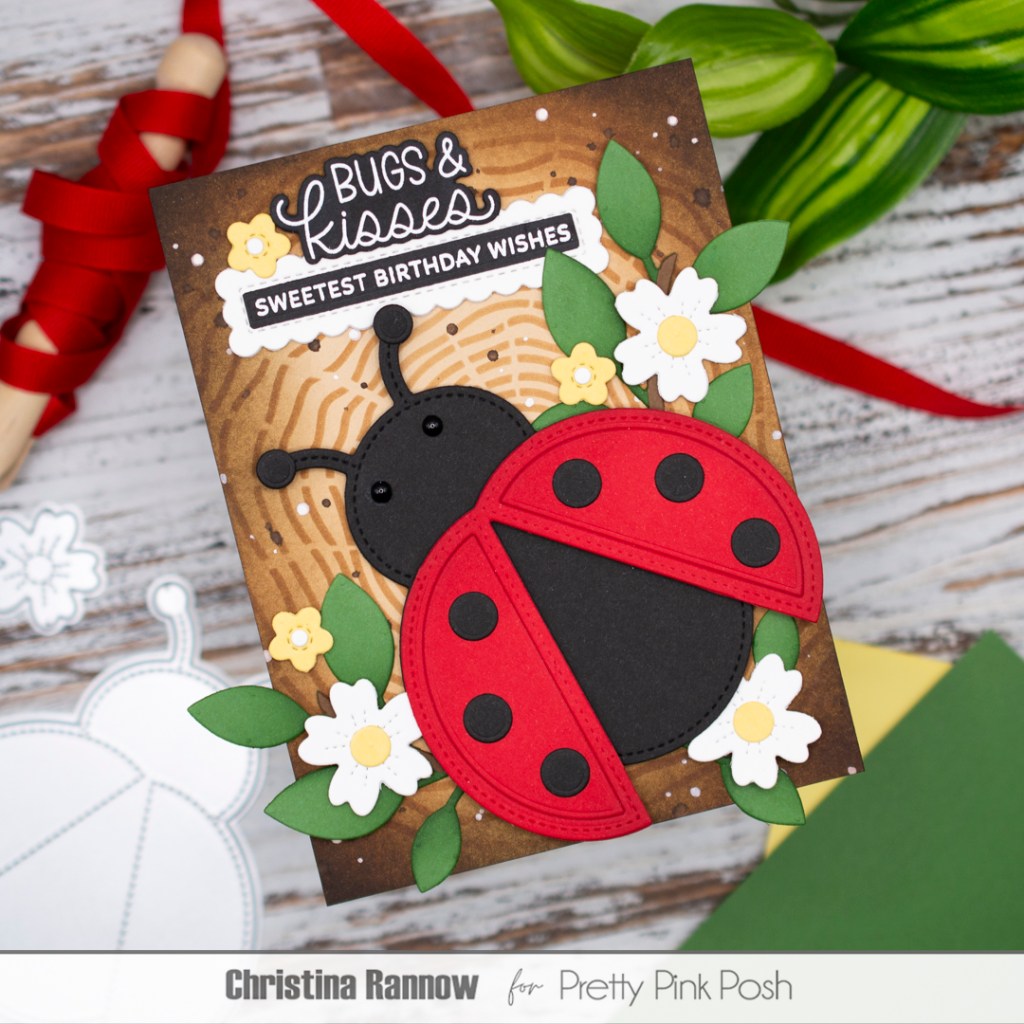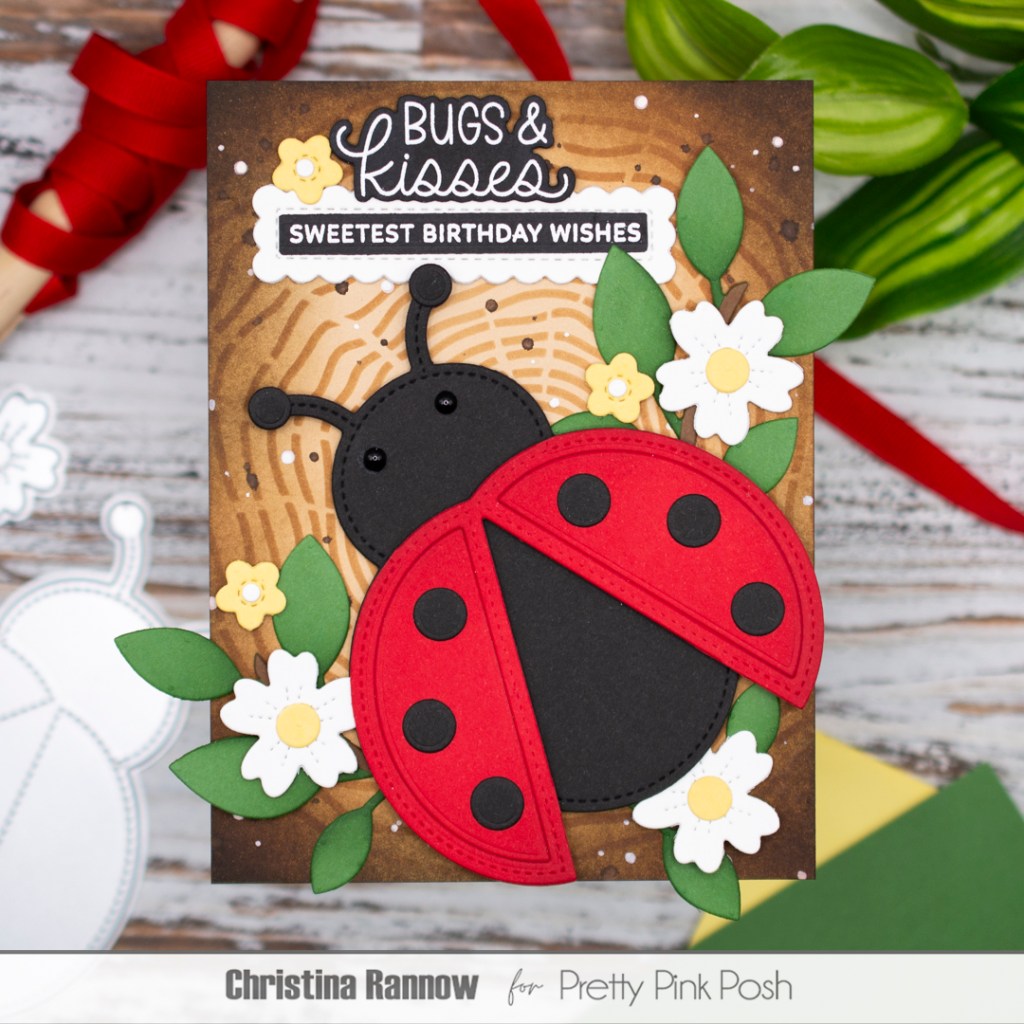
Hi friends! Today I’m sharing more ladybug inspiration featuring the Ladybug Shaker dies from the latest Pretty Pink Posh release. I wanted to share some inspiration that wasn’t Valentine-themed to show how versatile these cuties can be, and this lady looks right at home in this woodland-inspired birthday card. I shopped my stash and pulled out the Woodgrain Circle stencil, which was released a few years ago, for the background. And to round out this design, I added lots of leafy florals and finished with my favorite sentiment from this release – Bugs and Kisses! – Bugs and Kisses! Take a quick peek at the supplies I used (with affiliate links), and then we’ll get started!
PRETTY PINK POSH SUPPLIES
Ladybug Shaker Dies
Lovely Ladybugs Stamp Set – greeting
Lovely Ladybugs Coordinating Dies
Woodgrain Stencil
Fall Foliage Dies – greenery
Floral Wreath Builder – flowers
Sentiment Strip Dies
Sentiment Strips: Birthday Stamp Set
Onyx Pearls
OTHER SUPPLIES
Concord & 9th Cardstock Sand
Birch Press Design Cardstock Cherry
Lawn Fawn Cardstock Noble Fir, Chocolate Bar, and Black Licorice
Distress Inks Tea Dye, Gathered Twigs, Ground Espresso, Scorched Timber, and Rustic Wilderness
SSS Pawsitively Saturated Ink Sangria
SSS Pawsitively Perfect White Splatter Medium
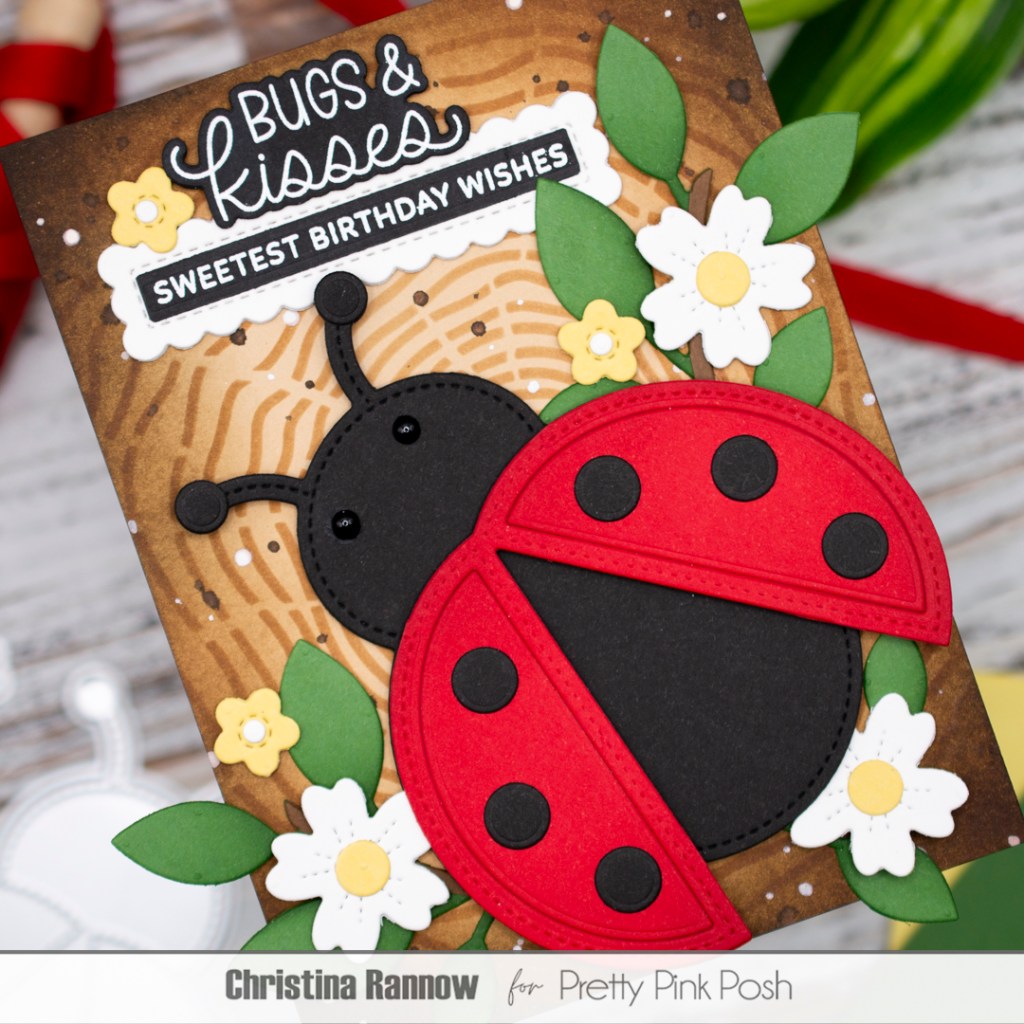
My first step was to create the woodgrain background. I started with a Sand cardstock panel and stenciled on the woodgrain pattern using Tea Dye and Gathered Twigs inks. Then I used Gathered Twigs, Ground Espresso, and Scorched Timber inks to darken the edges of the panel. Finally, I spattered the panel with Scorched Timber ink and Perfect White Splatter Medium.
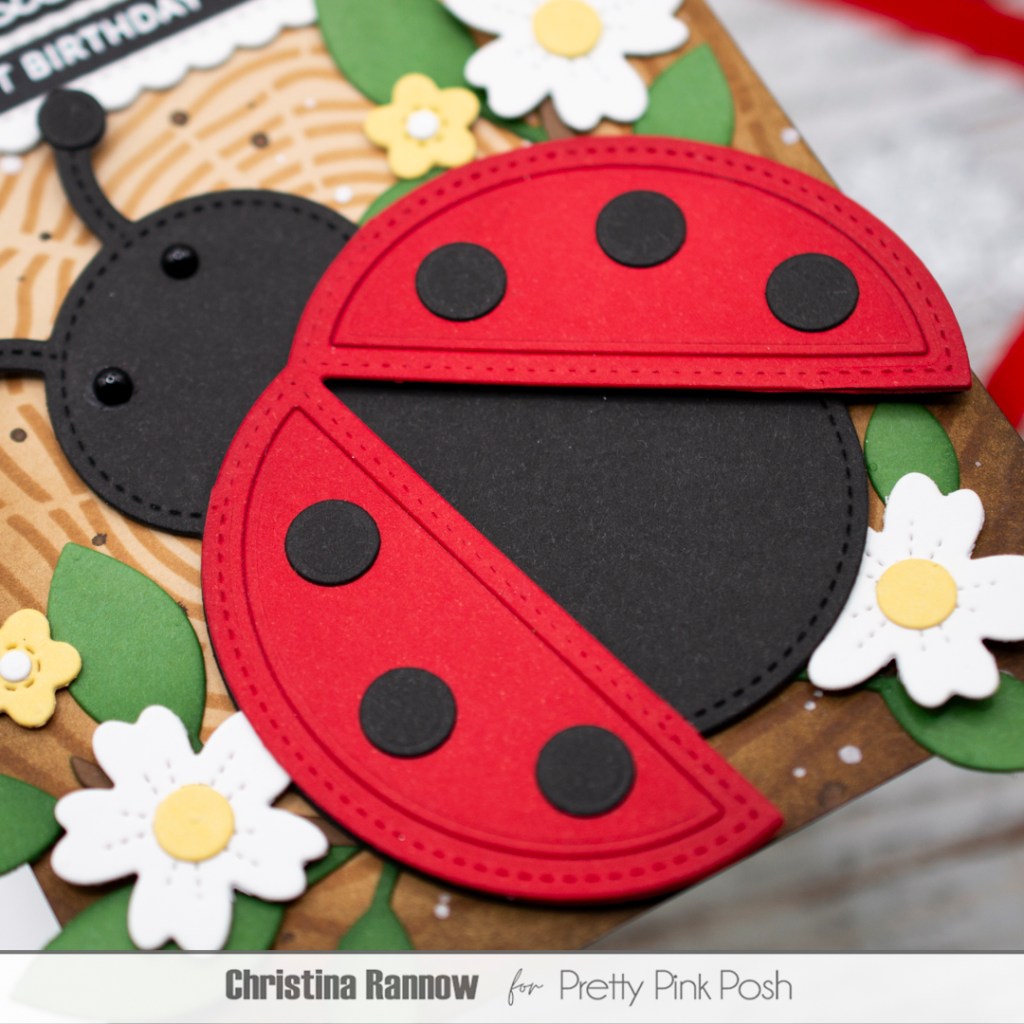
My next step was to die-cut the elements for my card design. The cardstocks I used are listed in the supplies above. After die-cutting the pieces, I added light shading to the ladybug, the greenery, and the twigs using coordinating ink colors. Then I assembled the diecuts and arranged them on the stenciled background. I used foam squares for the ladybug and some of the flowers; otherwise I used liquid adhesive.
My final step was to add the greeting and sentiment. I heat embossed both on black cardstock with white embossing powder and then die-cut the greeting with the coordinating die and the sentiment with a sentiment strip. I doubled up the sentiment with a decorative scallop-edged sentiment strip and then attached both to my card design.
Thank you so much for checking out my woodland-inspired birthday card featuring the new Ladybug Shaker Dies from Pretty Pink Posh. Happy crafting!