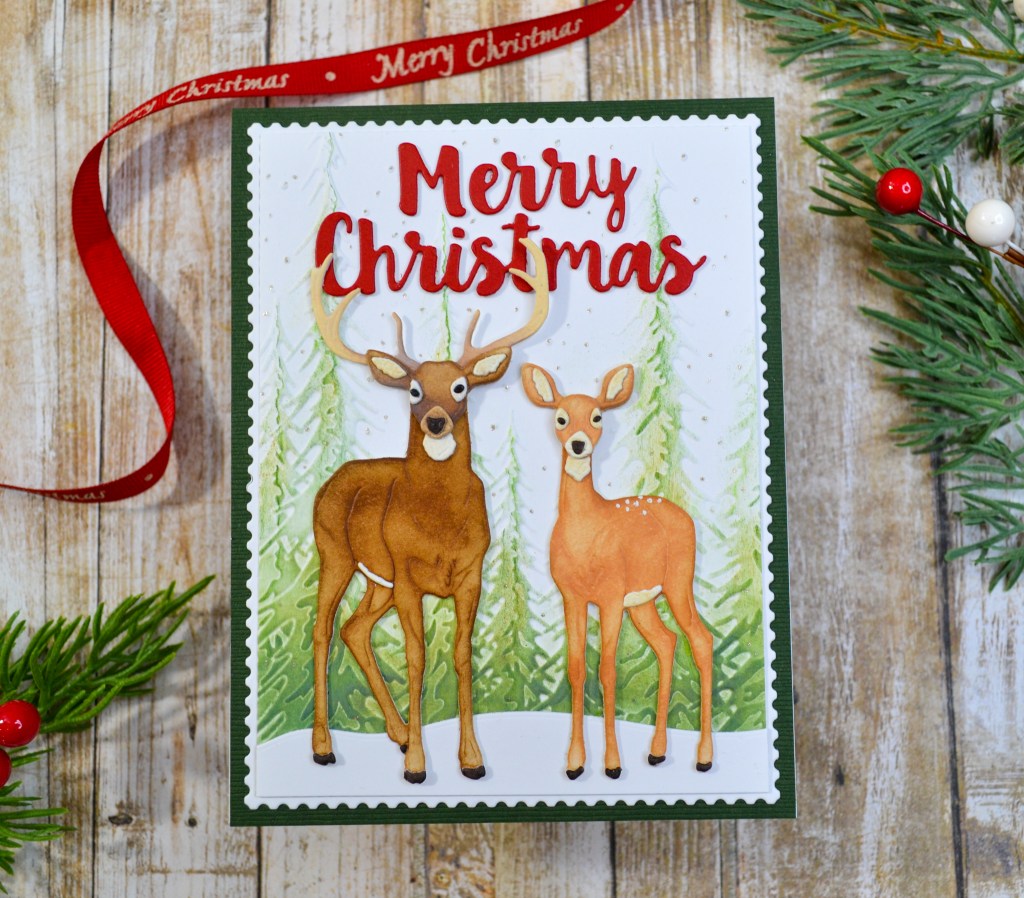
Often, I don’t have a clear plan in place when designing my cards. I usually just sit down with whatever products or mediums I want to use and let the creative process happen organically. But, once in a while, I’ll have a very specific design plan for a card, and this is one of those cards. It turned out exactly as I had imagined, maybe even better than I had imagined. I love when that happens. I paired the Honey Bee Stamps Lovely Layers: Deer with an embossing folder from the Simon Says Stamp Season of Wonder release, using Distress Inks to color both.
I’m a big fan of the Lovely Layers Honey Cuts dies because they always have multiple, layering dies with intricate embossing details. They give you very realistic, dimensional images like these deer. And, not wanting to distract from these layered beauties, I kept the background simple with an embossing folder. The embossing folder provides some dimensional interest, which I highlighted by lightly inking with Distress Inks. A traditional sentiment in red and a green border finish one of my favorite cards this season. All the steps and supplies are listed below. Thanks for visiting!

STEPS
1.) I started with die cutting all the elements for both deer out of white cardstock. There are a lot of dies for this one and some of them are super tiny, so be sure to have a magnetic sheet ready. After die cutting, I used Distress Inks to color all my pieces. I used two shades for the main bodies and head pieces to provide some shading. The face details and underbellies are single colors.
2.) With the help of the Layering Guide that is included with these dies, I assembled the deer. I did double up and stack the bodies of the deer to give them some more dimension when they are attached.
3.) Next, I created the background. Using the embossing folder, I embossed the forest background on white cardstock. I used a flat foam pad to gently graze Distress Inks over the top of the cardstock, catching just the raised, embossed areas. I masked off the sky as best as I could so I wouldn’t catch the embossed falling snow too. This technique doesn’t provide perfect results, but that’s kinda the look I was after. And, I used a sand eraser wherever it was over-inked too much. I then went in with colored pencils (two colors I think) and used the broad side of the tip to lightly apply color to the raised, embossed areas to deepen some of the color and get a more precise application.
4.) I added a snow line for the ground with white cardstock and liquid adhesive at the very bottom of the embossed panel. This meant that I needed to trim some from the top of the panel, which I did and some from the sides to create a 4 x 5 1/4 panel. Then, with a stardust glitter pen, I added some sparkle to the embossed falling snow.
5.) I wanted to mount the panel on a postage stamp frame but I don’t have one big enough for the 4 x 5 1/4 panel. I do have the Waffle Flower Postage Collage Die, which is much smaller, so I extended both sides with an easy die cutting hack. I placed the top plate of my die cutting sandwich so that it only cut part of the die. Then I shifted the die, aligning it with the portion already cut so that it would match up. I’ve done this before but usually with something much smaller, like a sentiment strip. But, it still worked quite well and the panel looks great mounted on the now larger postage frame. Then, with liquid adhesive, I attached the panel to a dark green, A2 card panel.
6.) Next, I die cut the sentiment twice from red cardstock and stacked them with liquid adhesive to give them more substance and stability. With liquid adhesive, I attached the sentiment and the completed deer to the panel. Lastly, everything went on a A2 top-fold card base.
SUPPLIES
Honey Bee Stamps Lovely Layers: Deer Honey Cuts
Simon Says Stamp Embossing Folder Textured Pine Trees
Waffle Flower Postage Collage Die
Mama Elephant Creative Cuts Wavy Borders
Neenah 110# Classic Crest Cardstock Solar White
We R Makers Quickstik Precision Pickup and Placement Tool
Sizzix Curved Fine-Tip Tweezers
Spellbinders Platinum Die Cutting And Embossing Machine
Bearly Art Precision Craft Glue
Tim Holtz Tonic Craft Mini Snips
Misti Precision Stamper Tool
Waffle Flower 6.5×8.5 Grip Mat
Scotch 3M Post-It Masking Tape
Lawn Fawn Bone Folder
Simon Says Stamp Blending Brushes Small
Simon Says Stamp White A2 Top Fold 120# scored cards
Sakura Stardust Clear Glitter Pens
Ranger Mini Round Ink Blending Tool
Distress Inks
* Crushed Olive
* Rustic Wilderness
* Mowed Lawn
Prismacolor Premier Colored Pencils
* Olive Green
* Dark Green
My Favorite Things Merry Christmas Die-namics – I can’t find a link for this
Red and Green Cardstock from my stash
