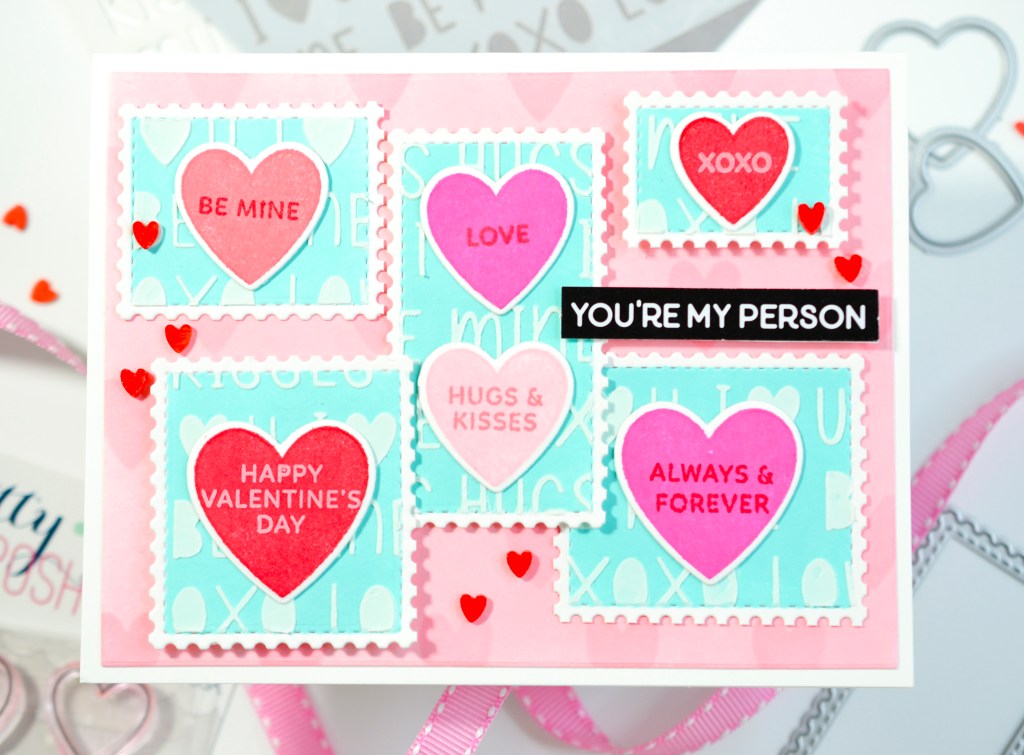
I love when companies play well together. And Pretty Pink Posh and Waffle Flower Crafts seem to design products that just go with everything! So, I decided to pair them up for this fun Valentine’s Day card.
I started with the Waffle Flower Postage Collage Die and then stenciled it with the new Pretty Pink Posh Valentine Words Stencil using white stencil paste. I love the texture stencil paste adds to a project. And speaking of stencils, I pulled out the previously released Pretty Pink Posh Layered XOXO Stencils and used just the heart layer for the soft pink background. I like the subtle tone on tone look for this background because there’s enough going on with the rest of the design, and I didn’t want it to compete with the other elements.
I added hearts from the Decorative Hearts Stamp Set stamped in pretty Valentine colors and added tiny sentiments from that same set as well as from the Sentiment Strips: Valentine Stamp Set. A quick and easy Subsentiments Love Diecut from Waffle Flower finished up my project. All the details are listed below friends! XOXO
💕PRETTY PINK POSH SUPPLIES 💕
Decorative Hearts Stamp Set
Decorative Hearts Coordinating Dies
Valentine Words Stencil
Sentiment Strips: Valentine Stamp Set
Layered XOXO Stencils
Valentine Hearts Clay Confetti

STEPS
1.) Stencil the heart layer from the Layered XOXO stencils using Spun Sugar Distress Ink on a light pink A2 card panel.
2.) Die cut the Postage Collage from white cardstock and mask the edges of each individual stamp with thin strips of low tact tape. Use Salvaged Patina Distress Ink and a blending brush to color the panel.
3.) Leaving the tape in place, use white stencil paste with the Valentine Words Stencil to stencil over the Salvaged Patina. Remove the tape and let the stencil paste completely set.
4.) Stamp a variety of hearts from the Decorative Hearts Stamp Set in pinks and reds. Then, stamp little sentiments on the hearts with white pigment ink and/or a darker color than the heart. Die cut the hearts with the coordinating dies.
5.) After the stencil paste has set, cut apart the Postage Collage into individual stamps. Arrange the stamps on the pink background panel and secure with both thin and regular foam squares.
6.) Attach the stamped hearts to the individual postage stamps with double-sided tape.
7.) Choose a sub-sentiment and attach with foam squares.
8.) For added embellishment, attach red clay hearts with liquid adhesive.
9.) Adhere everything to an A2, side-fold card base.
SUPPLIES
Waffle Flower Crafts Postage Collage Die
Neenah 110# Classic Crest Cardstock Solar White
Simon Says Stamp Cardstock 100lb Cotton Candy
We R Makers Quickstik Precision Pickup and Placement Tool
Simon Says Stamp Place and Pierce Embellishment Wand
Sizzix Curved Fine-Tip Tweezers
Spellbinders Platinum Die Cutting And Embossing Machine
Misti Precision Stamper Tool
Waffle Flower 6.5×8.5 Grip Mat
Bearly Art Precision Craft Glue
Tim Holtz Tonic Craft Mini Snips
Lawn Fawn Bone Folder
Scotch 3M Post-It Masking Tape
Simon Says Stamp Blending Brushes Large
Hero Arts Palette Knife
Scrapbook Adhesives Thin Foam Squares
Scrapbook Adhesives Foam Squares
Simon Says Stamp White A2 Side Fold Scored Cards 120#
Hero Arts Hero Paste
Tim Holtz Distress Ink Pad Worn Lipstick
Tim Holtz Distress Ink Pad Spun Sugar
Tim Holtz Distress Ink Pad Salvaged Patina
Tim Holtz Distress Ink Pad Lumberjack Plaid
Tim Holtz Distress Ink Pad Picked Raspberry
Lawn Fawn Yeti Ink Pad

I, too, use a mix of brands. This is a beautiful project! TFS –
Lori S in PA
LikeLike