
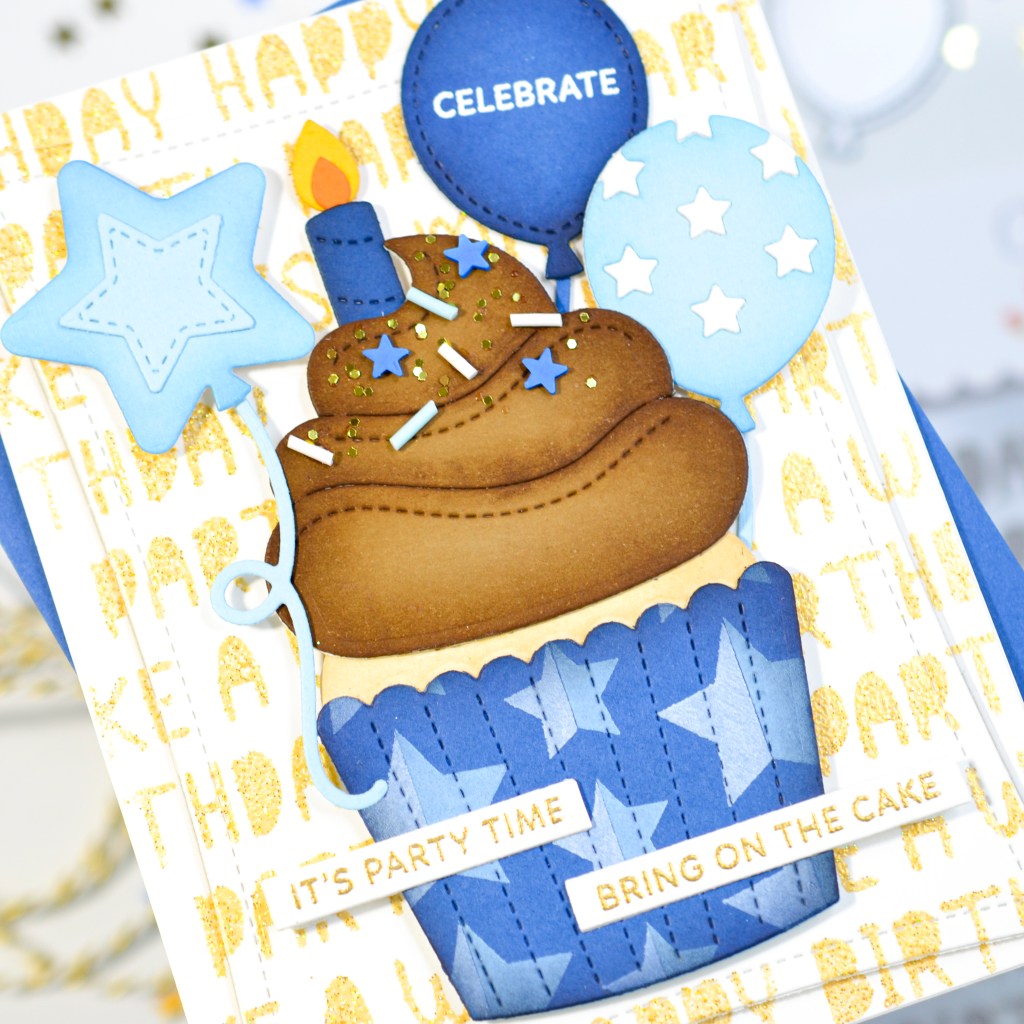
Can you believe I never seem to have enough birthday cards? Well, not the right card for the right person anyway. So, I’m sharing another birthday card today, this time using some of the newer Pretty Pink Posh goodies, including this luscious Big Valentine Cupcake that I got all dressed up for a birthday bash. I used the Half Stars Stencil for the cupcake liner and then topped my cupcake with glitter and sprinkles. And, you can’t have a birthday without balloons, so I added some of the new Party Balloons and put everything on a raised, stenciled Birthday Words background that I heat embossed with a fun sparkly gold. The Sentiment Strips: Birthday Stamp Set has so many, seriuosly, sooo many good sentiments that it was hard to choose just one. So I chose three. They’re small enough that you can tuck them in anywhere without taking away from the star of this show – that Big Valentine (birthday) Cupcake.
PRETTY PINK POSH SUPPLIES 💕
Big Valentine Cupcake
Party Balloons
Birthday Candles
Birthday Words Stencil
Half Stars Stencil
Sentiment Strips: Birthday Stamp Set
Wonky Stitched Rectangle Dies
Sentiment Strips Dies
Patriotic Stars Confetti
XOXO Clay Confetti Mix
More details are listed below, including additional supplies used. As always, thanks for visiting my post today!
STEPS
1.) Create the background.
▪️ Using clear embossing ink and a dauber, stencil the Birthday Words on an A2 white card panel.
▪️ Sprinkle sparkling gold embossing powder onto panel and heat set.
▪️ Die cut the panel with the largest Wonky Stitched Rectangle die.
▪️ Glue the negative piece from die cutting the rectangle to an A2 side-fold card base.
▪️ Attach the Wonky Stitched Rectangle to the center of the card base using foam tape.
2.) Create the cupcake.
▪️ Die cut the cupcake elements from colored cardstock.
▪️ Use the Half Stars Stencil to create a pattern on the liner using white pigment ink and Distress Oxide Inks.
▪️ Use Distress Inks to add shading and dimension to the die cuts.
▪️ Assemble the cupcake and secure with liquid adhesive.
▪️ Glue glitter and sprinkles to the top of the cupcake.
3.) Die cut the remaining elements.
▪️ Die cut the elements for the balloons and the candle from colored cardstock.
▪️ Use Distress Inks to add shading and dimension to the die cuts.
4.) Create sentiments.
▪️ Stamp and heat emboss a sentiment in white on one of the balloons.
▪️ Stamp and heat emboss additional sentiments in gold on white cardstock.
▪️ Die cut the sentiments with a sentiment strip die.
5.) Assemble the card front.
▪️ Use foam squares to attach the cupcake to the card panel.
▪️ Attach the remaining elements, tucking and trimming when necessary, with a combination of foam squares, thin foam squares and liquid adhesive to give the elements more dimension.
ADDITIONAL SUPPLIES
- Neenah 110# Classic Crest Cardstock Solar White
- Lawn Fawn Vanilla Malt Cardstock
- We R Makers Quickstik Precision Pickup and Placement Tool
- Simon Says Stamp Place and Score Embellishment Wand
- Simon Says Stamp Place and Pierce Embellishment Wand
- Sizzix Curved Fine-Tip Tweezers
- Spellbinders Platinum Die Cutting And Embossing Machine
- Misti Precision Stamper Tool
- Waffle Flower 6.5×8.5 Grip Mat
- Bearly Art Precision Craft Glue
- Tim Holtz Tonic Craft Mini Snips
- Lawn Fawn Bone Folder
- Scotch 3M Post-It Masking Tape
- Simon Says Stamp Blending Brushes Large
- Simon Says Stamp Blending Brushes Small
- Simon Says Stamp Anti Static Powder Brush Tool
- Simon Says Stamp Embossing Ink Clear
- Hero Arts White Detail Embossing Powder
- Hero Arts Gold Embossing Powder
- Wow Embossing Powder Glitter Metallic Gold
- Scrapbook Adhesives Thin Foam Squares
- Scrapbook Adhesives Foam Squares
- Scrapbook Adhesives White Crafty Foam Tape
- Simon Says Stamp White A2 Side Fold Scored Cards 120#
- Lawn Fawn Yeti Ink Pad
- Tim Holtz Distress Ink Pad Broken China
- Tim Holtz Distress Ink Pad Antique Linen
- Tim Holtz Distress Ink Pad Black Soot
- Tim Holtz Distress Ink Pad Walnut Stain
- Tim Holtz Distress Ink Pad Chipped Sapphire
- Tim Holtz Distress Ink Pad Gathered Twigs
- Tim Holtz Distress Oxide Ink Pad Tumbled Glass
