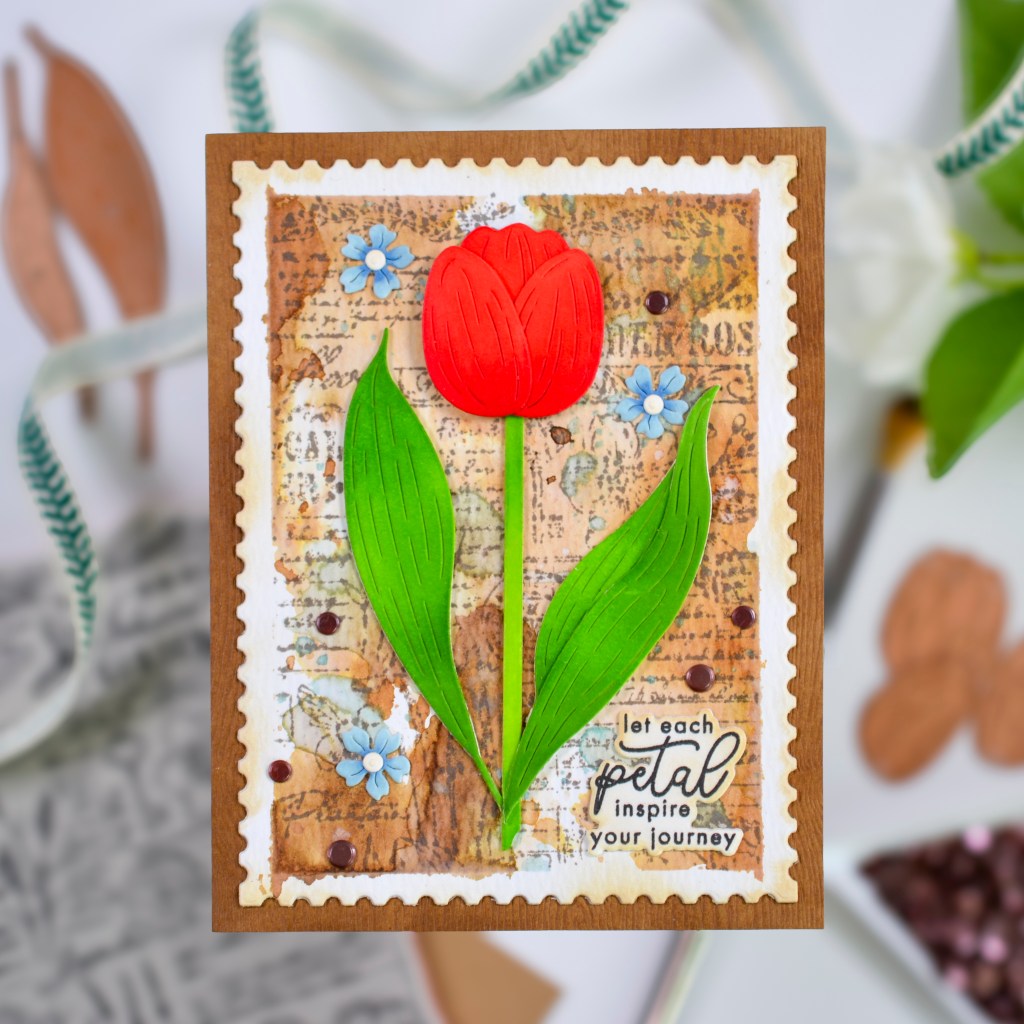
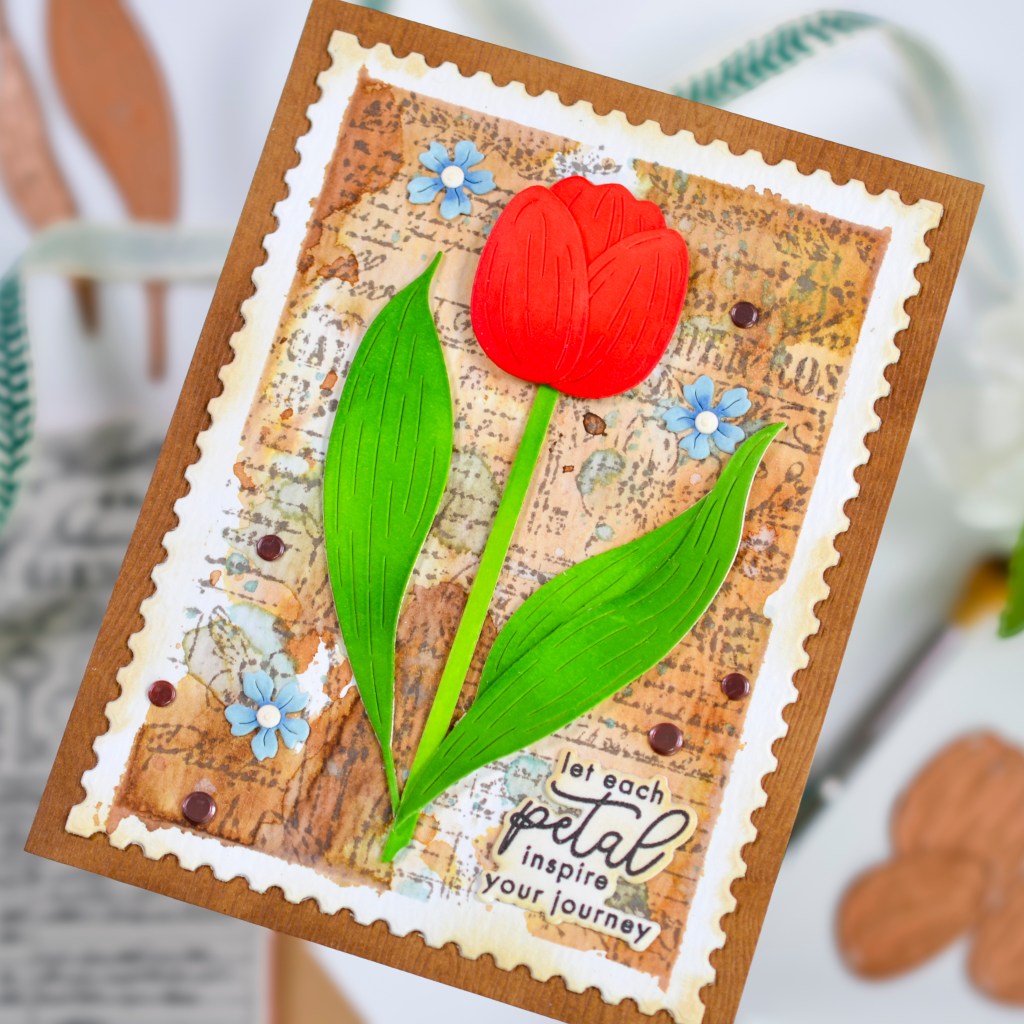
For the card I’m sharing today, I used some of my favorite companies for a mix-and-match project that, I think, came together seamlessly. The star of the show is a tulip from Spellbinders’ February 2024 Large Die of the Month Club. I used Distress Inks to color the tulip die cuts and for more of that fancy-schmancy ink smooshing on the background panel. Using brown ink and just a touch of blue gave the panel an aged, patinated look, which paired beautifully with the seriously gorgeous Vintage Flora Background Stamp from Honey Bee Stamps. I then die cut the panel using the Postage Stamp Edge Frame from Simon Says Stamp and added a sentiment from Hero Arts before securing the panel to a piece of woodgrain cardstock.
All the steps and supplies for this card are listed below. Thanks for stopping by!
STEPS
1.) Create the background panel.
▪️ Die cut a piece of Distress Watercolor Cardstock using the largest Postage Stamp Edge Frame die and mask the edges with low tack tape.
▪️ Using Walnut Stain, Gathered Twigs and Speckled Egg Distress Inks, smoosh the ink pads onto a glass work surface and spritz lightly with water. Use a paint brush to swirl the ink around a bit.
▪️ Smoosh different areas of the cardstock panel into the inky puddles, just a few times before heat setting with a heat gun. Repeat the process, allowing some areas to remain white, until the panel reaches desired results.
▪️ Using the Vintage Flora Background Stamp, stamp the panel with Pumice Stone Distress Ink.
▪️ Remove the low tack tape and use a blending brush to lightly apply Antique Linen Distress Ink to the edges in a few places to give the paper for an aged look.
2.) Create the other card elements.
▪️ Die cut all the pieces from white cardstock and use Distress Inks and blending brushes to color them. Assemble the tulip and small flowers and secure with liquid adhesive.
▪️ Stamp the sentiment in black ink on white cardstock and die cut using the coordinating die. Add a little Antique Linen Distress Ink with a blending brush and a very light hand. Die cut a blank sentiment and stack the two together, securing them with liquid adhesive.
3.) Finish the card.
▪️ Use foam squares to attach the tulip to the background panel. Use liquid adhesive to attach the stem, leaves, small flowers, and the sentiment.
▪️ Trim a piece of woodgrain cardstock to 5 1/2 x 4 1/4 and add Gathered Twigs Distress Ink to the edges with a blending brush, darkening the woodgrain. Use liquid adhesive to attach the background panel to the woodgrain cardstock.
▪️ Attach everything to an A2 side-fold card base and add embellishments.
SUPPLIES
- Spellbinders Small Die of the Month Feb 2024
- Spellbinders Large Die of the Month Feb2024
- Hero Arts My Monthly Hero March 2024
- Honey Bee Stamps Vintage Flora Background Stamp
- Simon Says Stamp Postage Stamp Edge Frames
- Tim Holtz 4.25 x 5.5 Distress Watercolor Cardstock
- Neenah 110# Classic Crest Cardstock Solar White
- Simon Says Stamp Kraft Woodgrain Cardstock 111 lb
- We R Makers Quickstik Precision Pickup and Placement Tool
- Simon Says Stamp Place and Score Embellishment Wand
- Simon Says Stamp Place and Pierce Embellishment Wand
- Sizzix Curved Fine-Tip Tweezers
- Spellbinders Platinum Die Cutting And Embossing Machine
- Misti Precision Stamper Tool
- Waffle Flower 6.5×8.5 Grip Mat
- Bearly Art Precision Craft Glue
- Tim Holtz Tonic Craft Mini Snips
- Lawn Fawn Bone Folder
- Scotch 3M Post-It Masking Tape
- Simon Says Stamp Blending Brushes Large
- Simon Says Stamp Blending Brushes Small
- Simon Says Stamp Blending Brushes Detail Round
- Waffle Flower Shader Brush 0+
- Scrapbook Adhesives Foam Squares
- Simon Says Stamp White A2 Side Fold Scored Cards 120#
- Pretty Pink Posh Espresso Confetti Mix
- Tim Holtz Distress Ink Pad Lumberjack Plaid
- Tim Holtz Distress Ink Pad Faded Jeans
- Tim Holtz Distress Ink Pad Gathered Twigs
- Tim Holtz Distress Ink Pad Antique Linen
- Tim Holtz Distress Ink Pad Speckled Egg
- Tim Holtz Distress Ink Pad Mowed Lawn
- Tim Holtz Distress Ink Pad Walnut Stain
- Tim Holtz Distress Ink Pad Lumberjack Plaid
- Tim Holtz Distress Ink Pad Pumice Stone
- Tim Holtz Distress Ink Pad Candied Apple
- Tim Holtz Distress Ink Pad Twisted Citron
- Tim Holtz Distress Ink Pad Abandoned Coral

Absolutely beautiful 😍
LikeLike
Thank you!
LikeLike