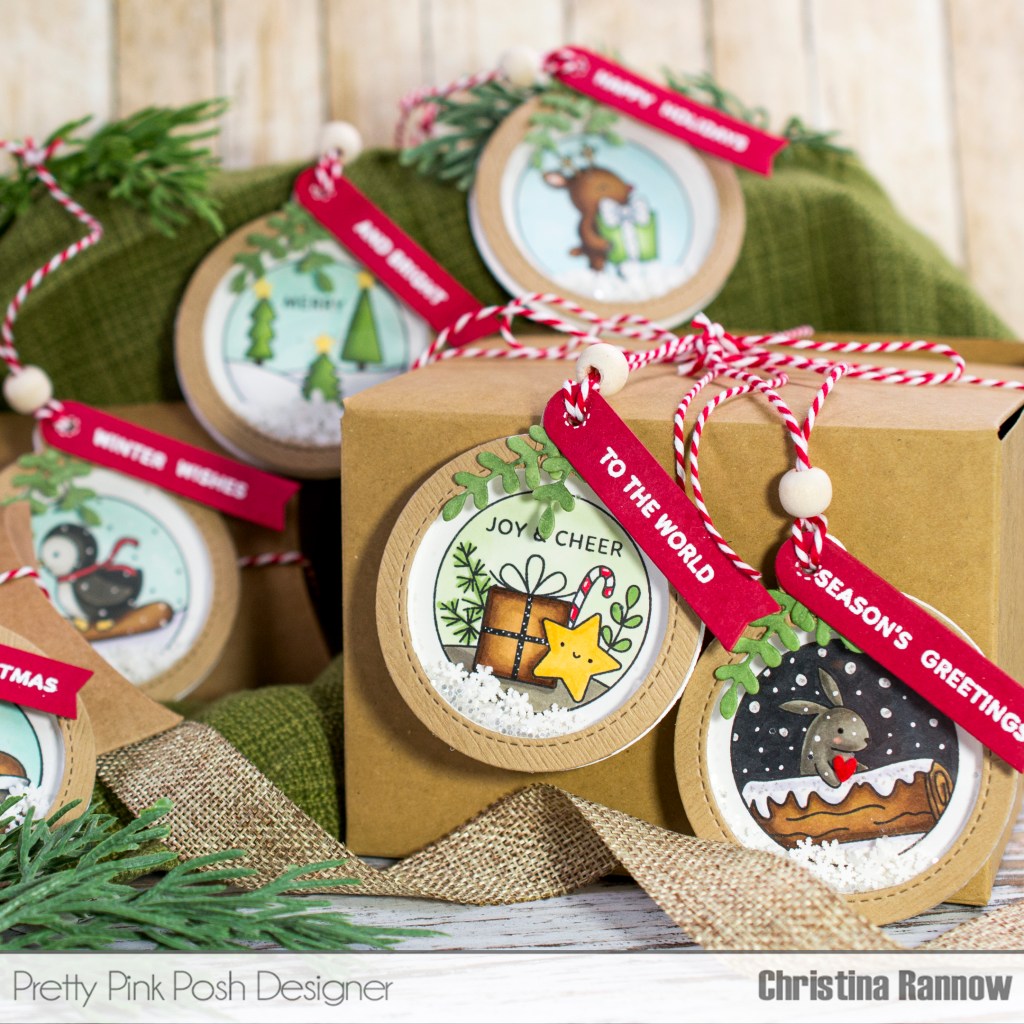
It’s the 15th annual STAMPtember celebration, and I’m thrilled to be a part of today’s exclusive collaboration with Pretty Pink Posh! This Joy & Cheer Stamp set is only available while supplies last, so be sure to get it while you can! This adorable set is so versatile; you can make quick and easy holiday cards, customize treat bags or place cards, or make gift tags like I did here for my inspiration project. Follow along below as I take you through the steps to create these festive shaker gift tags using the exclusive STAMPtember Joy & Cheer Stamp set.


Here are the main products I used to create this project :
Pretty Pink Posh STAMPtember Joy & Cheer Stamp Set
My Favorite Things Tag Builder Blueprints 6 Die-namics
Pretty Pink Posh Holiday Scripts Stamp Set
Pretty Pink Posh Valentine Hearts Clay Confetti
Pretty Pink Posh Americana Clay Confetti
Trinity Stamps Vanilla Sugar Snowflakes Sprinkles
Lawn Fawn Tiny Tags Sayings
Concord & 9th Boughs & Holly Dies
Simon Says Stamp Kraft Woodgrain Cardstock
Simon Says Stamp Clear Acetate Sheets
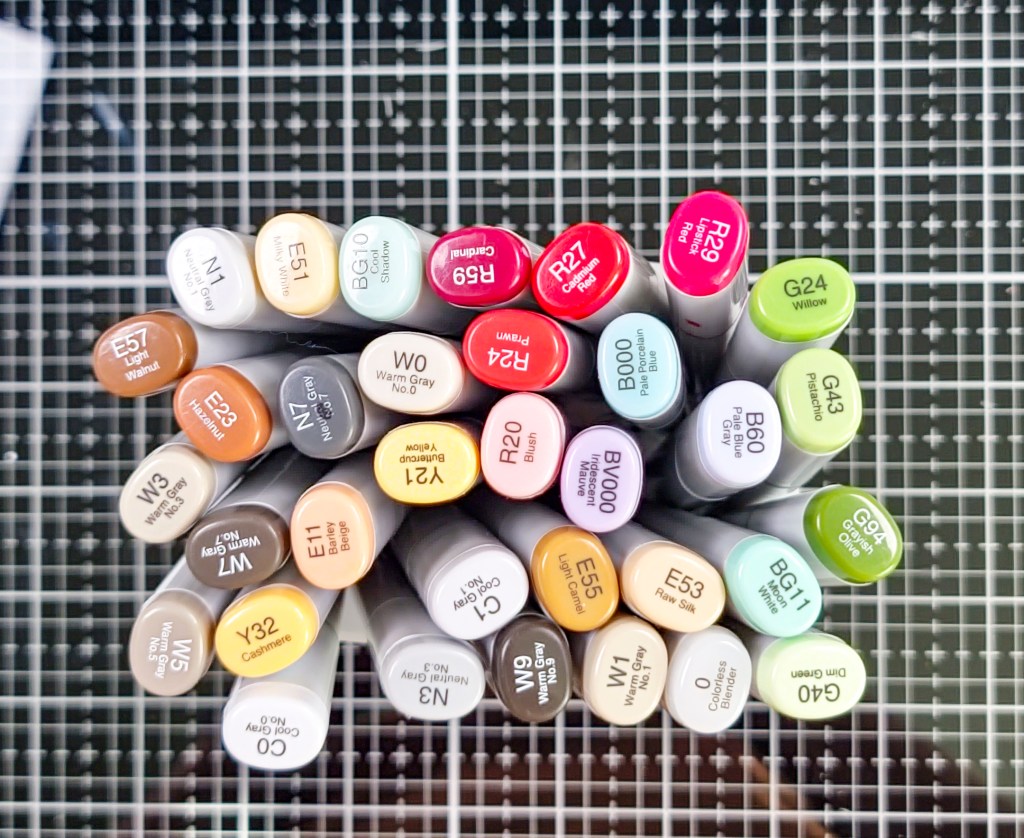
And here are the Copic colors I used for coloring and a shot of all my the supplies prepped and ready to go!
Let’s get started!
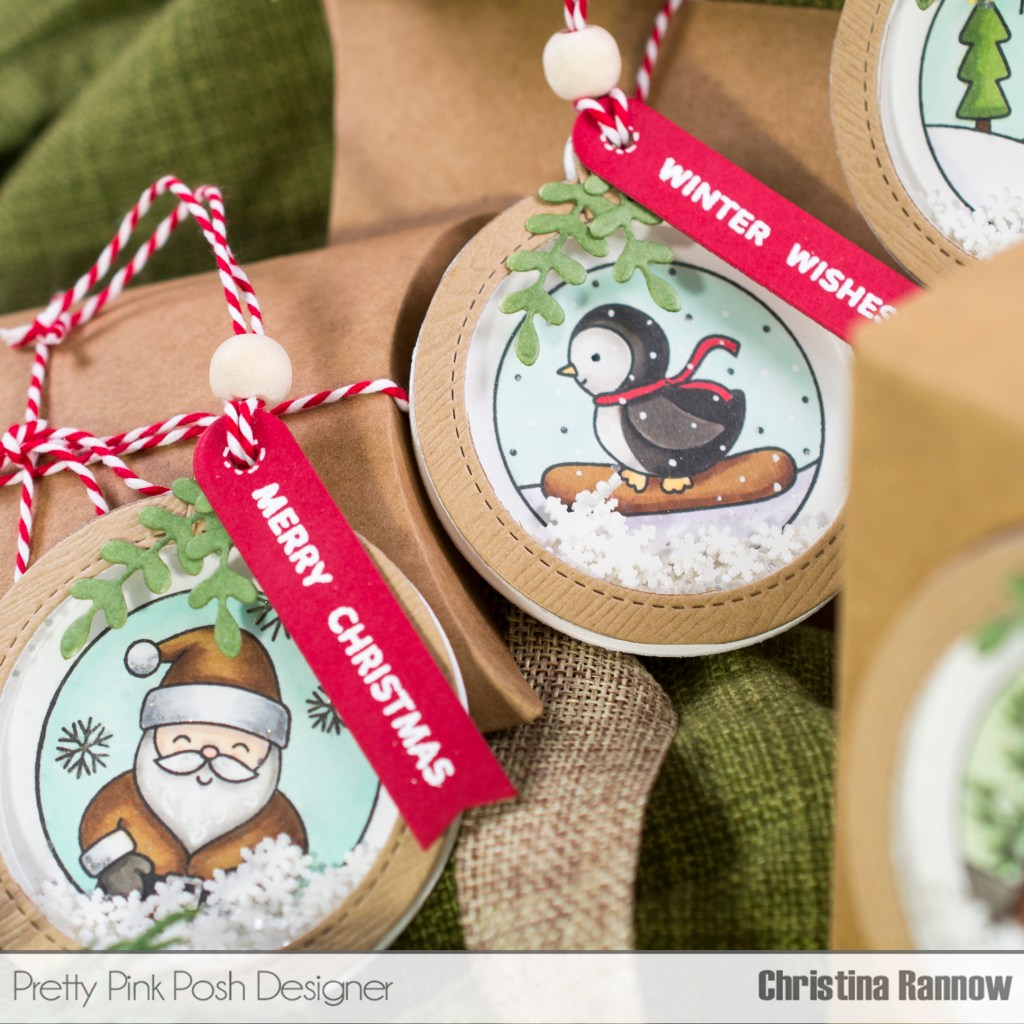
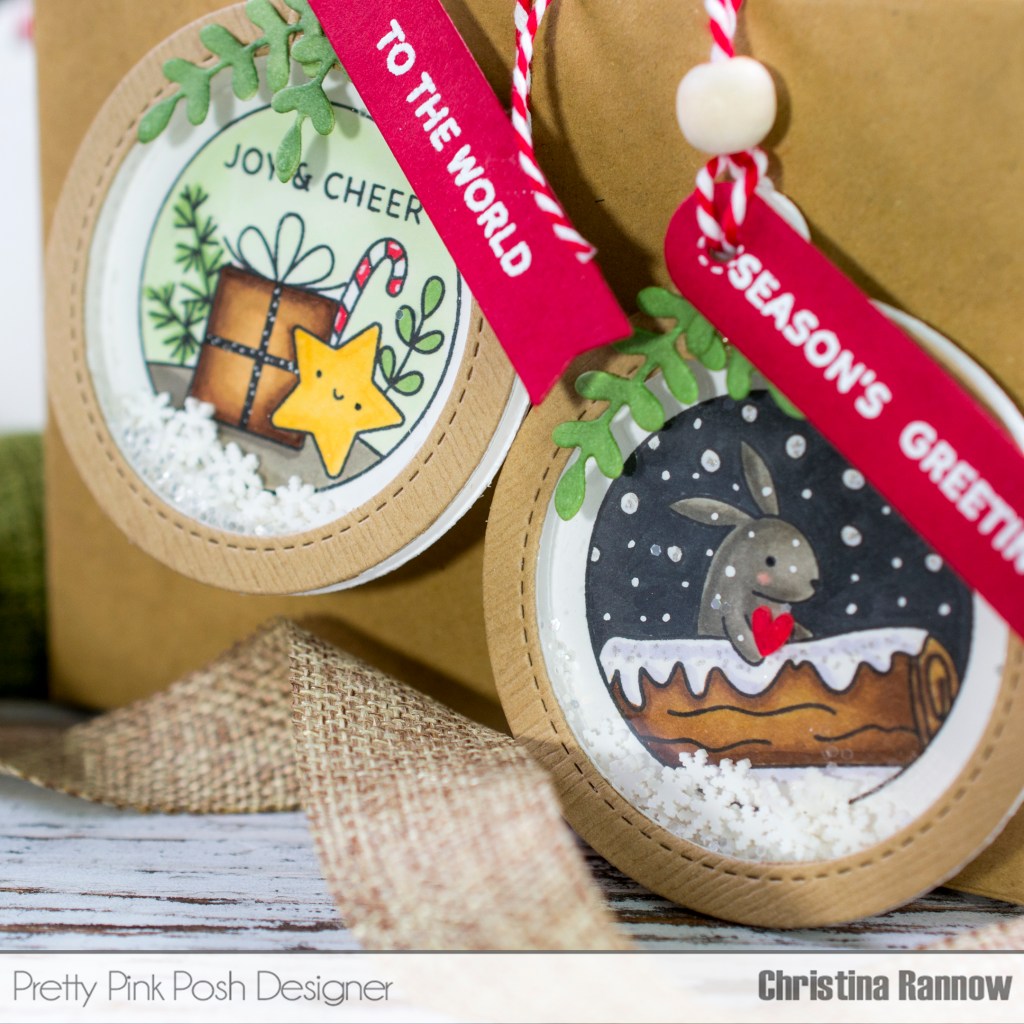
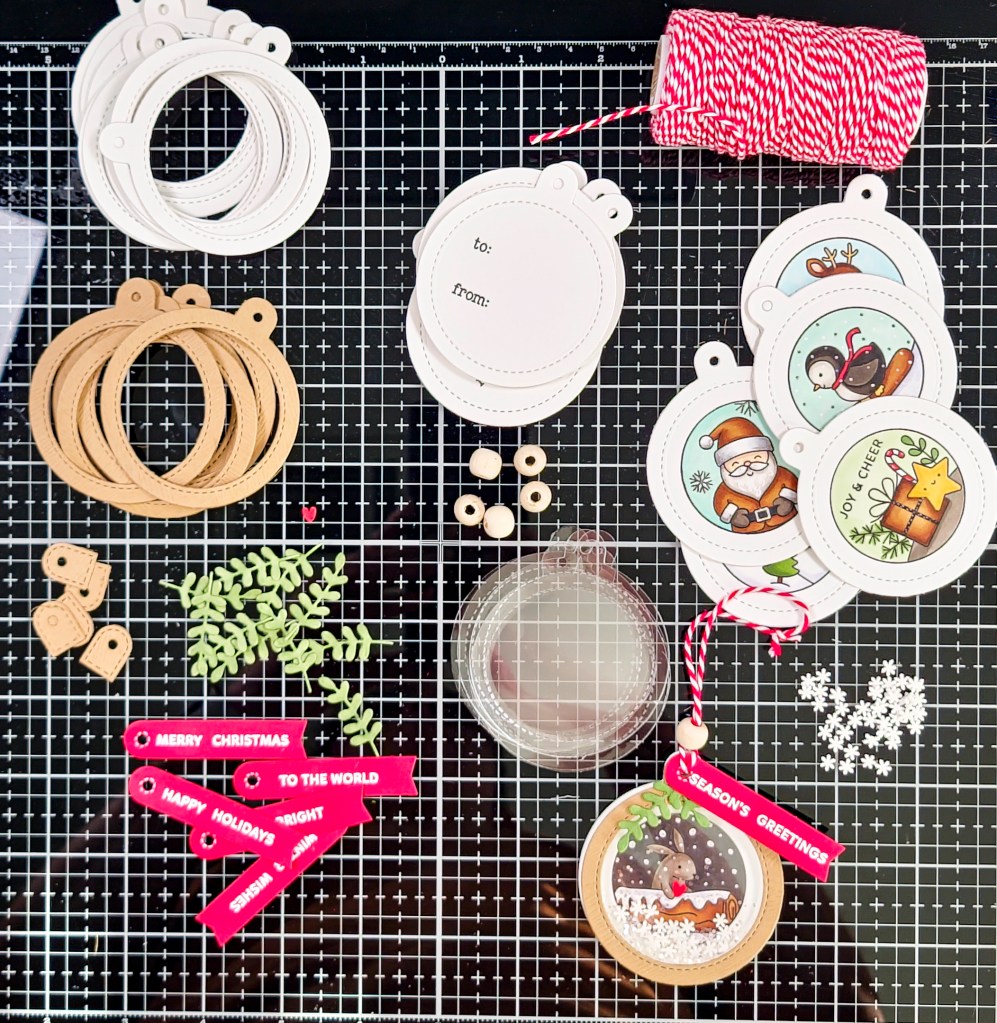
My first step was to stamp the images on white cardstock with black ink. Then I used the Copic colors above to color them. Next, I die cut the images using a die from the Tag Builder set before adding white gel pen, glitter pen, and black glaze pen details. I also added a clay heart, that I colored with R29, to the bunny image and some stars, colored with Y32, to the landscape image.
My next step was to die cut all the remaining elements before assembling anything, including:
6 backer pieces that I stamped with the Tiny Tag Sayings, To and From
6 woodgrain cardstock frames
6 acetate pieces
18 white cardstock frames
6 tag toppers from woodgrain cardstock
12 greenery pieces from the Boughs & Holly die set that I colored with G94
I also stamped and heat embossed in white, sentiments from the Holiday Scripts set on red cardstock before die cutting them with the skinny banner tag from the Tag Builder set.
With everything ready, I assembled the shaker tags with liquid adhesive. Here is the sandwich I used for each tag:
1. Woodgrain frame
2. White cardstock frame
3. Acetate
4. White cardstock frame
5. Foam strip, including around the tag top
I assembled these elements first and then added the clay confetti and glitter before continuing to add
the remaining layers.
6. White cardstock frame
7. Stamped and colored image die cut
8. Stamped backer piece
Next, I added the tag toppers before looping red and white twine through the tag and the skinny banner tags. I finished with a wood bead detail and a couple of sprigs of greenery on each tag.
And that’s it for these festive shaker tags using the STAMPtember Pretty Pink Posh exclusive collaboration Joy & Cheer Stamp set! Be sure to head over to Simon Says Stamp to grab this adorable set before they’re gone!

These tags are SUPER cute!! TFS!
Lori S in PA
LikeLiked by 1 person
These shaker tags are just adorable! Such a fun project! I couldn’t find the size of the stamps in their description, but I am thinking they are about 1 1/2 inches in diameter?
LikeLiked by 1 person
Thank you! And, yes the actual stamps are about 1 1/2″ . Pretty Pink Posh has many other circle sets too!
LikeLike
Thanks! I did notice the other circle sets also. So many cute designs!
LikeLiked by 1 person