Today I’m sharing a card I designed for the Pretty Pink Posh May Release INSTAGRAM HOP & GIVEAWAY! This release is full of the most adorable products for celebrating weddings, anniversaries, graduations, and all things new baby! The baby-themed products are definitely some of my favorites from this release, and I’ll be sharing all the details for this sweet card below, but first:
⠀⠀⠀⠀
Head over to Instagram and leave a comment by 5/20/2024 on each stop for a chance to win a $30 gift card to Pretty Pink Posh each day of the Instagram hop. Winners will be chosen randomly from the comments left on each participating designer’s Instagram post. Four winners will be announced on the Pretty Pink Posh Instagram account.
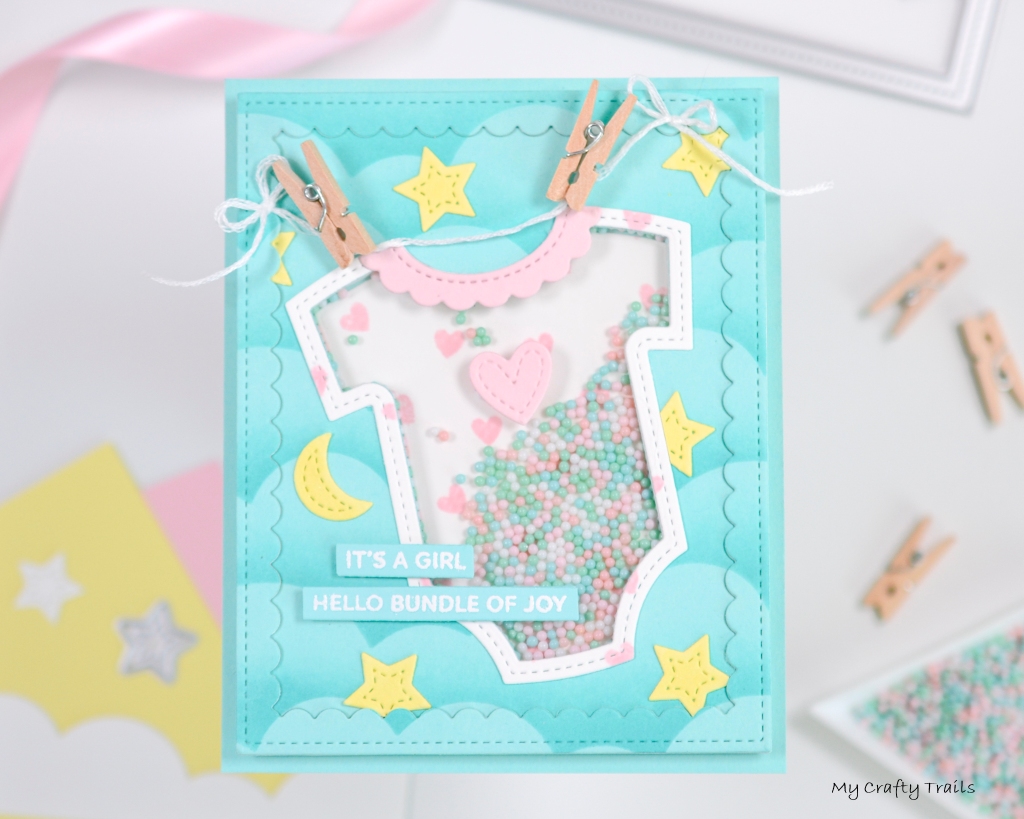
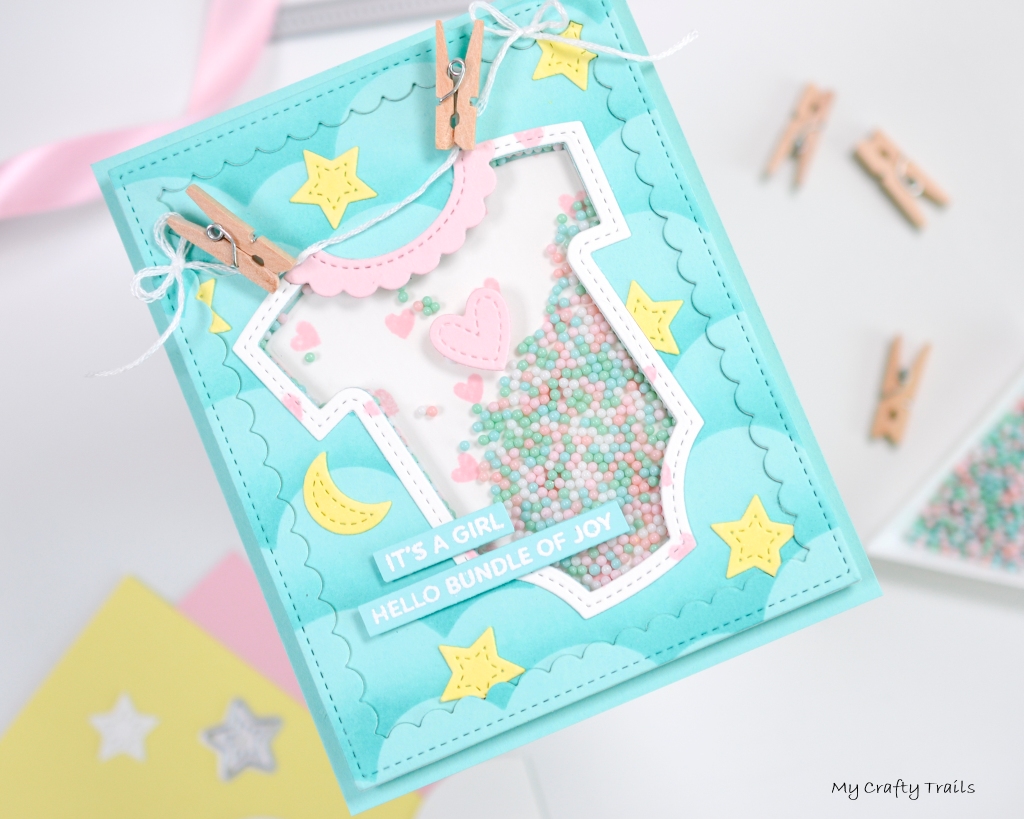
You know I love a good shaker card, especially when they’re filled with shaker beads from Pretty Pink Posh, and this release has the best new shaker goodies! I decorated the new Onesie Shaker Die cuts with a pink heart detail that I pulled from the Baby Animal Stamp Set before creating a shaker filled with the lovely pastel Sweet Dreams Shaker Beads.
I hung my onesie on a clothesline with teeny-tiny clothespins and created a nighttime sky on teal cardstock. To create the sky, I die cut the clouds from the Nature Essentials Dies and used it as a stencil to apply a darker teal ink. I finished with the decorative stitched details from the Onesie Shaker Dies and, of course, a couple of sentiments from the new Sentiment Strips: Occasions Stamp Set.
Thanks for stopping by to check out my Pretty Pink Posh May Instagram Hop project. This is such a great release and you’ll find plenty of amazing design inspiration when you hop along with us over on Instagram. Happy hopping!
PRETTY PINK POSH SUPPLIES USED:
Onesie Shaker Dies
Scallop Frames
Sentiment Strips: Occasions Stamp Set
Sentiment Strips Dies
Nature Essentials
Baby Animals Stamp Set
Sweet Dreams Shaker Beads

STEPS
1.) Create the background.
▪️ Start with two pieces of teal cardstock trimmed to 4 1/4 x 5 1/4 inches. Set one aside until assembling the shaker.
▪️ Die cut the Nature Essentials from scrap cardstock.
▪️ Use the cloud die cut as a stencil and, starting at the top of the panel, lightly apply teal ink with a blending brush. Move the cloud stencil down and again lightly apply ink. Repeat until the panel is full.
▪️ Die cut the largest Scallop Frame, 4 x 5 inches, from the stenciled panel and again from white or teal cardstock. Stack the frames and secure with liquid adhesive. Set aside.
2.) Create the card elements.
▪️ Die cut the two Onesie Shaker pieces, the body and the frame, from white cardstock.
▪️ Use a small heart stamp and pink ink to stamp a decorative detail on both onesie pieces. Set aside.
▪️ Die cut the the ruffle detail and heart from pink cardstock.
▪️ Die cut the stars and the moon from pale yellow cardstock.
▪️ Stamp the sentiments in clear embossing ink on teal cardstock and heat emboss with white embossing powder. Die cut with a sentiment strip, trimming if necessary.
3.) Create the shaker.
▪️ Die cut the inner, smaller onesie piece, slightly offset, from the stenciled background and discard this piece.
▪️ Attach the heart-stamped onesie body die cut with liquid adhesive on the other 4 1/4 x 5 1/4 inch piece of teal cardstock. Use the negative space in the stenciled background as a template for proper placement by centering it on the teal cardstock.
▪️ Attach a piece of acetate to the reverse side of the stenciled background, trimmed to fit over the negative onesie space, with double-sided tape.
▪️ Outline the heart-stamped onesie on the teal cardstock with foam strips, creating a well for the shaker beads.
▪️ Leaving a quarter inch border, attach foam strips or foam tape to the rest of the teal cardstock. A light pencil line helps with maintaining the border. You can use the frames from Step 1 as a template.
▪️ Remove all release paper and add shaker beads to the well area.
▪️ Carefully place the stenciled background over the well area, aligning the negative space of the onesie with the onesie glued to the teal cardstock. After placing, there will be a small amount of foam tape outside the background panel for the frame to be attached. HELPFUL TIP: To provide a little wiggle room when placing the background, liquid adhesive can be placed on the foam strips and foam tape, allowing the panel to be slid into proper alignment before it’s secured. I believe I learned this from the great Cathy Zielske!
▪️ Attach the stacked frame to the remaining foam tape, using the liquid adhesive hack if necessary.
4.) Finish the card assembly.
▪️ Attach the white heart-stamped onesie frame to the card front with liquid adhesive.
▪️ Attach the ruffle and heart details to the onesie with double-sided tape.
▪️ Attach the stars and the moon to the background, trimming if necessary, with liquid adhesive.
▪️ Attach a piece of embroidery floss across the top of the card front securing with liquid adhesive under the bows. A reverse tweezers helps hold the floss in place while drying.
▪️ Use foam squares and double-sided tape to attach the clothespins to the card front. Place the foam squares in the middle of the clothespins and the tape at the ends of the clothespins.
▪️ Attach the sentiments with thin foam squares.
▪️ The finished card size is 4 1/4 x 5 1/4 inches, slightly smaller than A2. Trim a 1/4 inch from an A2 card base for proper sizing.
ADDITIONAL SUPPLIES
- Neenah 110# Classic Crest Cardstock Solar White
- We R Makers Quickstik Precision Pickup and Placement Tool
- Simon Says Stamp Place and Score Embellishment Wand
- Simon Says Stamp Place and Pierce Embellishment Wand
- Sizzix Curved Fine-Tip Tweezers
- Spellbinders Platinum Die Cutting And Embossing Machine
- Misti Precision Stamper Tool
- Waffle Flower 6.5×8.5 Grip Mat
- Bearly Art Precision Craft Glue
- Tim Holtz Tonic Craft Mini Snips
- Lawn Fawn Bone Folder
- Scotch 3M Post-It Masking Tape
- Simon Says Stamp Blending Brushes Large
- Simon Says Stamp Anti Static Powder Brush Tool
- Simon Says Stamp Embossing Ink Clear
- Hero Arts White Detail Embossing Powder
- Scrapbook Adhesives Thin Foam Squares
- Scrapbook Adhesives Foam Squares
- Scrapbook Adhesives White Crafty Foam Tape
- Waffle Flower Foam Strips ⅛”
- Scor-Tape 0.5” Crafting Tape
- Scor-Tape 0.25” Crafting Tape
- Scor-Tape 0.125” Crafting Tape
- Simon Says Stamp White A2 Side Fold Scored Cards 120#
- Simon Says Stamp Clear Acetate Sheets
- Simon Say Stamp Pawsitively Saturated Ink Pad Dew
- Lawn Fawn Ballet Slippers Ink Pad
- Spellbinders Mini Wooden Clothespins
