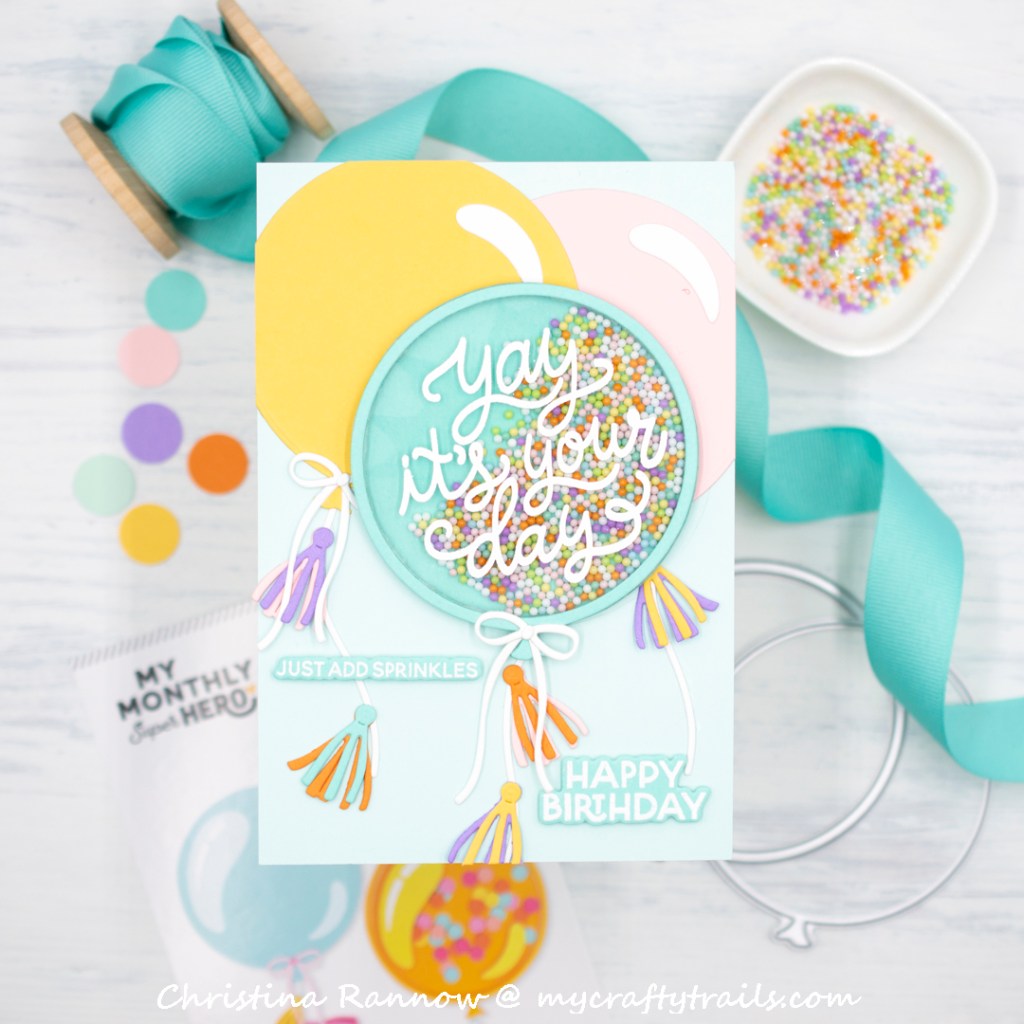
Happy Friday, friends! Today I’m sharing this festive shaker card showcasing some of the amazing things included in the Hero Arts May 2026 My Monthly Super Hero. I used the Big Balloon Shaker as my focal point on an A6 card because this balloon is BIG and I wanted a bouquet of balloons for this design. I utilized the cardstock that’s included with the kit and added a pretty lavender color to coordinate with the shaker beads that I used to fill my shaker. Take a peek at my supply list and then we’ll get the party started!
SUPPLIES
Hero Arts My Monthly Hero May 2026
Big Balloon Shaker Dies
Make a Wish Stamp & Cut
Birthday Icons Stamp & Cut
Spellbinders Cardstock: Blush, Beeswax, Carrot, Seaside, & Waterfall
Pretty Pink Posh Bunny Hop Shaker Beads
Birch Press Design Lavender Bloom Cardstock
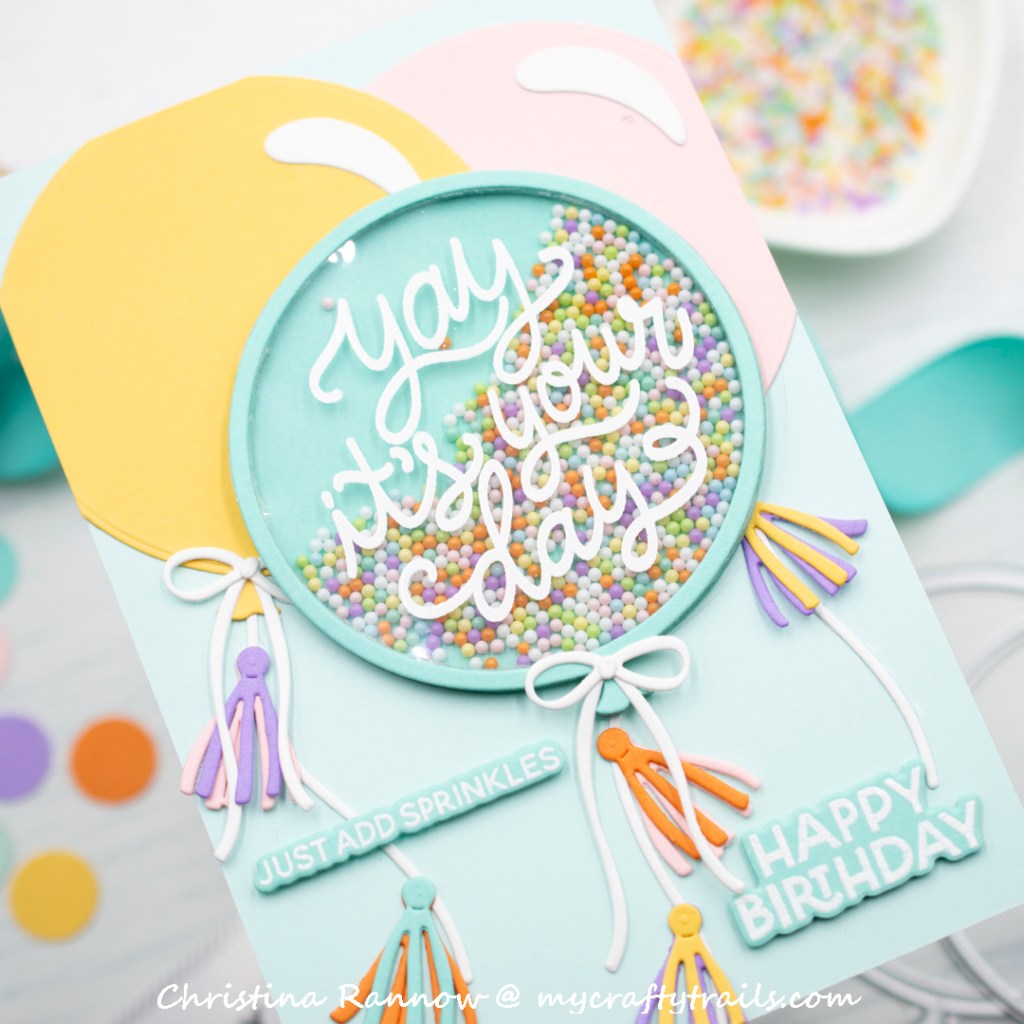
Like I mentioned above, I started with an A6 (4.25 x 6.25 inches) Seaside cardstock panel so I would have room for more than one balloon, one with a shaker element. I created the shaker balloon by first die-cutting and stacking six balloon frames. Then for the shaker window, because they fit perfectly, I chose one of the sentiments from the Make a Wish set and heat-embossed it on a piece of heat-resistant acetate with white embossing powder. I sandwiched this between the stacked balloon frames and one last balloon frame before filling it with shaker beads and adding the backer piece.
Next, I layered two regular balloon die-cuts, one yellow and one pink, onto the background panel, letting them overhang a bit, and added the shaker balloon on top. I trimmed the balloons that overhung the background panel and then added all the fun details, including small highlights to the balloons in the background, pretty white bows to tie off the balloons, and my favorite part, the fun colorful tassels.

To finish things up, I added two heat-embossed sub-sentiments from the Birthday Icons set. All the sentiments have coordinating dies, including the sentiment strips, which I love. I popped both of them up with a foam strip and then attached the card front to a side-fold card base I made from cardstock measuring 6.25 x 8.5 inches before scoring and folding.
Thank you so much for stopping by today! I hope you’re inspired to create something beautiful today!

